
Are you concerned about indoor air quality but hesitant to spend a fortune on a commercial air purifier? You’re not alone! Many people are looking for affordable ways to breathe cleaner air, and a DIY HEPA air purifier is a surprisingly effective solution. This guide will walk you through building a simple, yet powerful, air purifier using readily available materials – and we’ll start with a quick fix: a box fan and furnace filter combination can significantly improve air quality right now.
This comprehensive guide goes beyond that basic setup, offering detailed instructions for building a more robust and aesthetically pleasing DIY HEPA air purifier. We’ll cover material selection, step-by-step construction, performance optimization, and even troubleshooting common issues. By the end of this article, you’ll have the knowledge and skills to create a cost-effective air purifier tailored to your needs, and breathe easier knowing you’ve taken control of your indoor air quality.
What You’ll Need for Your DIY HEPA Air Purifier
| Item | Quantity | Specifications |
|---|---|---|
| Box Fan | 1 | 20” x 20” standard box fan (choose a multi-speed model) |
| HEPA Filter | 1-2 | 20” x 20” x 1” HEPA filter (MERV 13 or higher recommended) |
| Cardboard or Plywood | Varies | For constructing a housing (optional, but improves performance & aesthetics) |
| Duct Tape or Packing Tape | 1 Roll | Strong, wide tape for secure attachment |
| Bungee Cords or Straps | 2-4 | To further secure the filter to the fan (optional) |
| Measuring Tape | 1 | For accurate measurements |
| Utility Knife or Scissors | 1 | For cutting cardboard/plywood |
| Safety Glasses | 1 | Eye protection during cutting |
| Gloves | 1 Pair | Protect hands during assembly |
| Activated Carbon Filter (Optional) | 1 | 20” x 20” x 1” for odor control |
Preparing for Your Build & Safety Considerations
Before you begin, choose a well-ventilated workspace. Building a DIY air purifier is relatively simple, but safety is paramount. Always wear safety glasses when cutting cardboard or plywood to protect your eyes from debris. Gloves will help keep your hands clean and provide a better grip.
Consider the placement of your finished air purifier. It should be positioned in a central location within the room, away from obstructions like furniture or curtains, to allow for optimal airflow. Avoid placing it directly against a wall, as this can restrict airflow.
Finally, understand the limitations. While this DIY purifier can significantly improve air quality, it won’t perform identically to a high-end commercial unit. It’s a cost-effective solution, but it requires regular filter changes for continued effectiveness.
Step-by-Step Construction Process

Phase 1: Basic Filter Attachment (Quickest Method)
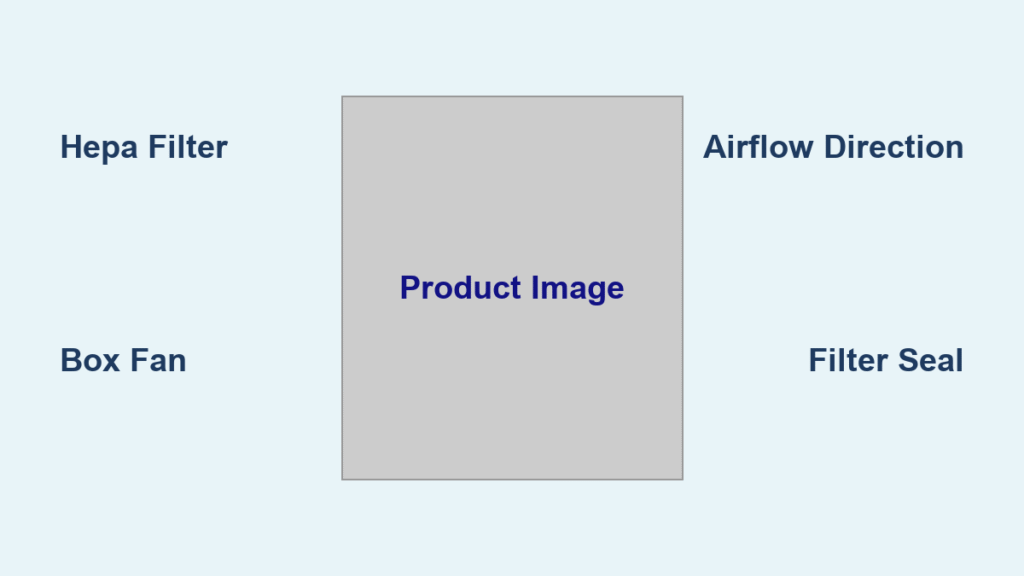
- Position the Filter: Place the HEPA filter directly against the intake side (back) of the box fan. Ensure the airflow direction on the filter matches the fan’s intake direction.
- Secure with Tape: Use duct tape to firmly attach the filter to the fan frame. Run tape along all four sides, creating a complete seal. Don’t cover the fan motor vents!
- Reinforce (Optional): Add bungee cords or straps around the fan and filter for extra security, especially if you plan to move the purifier frequently.
- Test: Turn on the fan (start with the lowest speed) and check for any air leaks around the filter. If you detect leaks, add more tape to seal them.
Phase 2: Building a Cardboard Housing (Improved Performance)
- Measure & Cut: Measure the dimensions of your box fan and HEPA filter. Cut cardboard pieces to create a housing that surrounds the fan and filter, leaving an opening for airflow. The housing should be slightly larger than the fan and filter to allow for proper airflow.
- Assemble the Housing: Fold and tape the cardboard pieces together to form a box-like structure. Ensure the box is sturdy and capable of supporting the fan and filter.
- Cut Air Intake & Exhaust: Cut a large opening on one side of the housing for the fan to draw air in. Cut openings on the other sides to allow clean air to exhaust.
- Install the Fan and Filter: Securely mount the fan and filter inside the cardboard housing, ensuring the filter is positioned to capture air before it reaches the fan.
- Seal Gaps: Use duct tape to seal any gaps between the fan, filter, and housing to prevent air from bypassing the filter.
Phase 3: Optional Carbon Filter Integration
- Positioning: Place the activated carbon filter before the HEPA filter in the airflow path. This will pre-filter larger particles and absorb odors before they reach the HEPA filter.
- Securing: Secure the carbon filter using duct tape, ensuring a tight seal between the carbon filter and the HEPA filter.
Post-Completion Testing and Troubleshooting
Once assembled, test your air purifier on all fan speed settings. Listen for any unusual noises, such as rattling or straining. Check for air leaks around the filter and housing.
Troubleshooting:
- Reduced Airflow: Check for a clogged filter. Replace the filter if necessary. Ensure the fan and filter are not obstructed.
- Unusual Noise: Tighten any loose screws or tape. Ensure the fan blades are not hitting anything.
- Ineffective Purification: Verify the filter is a true HEPA filter (MERV 13 or higher). Ensure a tight seal between the filter and the fan/housing. Consider adding a carbon filter for odor control.
Pro Tips for Optimal Performance

- Filter Selection: Invest in a quality HEPA filter with a high MERV rating (Minimum Efficiency Reporting Value). MERV 13 or higher is recommended for capturing smaller particles like viruses and bacteria.
- Pre-Filter: Adding a pre-filter (like a washable furnace filter) before the HEPA filter can extend the life of your HEPA filter by capturing larger dust particles.
- Fan Speed: Experiment with different fan speeds to find the best balance between airflow and noise level. Higher speeds provide better purification but are louder.
- Filter Replacement: Replace the HEPA filter every 3-6 months, depending on usage and air quality. A visibly dirty filter is a sign it’s time for replacement.
- Housing Material: While cardboard is affordable, plywood offers greater durability and a more polished look.
- Airflow Direction: Always ensure the airflow direction on the filter matches the fan’s intake direction.
Professional Help & When to Consider It
While building a DIY air purifier is a great project, there are situations where professional help is warranted:
- Severe Allergies or Respiratory Issues: If you have severe allergies or respiratory issues, a professionally manufactured air purifier with advanced features like UV-C sterilization may be a better choice.
- Large Spaces: For very large rooms, multiple DIY purifiers or a single, powerful commercial unit may be necessary.
- Complex Air Quality Concerns: If you’re concerned about specific pollutants like mold or volatile organic compounds (VOCs), a professional air quality assessment and targeted filtration system are recommended.
Typical cost of a commercial HEPA air purifier can range from $100 to $500+, depending on size and features.
FAQ
Q: How often should I change the filter?
A: Every 3-6 months is a good starting point, but it depends on your environment and usage. Check the filter regularly for visible dirt and replace it when it appears clogged.
Q: Can I use any type of filter?
A: No. You need a true HEPA filter, which meets specific standards for particle capture. Look for filters labeled as “HEPA” and with a MERV rating of 13 or higher.
Q: Will this remove odors?
A: A HEPA filter primarily removes particles. To remove odors, add an activated carbon filter in front of the HEPA filter.
Q: Is this safe?
A: Yes, as long as you follow safety precautions during construction, such as wearing safety glasses and ensuring the fan is stable.
Alternative Solutions
If building a DIY air purifier isn’t your style, consider these alternatives:
| Solution | Pros | Cons | Best For |
|---|---|---|---|
| Commercial HEPA Air Purifier | High efficiency, convenient, features | Expensive, requires maintenance | Individuals with severe allergies or respiratory issues |
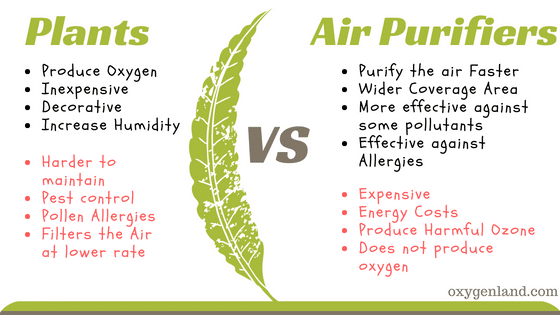
| Air-Purifying Plants | Natural, aesthetically pleasing | Limited effectiveness, requires care | Small spaces, supplemental air purification |
| Improved Ventilation | Brings in fresh air, reduces pollutants | Can be energy-intensive, may introduce outdoor allergens | Overall air quality improvement |
Keep Your Air Clean and Breathe Easy!
You’ve now learned how to build your own effective HEPA air purifier! Remember these key steps: selecting the right materials, building a secure housing (optional), and ensuring a tight seal around the filter.
By following this guide, you’ve taken a proactive step towards improving your indoor air quality and creating a healthier living environment.
What are your biggest concerns about indoor air quality? Share your thoughts and experiences in the comments below!


