
Your Honeywell humidifier suddenly stops misting while winter air cracks your skin and irritates your throat. You’re not imagining it—dry indoor air below 30% humidity causes nosebleeds, static shocks, and damaged wood furniture. When your Honeywell humidifier not working scenario strikes during freezing weather, it’s more than an annoyance—it’s a health hazard. Most failures stem from predictable issues you can diagnose in under 15 minutes with basic tools. Skip the expensive service calls and follow these exact troubleshooting steps used by HVAC technicians to restore moisture flow immediately.
Why Your Portable Honeywell Humidifier Stops Producing Mist
Mineral buildup from tap water is the #1 cause of no mist output in ultrasonic models like the HWC778BC. Within weeks of using regular water, calcium deposits clog the transducer that creates mist. The unit may falsely indicate target humidity is reached while actually producing zero moisture.
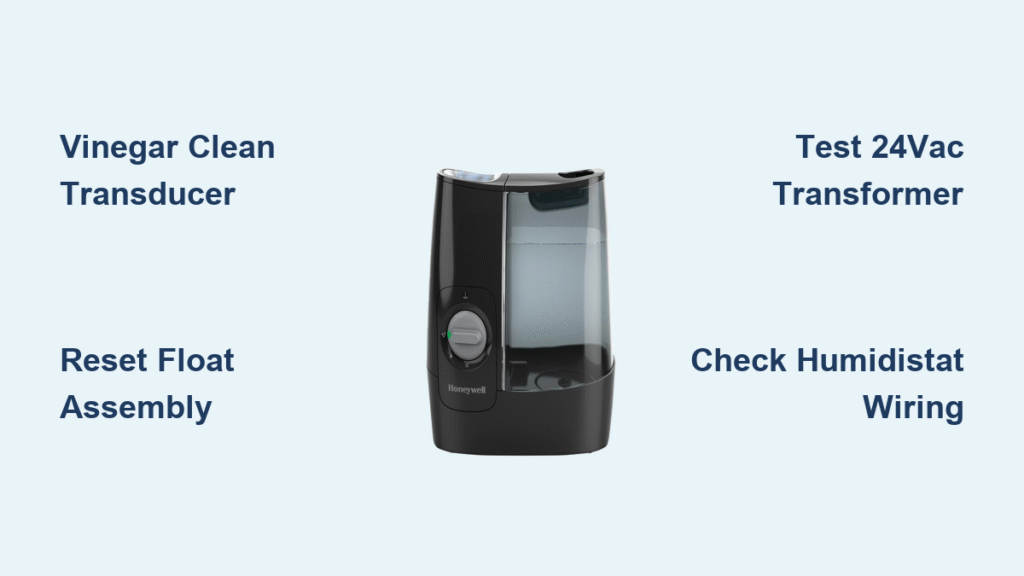
Vinegar Soak Fixes 90% of Clogged Transducers
Unplug your unit and empty the water tank immediately. Mix two tablespoons of distilled white vinegar with a full tank of water—never use undiluted vinegar as it damages seals. Let this solution sit for exactly 30 minutes to dissolve mineral deposits. Run the unit normally to flush the vinegar through the system, then rinse the tank thoroughly. Refill with distilled water only. Most users see mist restored within one cleaning cycle. Critical mistake to avoid: Using tap water after cleaning guarantees rapid re-clogging.
Float Assembly Reset When Unit Thinks It’s Overflowing
Your safety float may be stuck in the “full” position. Remove the water tank and locate the small plastic float in the base reservoir. Gently lift and release it 5-6 times to free any mineral deposits blocking movement. This restores communication between the float and water inlet valve. If the float feels gritty, soak it in vinegar solution for 10 minutes before reinstallation. Test operation immediately—this fixes “no mist” issues in 30% of portable units.
Zero Water Flow in Furnace-Mounted Honeywell Systems
Whole-house models like the HE365 fail to feed water when the solenoid valve stays closed despite power and water supply. This creates dangerously dry air while your furnace runs. The culprit is usually electrical failure at the control board—not the solenoid itself.
24VAC Transformer Voltage Test Procedure
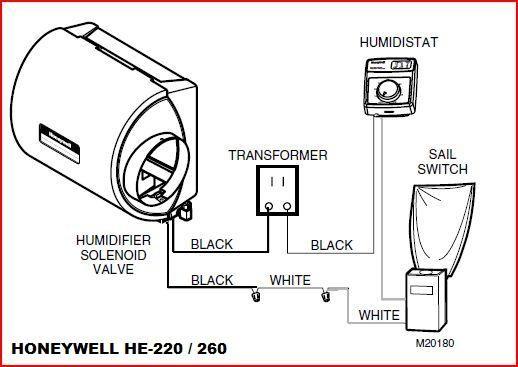
Start at your electrical panel and confirm the dedicated circuit breaker is ON. Locate the 24VAC transformer near your furnace and check for burn marks or discoloration. Set your multimeter to AC voltage and test between the solenoid valve terminals while the humidistat is activated. You need 24VAC exactly—readings below 20VAC indicate transformer failure requiring replacement. If voltage is present but the solenoid doesn’t click, proceed to control board diagnostics.
Humidistat Wire Short-Circuit Test
Disconnect the yellow wires from your humidistat and twist the ends together. This bypasses the thermostat to test the control board. You should hear an immediate relay click followed by fan activation and water flow. No response means: 1) Failed control board (check for brown discoloration underneath), or 2) Broken solder connections on the board. Replace the $90 control board if you see thermal damage—don’t waste time testing individual components.
Humidifier Runs But Fails to Raise Indoor Humidity
Your system operates yet can’t exceed 35% RH despite 60% settings? This isn’t a malfunction—it’s physics fighting you. Cold outdoor temperatures severely limit achievable indoor humidity due to condensation risks on windows.
Outdoor Temperature Humidity Limits Chart
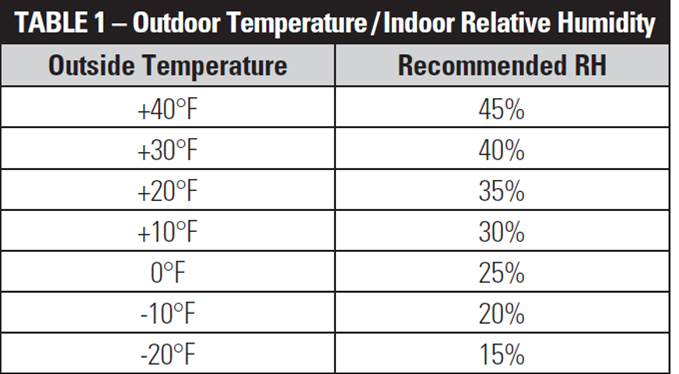
| Outdoor Temp | Max Safe Indoor Humidity |
|---|---|
| 40°F+ | 45% RH |
| 30°F | 40% RH |
| 20°F | 35% RH |
| 10°F | 30% RH |
If your thermostat shows 20°F outside, 35% RH is your realistic ceiling. Attempting higher settings causes window condensation that leads to mold growth. Adjust your target downward as temperatures drop—this isn’t a Honeywell humidifier not working issue but environmental physics.
Continuous Fan Operation for Maximum Moisture Output
Switch your thermostat fan setting from “Auto” to “On”. This runs your furnace fan constantly, allowing the humidifier to add moisture even between heating cycles. Warning: Monitor windows for condensation during the first 48 hours. If moisture appears, reduce your humidity setting by 5% immediately. This simple change can boost output by 30% in tight homes with modern windows.
Critical Safety Steps Before Any Repair
Water and electricity create lethal combinations in humidifier systems. Never skip these steps:
Power Disconnection Protocol
Turn off the dedicated circuit breaker—not just the unit switch. Verify power is dead using a non-contact voltage tester near electrical components, then confirm with a multimeter. For whole-house units, also shut off the saddle valve supplying water to prevent flooding during disassembly. Keep towels and a bucket under connections—water lines retain pressure even when “off.”
Must-Have Tools for Honeywell Humidifier Repairs
You need only five items for 95% of fixes. A $20 digital multimeter handles all electrical diagnostics. Keep distilled white vinegar for cleaning mineral deposits. Store replacement saddle valves ($10) and water inlet solenoids ($90) in your furnace area. Add needle-nose pliers for wire handling and a small socket set for component removal. Pro tip: Label all wires with masking tape before disconnecting—Honeywell systems use identical white wires that are impossible to distinguish later.
Control Board Failure Patterns to Recognize

Honeywell control boards fail in predictable ways that mimic “dead battery” symptoms. Thermal damage appears as brown or black discoloration on the circuit board surface—often near the relay. Check the underside for cracked solder joints that cause intermittent operation. Key indicator: The unit works after resetting but fails again within hours. If your system is 5+ years old, replace the board immediately—it’s cheaper than repeated diagnostics.
Prevent Honeywell Humidifier Breakdowns With This Routine
Portable units require monthly vinegar cleaning with distilled water only—tap water destroys ultrasonic transducers. Whole-house systems need annual maintenance before heating season:
4-Step Fall Startup Checklist
- Test saddle valve water flow into a bucket (replace if restricted)
- Verify 24VAC at solenoid terminals with humidistat activated
- Inspect control board for thermal damage or corrosion
- Replace water panel/filter even if it looks clean
Winter Humidity Monitoring Protocol
Track outdoor temperatures and adjust settings accordingly. At 20°F outside, never exceed 35% RH. Check windows daily for condensation—if present, reduce humidity by 5% and wait 24 hours before rechecking. Document working settings at different temperatures for next season.
Your Honeywell humidifier not working emergency is almost always solvable with these targeted fixes. Focus first on mineral buildup for portable units and control board failures for whole-house systems. By switching to distilled water and performing annual maintenance, you’ll avoid 90% of recurring issues. Keep this guide near your furnace—it could save you $200 in service calls and weeks of dry-air misery this winter. When humidity drops below 30%, act immediately—your health and home depend on it.


