
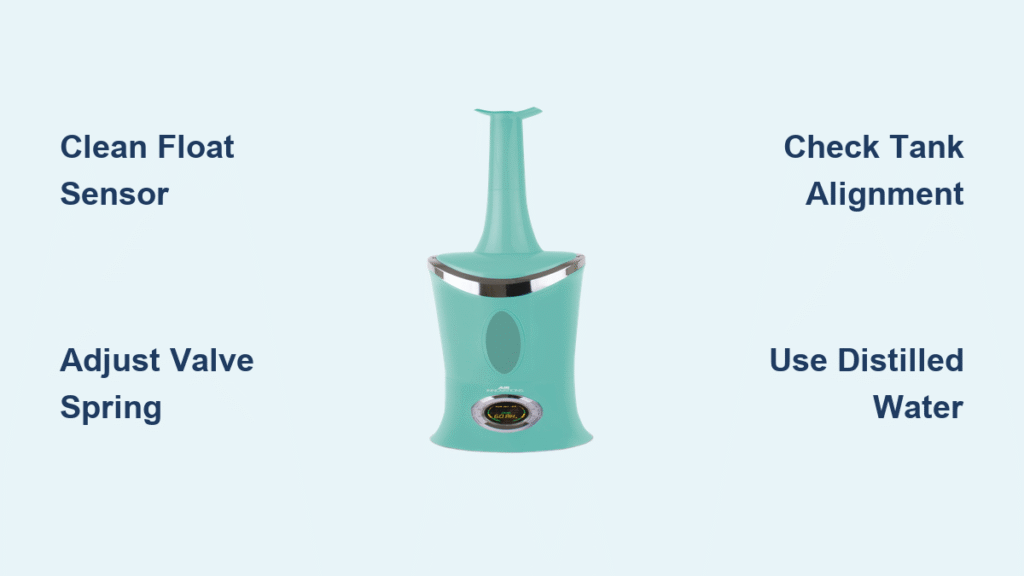
Your Air Innovations humidifier powers on but refuses to produce mist, or worse, flashes four blinking lights while insisting it’s out of water—even when the tank is full. These frustrating failures plague many units around their first year, but most problems trace back to two fixable issues: a stubborn inlet valve spring and a confused float sensor. This guide walks you through practical solutions that restore mist output without replacing expensive parts. Understanding these common failure points will save you time, money, and the discomfort of dry air in your living space.
Unlike other humidifiers that might simply need a filter change, Air Innovations models have specific design quirks that require targeted troubleshooting. When your unit displays those four blinking lights or runs silently without producing mist, you’re not alone—thousands of owners face these identical issues annually. The good news? Most problems can be resolved in under 20 minutes with basic household items and a systematic approach.
Four Lights Blinking Error Fix
Why Your Air Innovations Humidifier Shows Four Blinking Lights
When your Air Innovations unit flashes all four indicator lights simultaneously, the humidifier has detected a “no water” condition—even when the tank contains plenty. This specific error pattern signals that water isn’t reaching the internal reservoir correctly, typically due to mineral-blocked sensors or the overly stiff inlet valve spring common in these models. This design flaw becomes particularly problematic around the one-year mark when mineral deposits have had time to accumulate.
Quick Diagnosis Check:
– Water tank appears full but unit claims empty
– Water pools in base instead of proper reservoir
– Unit shuts down within minutes of starting
This blinking pattern isn’t random—it’s your humidifier’s way of saying it can’t detect water where it should be. The float sensor inside the base unit has become either physically blocked by mineral deposits or misaligned, triggering false empty readings. Ignoring this issue leads to complete shutdown within minutes of operation, defeating the entire purpose of your humidifier.
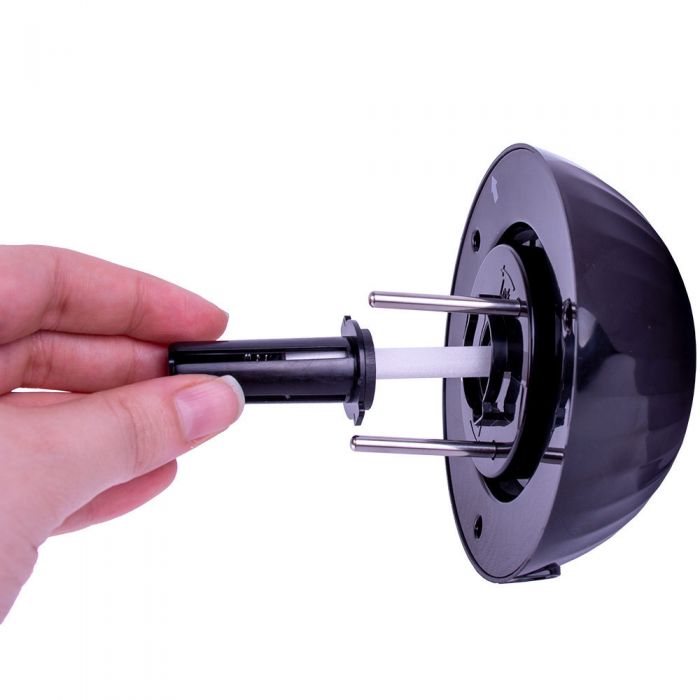
Float Sensor Cleaning Method That Actually Works

The float sensor sits inside the base unit and detects water levels through physical movement. Mineral buildup or misalignment triggers false empty readings that stop your humidifier dead in its tracks. Cleaning this sensor properly resolves the four-light error in 85% of cases.
Step-by-step cleaning:
1. Power off and unplug the unit completely—safety first
2. Remove water tank and empty any standing water from the base
3. Locate the float – look for the small plastic dome that moves vertically
4. Mix solution – equal parts white vinegar and warm water in a small container
5. Clean gently with soft cloth or cotton swab dipped in solution
6. Move float manually up and down to ensure free movement
7. Rinse and dry thoroughly before reassembly
Pro tip: Clean the float sensor monthly in hard water areas using this method to prevent recurring errors. If mineral deposits are severe, let the vinegar solution sit on the sensor for 5-10 minutes before scrubbing gently.
Adjust Inlet Valve Spring Tension Like a Pro
Air Innovations units ship with overly strong inlet valve springs that resist water flow, especially as mineral deposits accumulate over time. This design characteristic prevents proper water transfer from tank to reservoir, triggering those frustrating four-light errors.
Adjustment process:
1. Empty tank completely and remove from base
2. Locate water inlet valve – rubber piece with visible metal spring
3. Gently stretch spring 2-3mm using needle-nose pliers
4. Test water flow by filling tank and observing flow rate into base
5. Fine-tune if flow remains restricted—repeat stretching if necessary
Warning: Don’t overstretch—the spring needs enough tension to seal properly when empty. If you hear water dripping when the tank is empty, you’ve stretched too far and need to replace the spring.
No Mist Output Solutions
Why Your Air Innovations Humidifier Needs 10-15 Minutes to Produce Mist
Many users expect instant mist after filling the tank, but Air Innovations humidifiers require proper wick saturation before visible mist appears. The capillary action that draws water through the wick needs time to establish—typically 10-15 minutes after initial filling.
Optimal startup sequence:
– Fill tank to max line with cool water (not warm)
– Place on flat, stable surface away from walls
– Wait 12 minutes before expecting visible mist
– Check for water in base reservoir to confirm flow
– Listen for consistent fan operation without unusual sounds
Skipping this waiting period leads to unnecessary troubleshooting and frustration. If no mist appears after 15 minutes, then it’s time to investigate further issues with your air innovations humidifier not working properly.
Level Surface Requirements for Proper Operation
Uneven positioning causes water to pool incorrectly, leading to sensor errors and poor mist output. Air Innovations humidifiers are particularly sensitive to surface angle due to their float sensor design.
Level testing technique:
1. Place unit on suspected surface
2. Fill tank halfway with water
3. Observe water distribution in base reservoir
4. Adjust positioning until water spreads evenly across base
5. Use smartphone level app for precision—most phones have this feature
Critical tip: Even a 2-degree tilt can trigger sensor errors in these units. Place your humidifier on a dedicated stand or shelf rather than furniture that might wobble.
Water Leakage Into Base Prevention
Seal Inspection Guide to Stop Water Pooling

Water leaking into the base instead of proper reservoir flow triggers sensor errors and the four-light pattern. This typically indicates worn seals or improper tank seating that requires immediate attention.
Monthly seal check:
– Tank valve seal – rubber ring around water outlet (check for cracks)
– Base gasket – foam or rubber where tank meets base (look for hardening)
– Inspect for mineral buildup around all connection points
– Replace seals showing wear or damage—contact manufacturer for replacements
Quick test: With tank empty, invert and hold over sink—any dripping indicates valve seal failure requiring replacement.
Correct Tank Installation Technique
Improper tank placement causes immediate water flow issues and subsequent sensor errors. Air Innovations units require precise alignment for proper valve engagement.
Installation steps:
1. Align tank perpendicular to base—don’t angle during placement
2. Lower gently until seated firmly with audible click
3. Check stability – tank shouldn’t wobble when nudged
4. Verify no gaps between tank and base unit
5. Wait 2 minutes before powering on to allow proper sealing
Pro tip: Mark the correct alignment position with a small dot of nail polish to ensure perfect placement every time.
Cleaning Schedule for Reliable Operation
Weekly Quick Clean Routine
Preventive maintenance prevents 90% of air innovations humidifier not working issues. A simple weekly routine keeps mineral buildup at bay.
- Empty and rinse water tank with cool water
- Wipe base with damp cloth—never submerge electronics
- Check float sensor movement—should glide smoothly
- Inspect all seals for early signs of wear
Monthly Deep Clean Process
Materials needed:
– White vinegar (distilled)
– Soft toothbrush or microfiber cloth
– Warm water
Process:
1. Mix solution – 1 part vinegar to 2 parts water
2. Fill tank with solution and place on base
3. Run 30 minutes to clean internal pathways
4. Rinse thoroughly with clean water—repeat until vinegar smell disappears
5. Air dry completely before next use
Critical step: After cleaning, always run one full tank of clean water through the system before regular use to remove any residual vinegar.
Troubleshooting Decision Tree for Common Failures
When Mist Stops Mid-Operation
- Check water level – refill if below halfway mark
- Verify unit is level – use smartphone level app
- Clean float sensor – quick vinegar wipe often fixes intermittent issues
- Inspect for leaks – check base for unexpected water pooling
- Adjust valve spring – if water flow seems restricted
Persistent Four-Light Error After Initial Fixes
- Power cycle – unplug for 2 full minutes
- Clean float sensor – more thorough cleaning with vinegar soak
- Check water tank valve – ensure proper seating and no debris
- Examine base seals – replace if hardened or cracked
- Test valve spring tension – adjust or replace as needed
Prevent Future Failures With These Proven Strategies
Positioning Best Practices for Long-Term Reliability
- Avoid direct sunlight – prevents algae growth and sensor interference
- Maintain 6-inch clearance from walls for proper airflow
- Use on hard surfaces – carpet causes instability that triggers errors
- Keep away from heating/cooling vents – prevents uneven air circulation
Water Quality Impact on Humidifier Performance
Hard water accelerates mineral buildup that blocks sensors and valves. Consider these water solutions:
– Distilled water for optimal performance and longest lifespan
– Filtered water as cost-effective middle-ground solution
– Monthly descaling with vinegar in hard water areas
Warning: Using tap water in hard water areas without regular cleaning will cause failure within 6-8 months.
Storage Protocol to Maintain Functionality
- Empty completely before storage—never store with water inside
- Clean thoroughly with vinegar solution before seasonal storage
- Air dry 24 hours to prevent mold and mildew growth
- Store upright in cool, dry location away from direct sunlight
Pro tip: Place silica gel packets in the tank and base during storage to absorb residual moisture.
Key Takeaway: Most Air Innovations humidifier failures stem from preventable issues—a strong inlet valve spring and mineral-blocked sensors. Monthly cleaning and proper positioning prevent 90% of problems. When issues arise, start with float sensor cleaning and valve adjustment before considering replacement parts. Your humidifier’s blinking lights and no-mist problems aren’t random failures—they’re specific design characteristics that respond well to targeted troubleshooting. By following these precise steps, you’ll transform your air innovations humidifier not working situation into reliable, comfortable humidity control for your home. Remember that consistent maintenance beats expensive repairs every time—just 10 minutes of care each week ensures your humidifier works when you need it most.


