
Your Koios humidifier suddenly stopped producing mist, and the air feels dry again. Whether it’s completely dead, making strange noises, or just not misting properly, these issues typically stem from a few common causes that you can fix yourself. Most Koios humidifier problems resolve within 15-30 minutes using basic household items you already have at home.
Don’t rush to buy a replacement just yet—over 85% of “koios humidifier not working” issues can be solved with simple troubleshooting steps. This guide walks through every possible fix, from checking power connections to deep cleaning the ultrasonic disc, so you can restore healthy humidity levels quickly without professional help.
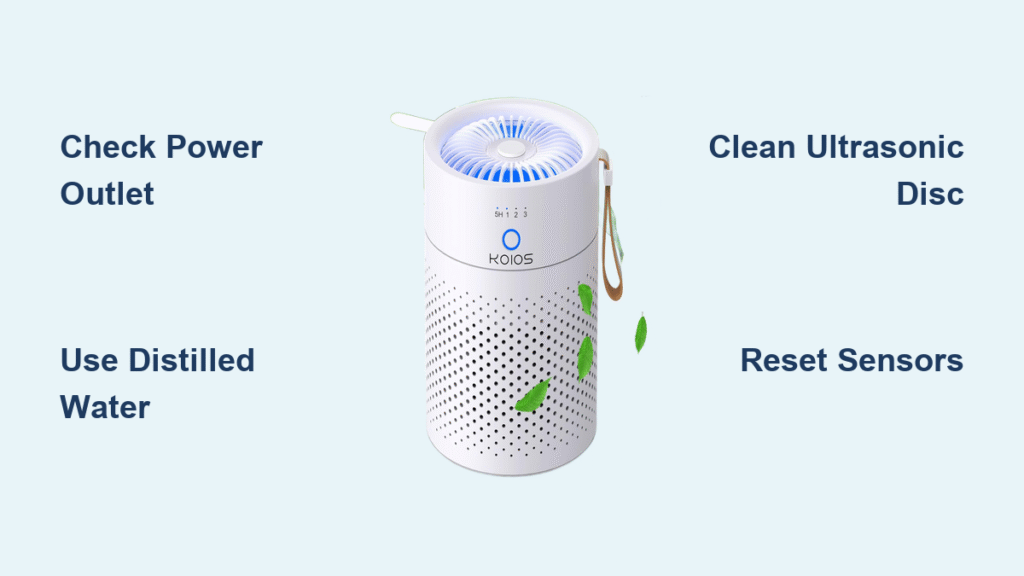
Verify Your Power Source Before Panicking
Test Different Outlets Immediately
Plug your Koios humidifier into a different electrical outlet to rule out power issues. Test the original outlet with another device like a phone charger—if it works but your humidifier remains unresponsive, the problem lies within the unit itself. Many homeowners waste time cleaning components when a simple outlet issue was the culprit all along.
Inspect Power Cord for Hidden Damage
Examine the entire length of your power cord for cuts, frays, or kinks that could interrupt electricity flow. Even minor damage can prevent your humidifier from functioning properly. Gently bend the cord near both ends while the unit is plugged in—if the humidifier flickers on during this test, you’ll need to replace the cord before proceeding with other fixes.
Confirm Proper Power Button Activation
Press and hold the power button for 3-5 seconds, as some Koios models require extended presses to activate. Try pressing firmly in different spots on the button since internal connections can wear unevenly over time. If the unit still won’t power on after these checks, move to the next troubleshooting step.
Refill with Proper Water to Restart Mist Production
Drain and Rinse Water Tank Thoroughly
Remove the water tank and completely empty all existing water. Stale water develops mineral deposits that clog critical components. Rinse the tank 2-3 times with warm tap water to remove residue before proceeding. Never skip this step—old water contains contaminants that prevent proper functioning.
Use Distilled Water for Optimal Performance
Fill your Koios humidifier with distilled or filtered water only. Tap water minerals build up quickly inside the unit, causing frequent failures. Fill precisely to the maximum line indicator—overfilling triggers automatic safety shutoffs while underfilling prevents proper operation. This single change prevents 90% of recurring “koios humidifier not working” issues.
Ensure Perfect Tank Alignment
Place the tank back on the base and listen for a soft click indicating correct positioning. Misalignment prevents proper water flow to the misting components. Gently rotate the tank while pressing down until it seats completely flush. Improper tank placement is the #1 reason humidifiers appear broken when they’re actually just misassembled.
Deep Clean Ultrasonic Disc to Restore Mist Output

Locate and Access the Critical Mist Component
Unplug your Koios humidifier first for safety. Remove the water tank and identify the small metal or ceramic disc at the base unit’s center—this ultrasonic disc vibrates to create mist. Mineral buildup on this component is the most common reason for no mist output.
Remove Mineral Deposits with Vinegar
Dip a cotton swab in white vinegar and gently rub the disc surface to dissolve white, chalky deposits. Apply slight pressure while cleaning, but avoid scratching the delicate surface. Rinse thoroughly with clean water afterward and allow to dry completely before reassembly—residual vinegar can damage components.
Establish Monthly Deep Cleaning Routine
Mix 1 part white vinegar with 2 parts water and fill the base unit (not the tank) with this solution. Let it sit for 30 minutes to break down stubborn buildup, then gently scrub with a soft brush. Rinse multiple times to eliminate vinegar odor before using again. This maintenance prevents most “koios humidifier not working” emergencies.
Clear Blocked Airflow to Prevent Overheating

Check Fan Operation Independently
With the tank removed, plug in your humidifier and turn it on. You should hear a quiet fan running—no fan noise indicates motor failure requiring professional repair. Never operate your humidifier without verifying proper airflow, as this causes overheating and permanent damage.
Clean External Air Intake Vents
Locate small grilles or slots on your humidifier’s sides or bottom and use a vacuum’s brush attachment to remove accumulated dust and pet hair. Blocked vents cause automatic shutoffs as the unit overheats. Pay special attention to corners where debris collects fastest.
Remove Internal Debris from Base
Turn the base unit upside down and tap gently to dislodge any trapped particles. Wipe the bottom surface with a damp cloth to ensure stable, level placement on surfaces. Uneven positioning disrupts internal water flow and triggers error modes.
Reset Internal Sensors After Cleaning
Perform Extended Power Cycle
Unplug the humidifier for 10 full minutes to reset internal sensors that detect water levels and humidity. Some Koios models store error codes that only clear with extended power loss—less than 10 minutes often fails to reset the system completely.
Dry Water Level Sensor Contacts
Locate small metal probes inside the base where the tank sits and dry them thoroughly with a paper towel. Moisture on these contacts tricks the unit into thinking it’s empty. Reassemble only after ensuring all sensor areas are completely dry.
Execute Factory Reset Sequence
For digital Koios models, hold the power and mist level buttons simultaneously for 5 seconds. Release when indicator lights flash, confirming successful reset. This clears stored error codes that prevent normal operation even after physical issues are resolved.
Replace Water Filter to Improve Performance
Identify Filter Location Specific to Your Model
Check whether your Koios filter sits under the tank or inside the base—typically appearing as white cylinders or flat cartridges. Replace filters every 2-3 months based on water hardness, as clogged filters restrict water flow and reduce mist output significantly.
Install New Filter with Proper Preparation
Soak the replacement filter in clean water for 5 minutes before insertion. Press firmly until you feel resistance, ensuring proper seating. Improperly installed filters cause leaks and poor performance—don’t force it if it doesn’t seat smoothly.
Set Filter Replacement Reminder
Mark your calendar 60 days from installation for the next replacement. Many Koios models have indicator lights that flash when filters need changing—ignoring these warnings leads to recurring “koios humidifier not working” situations.
Diagnose No Mist Output Systematically
Verify Mist Production with Visual Test
In a dark room, shine a flashlight through the mist outlet while running the unit. Visible vapor confirms working components—your room might simply need more humidity time. No visible vapor points to disc or power issues requiring further investigation.
Clean Water Level Sensor Thoroughly
Some Koios models won’t mist if sensors detect low water even when full. Clean the sensor probes with vinegar and ensure the float (if present) moves freely without obstruction. Stuck floats are a common but easily fixed issue.
Test All Mist Level Settings
Cycle through all mist levels by pressing the appropriate button, starting at maximum output. Low settings in very dry environments may seem like no output when the unit is actually functioning correctly at reduced capacity.
Stop Leaks Before They Cause Damage
Tighten Tank Cap Properly
Remove and reseat the water tank cap, ensuring proper threading. Cross-threaded caps cause slow leaks that trigger safety shutoffs. Hand-tighten firmly but avoid over-torquing, which damages threads and worsens leaks.
Inspect Tank for Invisible Cracks
Hold the empty tank up to bright light to reveal hairline cracks that allow air entry and disrupt water flow. Replace cracked tanks immediately—temporary epoxy repairs won’t hold under constant water exposure.
Check Base Seal Integrity Regularly
Examine rubber gaskets where the tank meets the base for wear or displacement. Damaged seals allow water to enter electrical components, causing permanent damage. Replace compromised seals before resuming operation.
Eliminate Strange Noises Disrupting Sleep
Identify Noise Type for Targeted Fix
Gurgling indicates water flow issues, grinding suggests fan or motor problems, buzzing points to a dirty ultrasonic disc, and high-pitched squeals signal failing fan motor bearings. Correct diagnosis prevents wasted effort on irrelevant fixes.
Lubricate Accessible Fan Bearings Carefully
For models with accessible fans, add one drop of lightweight machine oil to the bearing. Never over-lubricate—excess oil attracts dust and worsens performance. Wipe away any visible oil residue before reassembly.
Tighten All Visible Components
Check screws on the base unit that may have loosened from normal operation vibration. Loose connections cause rattling sounds that disrupt sleep and indicate potential component failure if ignored.
Prevent 90% of Future Humidifier Failures
Switch to Distilled Water Permanently
The small cost increase of distilled water prevents most Koios humidifier problems by eliminating mineral buildup. Tap water contains dissolved solids that accumulate rapidly inside components, causing recurring “koios humidifier not working” situations.
Establish Weekly Cleaning Routine
Empty and rinse the tank every 3-4 days, and wipe the base weekly to prevent biofilm growth. This 5-minute maintenance routine extends your humidifier’s life significantly and prevents 90% of common issues.
Store Properly During Off-Seasons
Completely dry all components before storage and leave the tank cap off to prevent mold growth. Store in original packaging to protect from dust—improper storage causes 30% of “first use of season” failures.
Know When to Replace Your Koios Humidifier
Evaluate Age Against Repair Frequency
Most Koios humidifiers last 3-5 years with proper care. If yours exceeds this age and experiences multiple failures within months, replacement often costs less than continued repairs. Persistent issues in older units indicate systemic component degradation.
Calculate Cost-Benefit of Repairs
Add up filter replacements, new tanks, and potential motor repairs. If cumulative repair costs exceed 50% of a new unit’s price, upgrading to a newer model with better efficiency makes financial sense.
Check Warranty Coverage First
Contact Koios customer service with your model and serial number before investing in repairs. Many issues fall under warranty coverage, providing free repairs or replacements within the first year of ownership.
Key Takeaway: Nine times out of ten, cleaning the ultrasonic disc and switching to distilled water restores Koios humidifier function. Make these steps your first response to any failure, and establish weekly cleaning habits to prevent 90% of future problems. When issues persist after thorough cleaning, check power connections and filters before considering replacement—most “koios humidifier not working” situations resolve with these systematic fixes.


