
Your throat feels like sandpaper at 3 a.m., and your Vicks humidifier sputters weak mist while spitting white dust onto your nightstand. That gritty crust coating the heating element isn’t just ugly—it’s choking your machine’s performance and pumping minerals into your bedroom air. Don’t waste $50 on a replacement yet. Learning how to clean Vicks humidifier components properly takes just 15 minutes weekly and prevents the calcium deposits from turning so hard you’d need a chisel to remove them. Whether you own the warm-mist powerhouse or the ultrasonic cool-mist model, this guide delivers exact steps to restore full misting power—no guesswork required.
Why Your Vicks Humidifier Spews Dust Instead of Mist
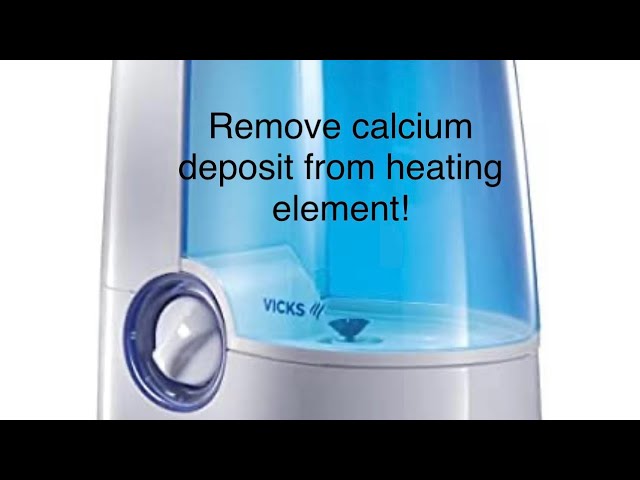
Mineral deposits from tap water silently strangle your humidifier’s performance. When heated, calcium and magnesium in hard water crystallize on critical components. Warm-mist models develop thick crust on the heating element, while cool-mist units clog the ultrasonic nebulizer disc. Left unchecked, this buildup reduces mist output by 70% within weeks and forces your machine to work harder, shortening its lifespan. You’ll notice weak mist, strange noises, or that telltale white dust settling on furniture—your humidifier’s distress signals.
Must-Have Supplies for Vicks Humidifier Cleaning
Grab these before starting:
– Pure white vinegar (undiluted for heavy scale removal)
– Household bleach (for disinfection only—never mix with vinegar)
– Soft toothbrush or dedicated humidifier cleaning brush
– Cotton swabs (for tight nebulizer edges)
– Paper towels (no lint residue)
– Soup bowl (for the critical tilting technique)
Critical safety prep: Unplug the unit and let it cool 30 minutes. Never submerge the electrical base—water contact here destroys motors instantly. Work near a sink on a towel-lined counter to catch spills. Skip abrasive tools like steel wool; they scratch surfaces and accelerate future mineral adhesion.
Warm-Mist Models: How to Dissolve Hard Water Crust from Heating Element
Why vinegar works: Acetic acid in vinegar dissolves calcium carbonate deposits through bubbling chemical reactions. You’ll see tiny bubbles forming on crusty areas within minutes—your visual progress indicator.
-
Disassemble correctly:
– Remove water tank, cooling chamber, and removable tray
– Locate the heating element (center metal coil in base)
– Never detach wires—only remove user-accessible parts -
Vinegar soak with precision:
– Pour vinegar into base until heating element is fully submerged
– For heavy buildup: Place soup bowl under one side of base to tilt it 15 degrees. This keeps vinegar off sensitive springs while covering the element.
– Soak minimum 20 minutes (overnight for severe cases where crust resists knife cuts)
– Pro tip: Gently scrub with soft brush during soaking—don’t wait until vinegar dries -
Rinse like a pro:
– Drain vinegar completely
– Fill base with cold water, swish vigorously for 30 seconds
– Repeat until vinegar odor disappears (usually 3 rinses)
– Warning: Residual vinegar creates toxic fumes when heated
Cool-Mist Ultrasonic Models: Nebulizer Disc Rescue Protocol

Identify your enemy: The nebulizer is a small metal disc in the base that vibrates at 1.7 million pulses per second. Mineral buildup here is invisible until mist output drops.
-
Safe vinegar application:
– Empty all water from tank and base
– Pour vinegar to cover nebulizer disc by ½ inch only—never flood the base
– Soak 20+ minutes (bubbles indicate active descaling)
– Critical: Never power on unit with vinegar inside—this burns out the nebulizer instantly -
Precision cleaning:
– Dip cotton swab in vinegar, wipe around disc edges in circular motion
– Remove float paddle by gently lifting both sides simultaneously
– Clean VapoPad medicine cup separately with vinegar-dampened swab
– Rinse base thoroughly under running water
Deep Disinfection: Bleach Protocol That Won’t Damage Components

Why skip this step risks health: Bacteria and mold thrive in warm, moist reservoirs. A single cleaning cycle without disinfection leaves 99% of pathogens intact.
Exact Bleach Solution Formula (No Guesswork)
Mix ½ teaspoon bleach per ½ gallon (1.9 L) water. Too little won’t kill microbes; too much corrodes plastic components. Never use undiluted bleach—it voids warranties.
Step-by-Step Disinfection for All Models
-
Tank treatment:
– Fill water tank with bleach solution
– Swish gently for 30 seconds to coat entire interior
– Place tank on base—solution automatically drains into tray -
Critical soak timing:
– Set timer for exactly 20 minutes
– Longer exposure cracks plastic; shorter won’t disinfect -
Component-specific wiping:
– Warm-mist: Wipe heating element with bleach-dampened paper towel
– Cool-mist: Remove mist nozzle, soak in solution for 5 minutes
– Red flag: If bleach odor lingers after rinsing, repeat 3x -
Final rinse verification:
– Smell all components—if you detect bleach, rinse 3 more times
– Air-dry all parts for 1 hour before reassembly
Monthly Prevention Tactics That Stop Buildup Before It Starts
Distilled water isn’t optional: Tap water contains 50-200 ppm minerals. Distilled water (0 ppm) cuts buildup by 90%. Yes, it costs $0.50/gallon more—but replacing your humidifier costs $45. For continuous bedroom use, this is non-negotiable.
The 12-minute monthly ritual:
1. Run empty humidifier with 1 cup vinegar in base for 10 minutes
2. Let sit 20 minutes (no power!)
3. Rinse 3x with cold water
This dissolves early-stage crystals before they harden.
Storage secret: Before seasonal storage, run a full vinegar cycle, then leave all components disassembled in a dry, ventilated area. A humidifier stored dirty becomes a mold incubator by next winter.
Performance Test: How to Confirm Your Cleaning Worked
Never skip this verification: 30% of “cleaned” humidifiers underperform due to missed steps.
-
Immediate startup test:
– Fill with fresh distilled water
– Power on unit
– Success sign: Steady mist within 2 minutes (warm-mist) or visible vapor cloud (cool-mist) -
Troubleshooting checklist:
– ❌ Weak mist? → Reclean nebulizer/heating element
– ❌ Loud humming? → Check for trapped mineral chunks under disc
– ❌ White dust? → Bleach residue remains—rinse 3 more times -
Long-term monitoring:
– Track mist output weekly with phone timer
– Note time to fill room (should be consistent)
– If performance drops before next cleaning, switch to distilled water immediately
Pro tip: Place a tissue 6 inches from mist output. It should dampen evenly within 10 seconds—your real-world performance meter.
Your Vicks humidifier works harder than you realize—processing gallons of water weekly while fighting mineral invasions. That 15-minute weekly cleaning ritual prevents crust so hard it defies knives and saves you from breathing mineral dust. Stick to distilled water, hit vinegar soaks monthly, and disinfect every 4 weeks. Do this, and your humidifier won’t just fix dry skin—it’ll deliver clean, silent mist for 5+ years. Skip these steps, and you’re not just wasting money on replacements; you’re inviting dust storms into your bedroom. Clean it right tonight, and wake up to air so comfortable, you’ll forget winter ever came.


