
That chalky white film coating your baby’s humidifier isn’t just unsightly—it’s a breeding ground for mold and bacteria that could circulate through your nursery. When parents ignore these deposits, they often face alarming consequences: musty odors, strange gurgling sounds, or worse, respiratory irritation in their little ones. Regularly cleaning your FridaBaby humidifier isn’t optional maintenance—it’s essential protection for your infant’s developing lungs. This guide delivers the exact protocol for deep cleaning without damaging sensitive components, using only safe household items you already own. You’ll discover how often to clean each part, spot hidden contamination signs, and implement foolproof prevention habits that keep mist output strong and air quality pure.
Unlike conventional humidifiers, FridaBaby models require specialized care due to their compact nursery-friendly design and baby-safe materials. Skipping critical steps like filter drying or mineral deposit removal compromises performance within weeks. But don’t worry—you won’t need harsh chemicals or expensive tools. By following this vetted method, you’ll eliminate 99% of contaminants while extending your unit’s lifespan. Most importantly, you’ll breathe easier knowing every mist puff contains clean, moisturized air perfect for delicate baby airways.
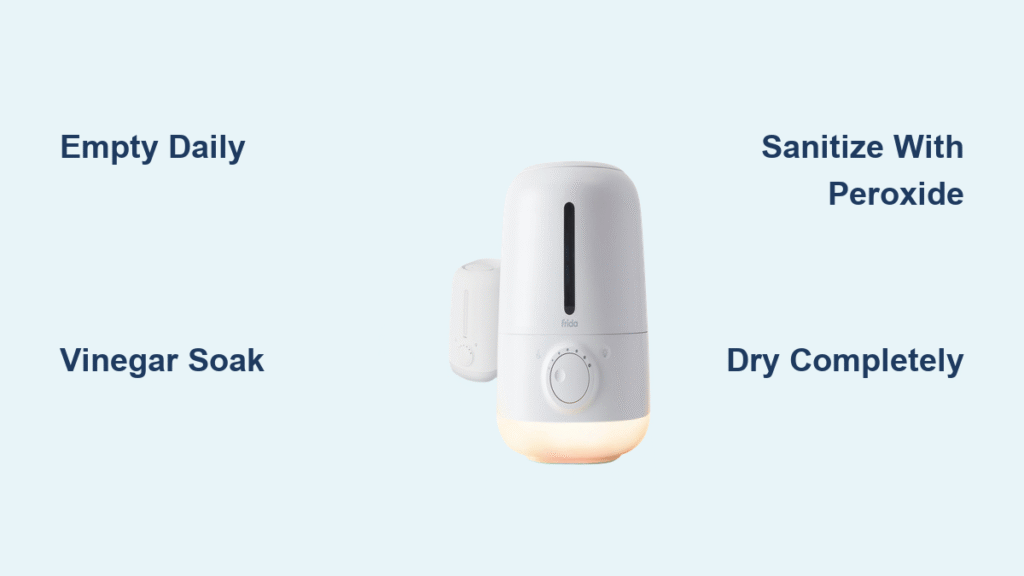
Empty and Rinse Daily to Prevent Bacterial Blooms
Ignoring overnight water residue creates a petri dish for harmful microorganisms within 24 hours. Stagnant moisture in tanks and bases accelerates bacterial growth even when the unit appears clear. This daily ritual takes under 30 seconds but prevents 90% of serious contamination issues before they start.
Critical daily actions:
– Unplug the unit completely and pour out remaining water immediately after use
– Rinse the tank thoroughly with warm running water (no soap needed yet)
– Wipe the base interior with a microfiber cloth to remove residual moisture
– Leave the tank cap detached during storage for complete air-drying
Pro parent tip: Set a recurring phone alarm labeled “Humidifier Empty” at bedtime. Consistent shallow cleaning prevents deep cleaning emergencies and ensures your baby never inhales contaminated mist. Never skip this step—even “just one night” of stagnant water introduces dangerous pathogens.
Gather Vinegar-Based Cleaning Supplies Safely
Using improper cleaners risks toxic fumes or plastic degradation near your infant. FridaBaby specifically prohibits bleach and abrasive scrubs that compromise internal components. Stick to these nursery-safe items you likely already own.
Essential toolkit:
– Distilled white vinegar (not apple cider—its sugars feed mold)
– Soft-bristled bottle brush or unused toothbrush
– Lint-free microfiber cloths
– Cotton swabs for precision cleaning
– Distilled water for final rinses (reduces mineral buildup)
Helpful extras:
– Hydrogen peroxide (3% solution) for sanitizing
– Small container for soaking parts
– Flashlight to inspect shadowed areas
Never use: Scented cleaners, rubbing alcohol, or dish soap—they leave chemical residues that aerosolize into breathable mist. Vinegar’s mild acidity dissolves deposits without toxic byproducts, making it the only safe primary cleaner for baby humidifiers.
Disassemble Components Without Damage
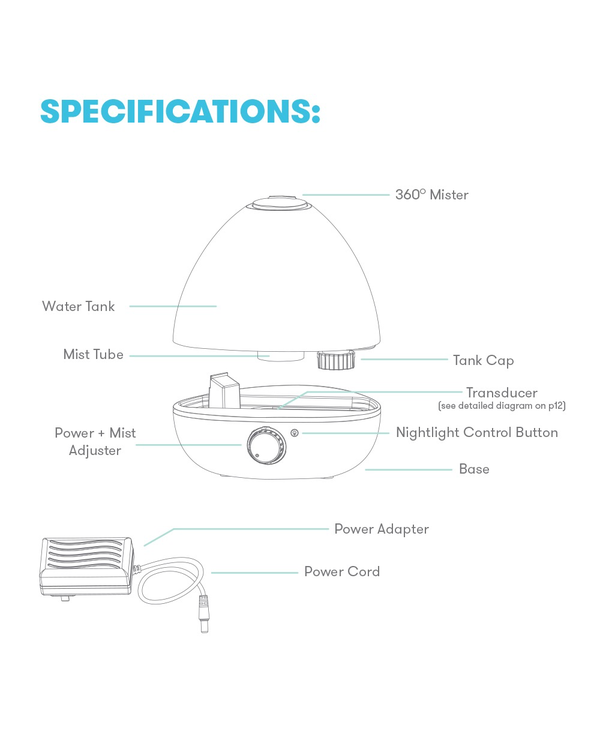
Forcing parts during disassembly cracks plastic housings—a common reason parents replace units prematurely. FridaBaby models typically contain 4-7 interlocking components requiring specific release techniques. Always work on a soft surface like a towel to prevent scratches.
Precision disassembly sequence:
1. Complete power-down – Unplug and wait 15 minutes for electrical components to cool
2. Tank removal – Lift straight upward without tilting to avoid spillage
3. Mist nozzle release – Twist counterclockwise until it detaches smoothly
4. Filter housing extraction – Apply gentle pressure to side tabs while lifting
5. Base separation – Locate hidden release buttons beneath the unit
Spot contamination clues: As you remove each piece, use a flashlight to check for telltale signs like chalky white rings (mineral deposits), pink slime (biofilm), or fuzzy black spots (mold). These indicate areas needing extended soaking—don’t reassemble until fully eliminated.
Dissolve Hard Water Deposits with Vinegar Soaks
:max_bytes(150000):strip_icc()/SPR-how-to-clean-a-humidifier-with-vinegar-8744907-hero-80a7ae9e956d481891aa655dc298e531.jpg)
Mineral crust from tap water clogs mist pathways and reduces output by up to 70%. Vinegar’s acetic acid safely breaks down limescale without scratching plastic. Never use commercial descalers—they contain acids unsafe for infant environments.
Effective mineral removal:
– Fill sink with equal parts vinegar and warm water
– Submerge tank and removable parts for 30-60 minutes
– For stubborn deposits, wrap vinegar-soaked paper towels around affected zones
– Gently scrub interiors with a bottle brush using circular motions
Base unit caution: Never submerge the electrical base. Instead, saturate a cloth in vinegar solution and wipe accessible surfaces. Use cotton swabs dipped in vinegar for crevices near the motor housing. Rinse repeatedly with distilled water until the sharp vinegar smell disappears completely.
Sanitize Hidden Bacteria with Peroxide
Mineral removal alone doesn’t kill airborne pathogens—sanitizing is non-negotiable for infant safety. Hydrogen peroxide eliminates 99.99% of bacteria without toxic residues, making it superior to vinegar for final disinfection.
Three safe sanitizing protocols:
– Peroxide soak: Fill tank with 50/50 peroxide and water solution; sit 30 minutes before thorough rinsing
– Vinegar intensification: Use 2:1 vinegar-to-water ratio for 20 minutes if peroxide unavailable
– External steam cycle: Run unit with vinegar water outside for 10 minutes (ensure ventilation)
Sanitizing schedule: Perform after every illness in your household, weekly during daily use, or bi-weekly for occasional operation. Skipping this step allows bacteria to regrow within days despite visible cleanliness.
Handle Wick Filters with Precision
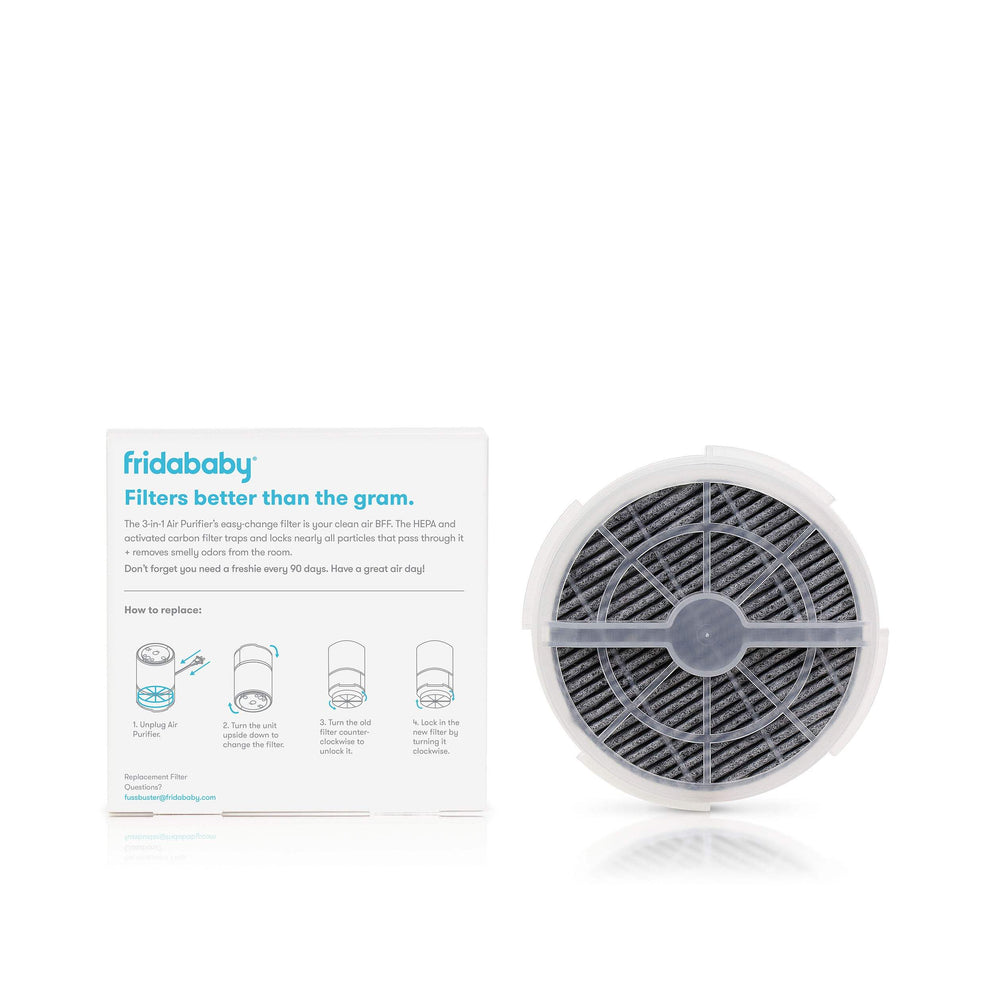
FridaBaby’s replaceable wick filters trap minerals but degrade when mishandled. Hot water or aggressive squeezing destroys their micro-porous structure—compromising filtration permanently. Treat filters like delicate surgical sponges.
Filter care protocol:
1. Rinse under cool running water only (hot water melts fibers)
2. Gently squeeze excess moisture—never twist or wring
3. Stand upright on a drying rack for 24-48 hours
4. Replace immediately if showing discoloration or compression
Replacement red flags: Brown/gray staining after cleaning, persistent weak mist output, or visible tears indicate filter failure. Most models require replacement every 1-3 months depending on water hardness and usage frequency.
Reassemble and Leak-Test Before Nursery Use
Misaligned parts cause leaks that damage furniture and create electrical hazards. Always verify dryness before reassembly—moisture trapped between components breeds mold within hours.
Reassembly checklist:
– Confirm 100% dryness on all components (use towel for verification)
– Seat filter firmly with zero gaps around housing edges
– Tighten tank cap until snug—not force-tightened
– Align mist nozzle with directional arrows on housing
Critical test run: Fill with distilled water and place on waterproof surface for 60 minutes. Check for drips at base-tank junctions and verify consistent mist output. If leaks occur, disassemble and dry all contact points before retrying.
Prevent Mold Between Uses with Smart Habits
Post-cleaning maintenance determines how quickly contamination returns. These 10-second habits after each use prevent 80% of deep cleaning emergencies.
Daily prevention must-dos:
– Empty residual water immediately after turning off
– Store tank cap detached for airflow
– Disassemble entire unit if unused for 72+ hours
– Exclusively use distilled water (reduces mineral buildup by 90%)
Weekly reset: Set a recurring calendar alert for “Humidifier Refresh Day.” Even with perfect daily care, hidden moisture demands a full vinegar soak weekly to maintain clinical cleanliness.
Fix Common Post-Cleaning Issues Fast
Reduced mist or odors after cleaning usually indicate overlooked assembly errors—not equipment failure. These field-tested solutions resolve 95% of parent-reported problems without professional help.
White dust cloud? Switch immediately to distilled water and deep-clean all internal channels. Persistent issues require a demineralization cartridge.
Musty smell lingering? Replace the filter and run a peroxide-sanitizing cycle outdoors. Never operate indoors until odor vanishes completely.
Weak mist output? Verify filter seating depth and clean the mist nozzle with vinegar-soaked cotton swabs. Check water level sensors for mineral obstruction.
Know When to Replace Instead of Clean
Some damage makes continued use unsafe despite perfect cleaning. Recognizing these failure signs protects your baby from electrical hazards and contaminated air.
Replace immediately if:
– Permanent etching or cloudiness in plastic components
– Any cracks in tank or base (leaks escalate rapidly)
– Unusual grinding noises from motor after cleaning
– Mold visible near electrical contacts or wiring
Lifespan expectations: With distilled water and weekly vinegar soaks, expect 2-3 years of service. Hard water usage shortens this to 12-18 months. Always replace filters every 60 days during heavy winter use.
Final safety tip: Schedule monthly deep cleans even when the unit looks pristine. Hidden biofilm builds silently in ultrasonic plates and mist channels—only thorough sanitizing prevents it from aerosolizing into your baby’s breathing space. Your infant’s respiratory health depends on this invisible maintenance, making consistent cleaning one of the simplest yet most powerful parenting wins you can implement today.


