
That chalky white crust lining your humidifier tank isn’t just ugly—it’s actively pumping mold spores and bacteria into your breathing space every time you turn it on. When neglected, even a brand-new humidifier becomes a health hazard within weeks, potentially triggering asthma attacks, sinus infections, or flu-like symptoms. The solution? A $2 bottle of white vinegar can destroy mineral deposits and microbial colonies while being completely safe for your lungs. This guide reveals the exact vinegar cleaning method recommended by the EPA and allergists to restore your humidifier’s performance in under 30 minutes—no special tools required.
You’ll learn why vinegar outperforms chemical cleaners, discover the critical safety step 90% of users skip, and get model-specific instructions for ultrasonic, warm mist, and evaporative units. Most importantly, you’ll implement a foolproof weekly routine that prevents health risks while doubling your humidifier’s lifespan. Let’s transform that germ factory back into a wellness tool.
Why Vinegar Outperforms Chemical Cleaners
White vinegar’s acetic acid dissolves limescale and mineral deposits while simultaneously killing 99% of mold, bacteria, and viruses—proven effective against common household pathogens like E. coli and Aspergillus niger. Unlike store-bought cleaners, vinegar leaves zero toxic residue that could irritate airways or trigger allergic reactions. The EPA confirms vinegar’s safety for respiratory health, while chemical alternatives often contain volatile organic compounds that worsen indoor air quality.
Key advantage: Vinegar costs pennies per cleaning versus $10-$20 for specialized solutions, yet delivers superior results on calcium and magnesium buildup—the white crust caused by hard water. Never risk mixing vinegar with bleach, as this creates dangerous chlorine gas.
Essential Supplies You Already Own
Must-have items:
– Distilled white vinegar (1-2 cups)
– Distilled water for rinsing (reduces future scaling)
– Soft-bristled toothbrush or nylon dish brush
– Microfiber cloths
– Cotton swabs for tight spots
– Basin or sink for soaking parts
Critical no-nos:
– ❌ Steel wool or abrasive pads (scratch plastic, trap bacteria)
– ❌ Dish soap (leaves film affecting mist quality)
– ❌ Bleach in same session as vinegar (toxic reaction)
– ❌ Tap water for rinsing (adds new minerals)
Pre-Clean Safety Steps You Can’t Skip
Before touching your humidifier:
1. Unplug immediately—water and electricity cause electrocution risk
2. Empty ALL water from tank and base reservoir
3. Disassemble completely—remove tank, cap, mist nozzle, filters
4. Cool warm mist units—never clean heated components
Red flag: If you smell mustiness or see black spots, wear gloves and a mask. These indicate active mold growth requiring extended soaking. Never submerge electrical bases—keep vinegar solution below motor housings.
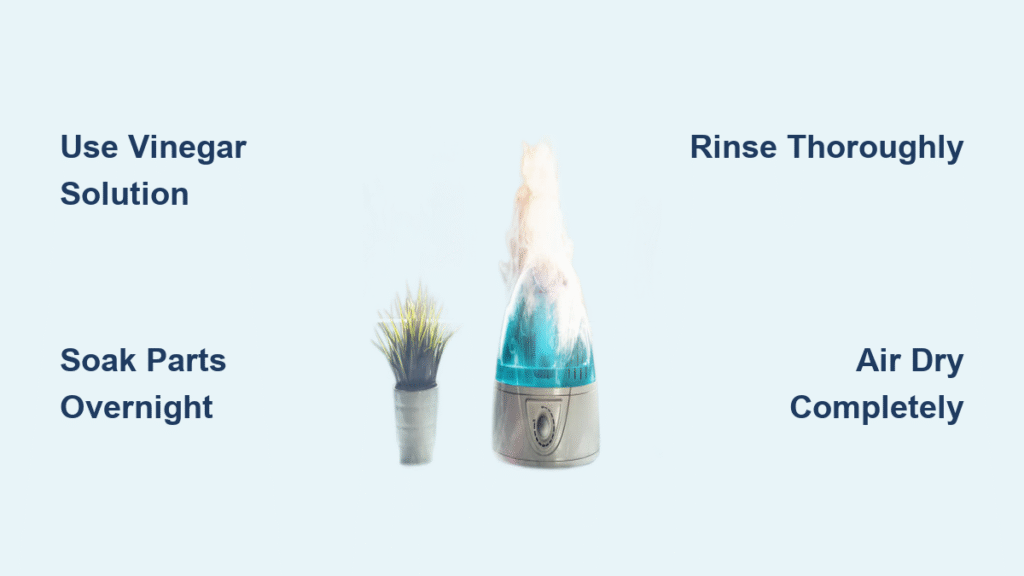
Create the Perfect Vinegar Cleaning Solution
Standard mix: Equal parts white vinegar and water (1:1 ratio) for routine maintenance. For severe scaling (thick white crust), use undiluted vinegar straight from the bottle. Pro tip: Warm vinegar works 30% faster—microwave solution for 30 seconds before use.
Quantity guide:
– Small humidifiers (1-2 gallon): 1 cup solution
– Large units (3+ gallon): 2 cups solution
– Overnight soak: Use undiluted vinegar for extreme buildup
Deep Clean Water Tank in 5 Minutes
Step 1: Fill tank with vinegar solution (2 cups for standard units)
Step 2: Seal tightly and shake vigorously for 2 minutes—this dislodges hidden deposits in valves and corners
Step 3: Let stand 15-30 minutes (overnight for heavy scaling)
Step 4: Scrub interior with toothbrush, focusing on seams and the waterline ring
Step 5: For bottom-fill models: Press release valve to flush vinegar through mechanism
Warning: Never skip shaking—mineral deposits hide in valve mechanisms even if the tank looks clean.
Base and Heating Element Cleaning Protocol
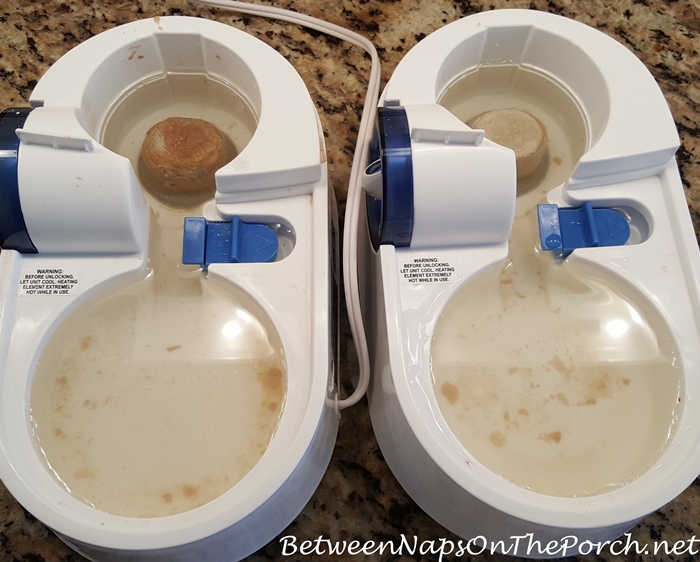
For warm mist units:
Pour vinegar solution into the base until the heating element is submerged. Soak 20-30 minutes, then gently brush the element in circular motions. Never immerse the entire base—keep liquid below electrical components. Check the automatic shut-off sensor for hidden scale.
For ultrasonic models:
Dampen a cotton swab with vinegar and clean the nebulizer disc (shiny metal plate in the base) using light pressure. Remove mineral film blocking vibration. Verify all mist output holes are clear using a toothpick.
Small Parts Cleaning You’re Probably Missing

Caps, nozzles, and mist outlets harbor 70% of microbial growth. Create a vinegar bath in a shallow bowl and submerge these parts for 15-20 minutes. Use cotton swabs to clean interior passages—especially the chimney where mist exits. For clogged vents, insert a dry swab after vinegar cleaning to remove loosened debris.
Critical check: Hold parts up to light—any remaining white film means re-soaking is needed before reassembly.
Rinse and Dry Thoroughly (Avoid Vinegar Smell!)
Rinsing process:
1. Rinse each component under warm running water for 60+ seconds
2. Continue until vinegar odor completely disappears (sniff test!)
3. Inspect for stubborn deposits—repeat cleaning if needed
4. Shake vigorously to remove trapped water
Drying method:
– Place tank upside down on a clean towel
– Position base on its side for airflow
– Air dry for 2-4 hours minimum
– Never reassemble damp parts—this breeds mold
Humidifier-Specific Cleaning Tips

Warm Mist Units
Focus on the heating element where minerals bake onto hot surfaces. Severe scaling requires overnight soaking. After cleaning, test the unit outdoors first—mineral residue can cause temporary white smoke.
Cool Mist Ultrasonic
Clean the nebulizer disc weekly with vinegar to prevent performance loss. Never scrub the disc aggressively—it’s easily damaged. If mist output weakens after cleaning, check for water level sensor blockage.
Evaporative Models
Never wash wick filters with vinegar—this destroys antimicrobial coatings. Instead, swish filters in cold water during maintenance. Replace filters every 3-6 months regardless of appearance.
Weekly Maintenance That Prevents Health Risks
Daily (30 seconds):
– Empty tank completely
– Air dry upside down
– Refill with distilled water
Weekly (15 minutes):
– Full vinegar cleaning cycle
– Check for musty odors
– Inspect base for deposits
Monthly:
– Alternate with hydrogen peroxide disinfection
– Replace filters as scheduled
– Test all functions at highest setting
Fix These Common Post-Cleaning Problems
White dust continues
Switch exclusively to distilled water—tap water minerals cause this. If persistent, clean the nebulizer disc again with undiluted vinegar. Cracked discs require replacement.
Musty odor lingers
Soak all parts in undiluted vinegar for 2 hours. Replace rubber gaskets—they trap moisture. Check hidden reservoir corners with a flashlight.
Weak mist output
Clean mist outlet holes with a toothpick. Verify water level covers the nebulizer disc. For evaporative models, replace clogged wick filters immediately.
Prevention Strategies That Work
Water quality is critical:
– Distilled water reduces cleaning needs by 90%
– Filtered water cuts mineral buildup by 50%
– Never use well water without pre-treatment
Storage protocol:
– Clean thoroughly before storing
– Dry for 48+ hours in a ventilated area
– Store with tank lid off
– Replace filters when restarting
Quick Reference Cleaning Checklist
Before each use:
– [ ] Empty previous water
– [ ] Quick visual inspection for mold
– [ ] Refill with fresh distilled water
Weekly deep clean:
– [ ] Unplug and disassemble completely
– [ ] Soak parts in 1:1 vinegar solution 30 min
– [ ] Scrub all surfaces with soft brush
– [ ] Rinse until vinegar-free
– [ ] Air dry 4+ hours
Final Thoughts
Cleaning your humidifier with vinegar isn’t just maintenance—it’s a non-negotiable health practice. That 20-minute weekly ritual prevents respiratory infections, extends your unit’s life by years, and ensures you’re breathing purified moisture instead of mold spores. Set a recurring phone alert for the same day each week; your lungs will feel the difference within days. Remember: a clean humidifier operates 30% more efficiently, uses less energy, and most crucially, transforms from a hidden health threat into your home’s wellness guardian. Never skip the rinse step—your next breath depends on it.


