
Is your Dyson air purifier’s sensor failing to detect air quality changes, leaving you in the dark about pollutants in your home? It’s frustrating when this smart device, designed to keep your air clean automatically, suddenly stops responding—maybe the display shows no readings, or it doesn’t adjust fan speed based on detected particles. The good news is that a Dyson air purifier sensor not working is often due to simple issues like dust buildup or a temporary glitch, and you can fix it quickly with a basic reset or cleaning in under 10 minutes for immediate relief.
In this comprehensive guide, we’ll go beyond that quick fix to explore the most common causes of a Dyson air purifier sensor not working, provide step-by-step troubleshooting methods from easy DIY solutions to more advanced checks, and share prevention tips to keep your unit running smoothly. By the end, you’ll have the tools and confidence to restore full functionality to your Dyson air purifier, ensuring cleaner air without unnecessary hassle or expense.
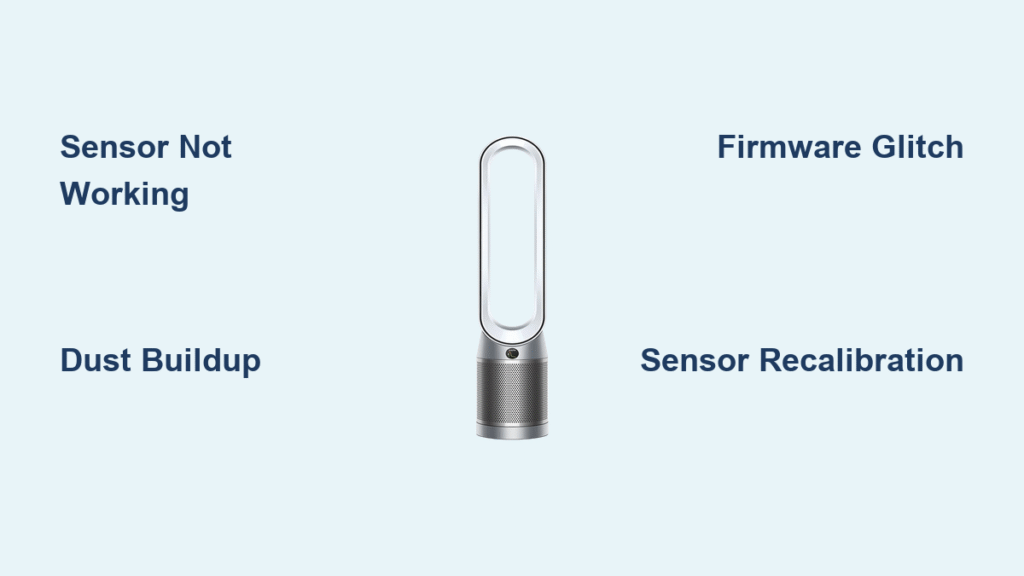
Common Causes of Dyson Air Purifier Sensor Not Working
Understanding why your Dyson air purifier’s sensor is malfunctioning is the first step to fixing it. Dyson models like the Pure Cool, TP series, or HP series rely on optical or laser sensors to measure particulate matter (PM2.5, PM10), VOCs, and other pollutants. When these sensors fail, it’s usually not a complete breakdown but something fixable at home. Below, we’ll break down the top causes with explanations to help you diagnose quickly.
Dust and Debris Buildup on the Sensor
The most frequent culprit is accumulated dust or pet hair blocking the sensor’s light path. Dyson’s air quality sensors use infrared light to detect particles, so even a thin layer of grime can disrupt readings. This is especially common in high-pollution environments or if the unit hasn’t been cleaned in months. Symptoms include erratic or zero air quality readings on the display or app.
Software or Firmware Glitch
Dyson’s smart purifiers run on firmware that can glitch due to power interruptions, outdated software, or app connectivity issues. If the sensor calibration gets thrown off, it might report inaccurate data or stop functioning altogether. This often happens after a firmware update or during humid weather that affects internal electronics.
Poor Placement or Environmental Interference
Placing your purifier too close to walls, curtains, or heat sources can interfere with sensor accuracy. Electromagnetic interference from nearby Wi-Fi routers or microwaves, or extreme temperatures (below 32°F or above 104°F), can also cause malfunctions. Dyson’s guidelines recommend at least 4 inches of clearance around the unit for optimal sensor performance.
Hardware or Connection Issues
Loose internal connections, worn-out sensor components, or power supply problems can lead to sensor failure. In older models (e.g., pre-2020 TP04), battery backups or capacitors might degrade over time. If the unit powers on but the sensor doesn’t, this could indicate a faulty wire harness or a need for recalibration.
Overheating or Ventilation Blockage
If vents are clogged, the unit can overheat, affecting the sensor’s electronics. This is less common but seen in dusty homes where airflow is restricted, causing the sensor to shut down as a safety measure.
How to Fix Dyson Air Purifier Sensor Not Working

Don’t worry—most Dyson air purifier sensor not working issues can be resolved without tools or professional help. We’ll cover four progressive methods, starting with the simplest. Always unplug the unit before starting any internal work for safety. These steps apply to popular models like the Dyson Pure Cool TP07, HP09, or Purifier Cool Formaldehyde; check your manual for model-specific variations. Expect the entire process to take 15-45 minutes depending on the method.
Method 1: Quick Reset and Recalibration (Easiest Fix, 5-10 Minutes)
A simple reset often clears temporary glitches without any disassembly. This is your go-to for software-related sensor issues.
Diagnosing the Issue
Power on your Dyson and check the display or MyDyson app for error codes (e.g., “Sensor Fault” on some models). If readings are stuck at “Good” despite obvious pollution, it’s likely a calibration problem.
Fix Steps
- Unplug the purifier from the wall outlet and wait 2 minutes to discharge any residual power—this fully resets the electronics.
- While unplugged, press and hold the power button for 10 seconds to initiate a hard reset (on touch-enabled models, this might be the oscillation button).
- Plug it back in and turn it on. The sensor should recalibrate automatically within 30 seconds; you’ll see the air quality ring change colors as it detects room air.
- Open the MyDyson app (if connected), go to Settings > Device > Recalibrate Sensor, and follow prompts. Ensure the app is updated via the App Store or Google Play.
Testing
Run the purifier in Auto mode for 10 minutes near a smoky candle (safely, outdoors if possible). The sensor should detect rising PM levels and increase fan speed. If not, move to the next method.
Warning: Avoid resetting during a firmware update, as it could corrupt the software.
Method 2: Cleaning the Sensor and Vents (DIY Cleaning, 10-20 Minutes)
Dust is the enemy of precision sensors, so a thorough clean can restore accuracy. This method targets buildup without voiding your warranty if done gently.
Diagnosing the Issue
Inspect the air intake grille for visible dust. If the sensor readings don’t fluctuate with door openings (introducing “dirty” air), debris is likely the cause.
Fix Steps
- Unplug and place the unit on a flat surface covered with a towel to catch dust.
- Use a soft, dry microfiber cloth or Dyson’s official cleaning brush (included with many models) to gently wipe the sensor window—usually a small lens near the base or top grille. For models like the TP09, it’s behind the front panel; refer to your manual.
- Vacuum the vents and filters with a soft brush attachment on low suction. Remove the HEPA filter if accessible (twist counterclockwise) and tap out excess dust outdoors.
- For stubborn grime, dampen a cloth with distilled water (never use chemicals) and wipe the sensor lightly—let it dry completely for 5 minutes.
- Reassemble, plug in, and run a 5-minute test cycle in Manual mode on high speed to clear any loose particles.
Testing
Monitor the app or display for responsive readings over an hour. Introduce a controlled pollutant like incense smoke from afar; the sensor should react promptly.
Important: Never submerge the unit or use compressed air, as it can damage delicate sensor components.
Method 3: Checking Connections and Firmware Update (Intermediate, 20-30 Minutes)
If resets and cleaning fail, inspect for loose parts or update the software for better sensor stability.
Diagnosing the Issue
Listen for unusual humming from the base (indicating connection issues) or check if the Wi-Fi light blinks erratically.
Fix Steps
- Unplug and remove the bottom cover (if your model allows; for TP series, unscrew 4-6 Phillips screws—use a screwdriver set).
- Gently check the sensor cable connections inside—look for the small ribbon cable plugged into the main board. If loose, reseat it carefully without bending pins.
- Reassemble and power on. Connect to Wi-Fi via the app: Go to Settings > Update Firmware. This can take 10-15 minutes and often fixes sensor calibration bugs.
- If no update is available, perform a factory reset: Hold the power and timer buttons simultaneously for 10 seconds until the display flashes.
Testing
Place the purifier in a different room and compare readings against a secondary air quality monitor (like a cheap PM2.5 tester from Amazon). Consistency indicates success.
Pro Tip: Download the latest firmware manually from Dyson’s support site if the app fails.
Method 4: Sensor Replacement or Advanced Diagnostics (Advanced, 30-45 Minutes)
For persistent hardware faults, replacing the sensor module might be needed, but this is a last resort for DIYers.
Diagnosing the Issue
If other methods fail and the unit shows consistent errors, it’s likely hardware. Contact Dyson support for a diagnostic code via their app.
Fix Steps
- Order a replacement sensor kit from Dyson’s website (around $50-100, model-specific like part #970139-01 for TP07).
- Disassemble as in Method 3, then unplug the old sensor (a small PCB board) and snap in the new one—follow Dyson’s video tutorial for your model.
- Reassemble and recalibrate as in Method 1.
- If uncomfortable, skip to professional help.
Testing
Full overnight run in Auto mode; log data in the app to confirm accurate pollutant detection.
Warning: Tampering with internals may void warranty if not done correctly—document everything with photos.
Prevention Tips and Maintenance Advice for Dyson Air Purifier Sensors
To avoid future Dyson air purifier sensor not working episodes, proactive care is key. Sensors last 3-5 years with proper maintenance, but neglect can shorten this.
- Regular Cleaning Schedule: Wipe the sensor monthly and vacuum filters bi-weekly. Use Dyson’s maintenance kit for best results.
- Optimal Placement: Keep the unit 1-2 feet from walls and away from direct sunlight or vents. Avoid kitchens to prevent grease buildup.
- Firmware Vigilance: Enable auto-updates in the app and check monthly. This ensures sensor algorithms stay current.
- Environmental Controls: Maintain room humidity at 40-60% with a separate hygrometer to prevent condensation on sensors.
- Filter Replacements: Swap HEPA filters every 6-12 months (Dyson notifies via app) to reduce strain on the sensor from overloaded air intake.
- Power Protection: Use a surge protector to shield against electrical spikes that can fry sensor circuits.
Following these, your purifier could run flawlessly for years, saving you from costly repairs.
Pro Tips for Dyson Air Purifier Sensor Troubleshooting
Here are expert insights to optimize your fixes and avoid pitfalls:
- Use the App for Real-Time Diagnostics: The MyDyson app logs sensor data—review history to spot patterns, like failures during high-humidity days.
- Test in Isolation: Move the unit to a clean garage for testing to rule out room-specific interference.
- Avoid Common Mistakes: Don’t use household cleaners on sensors (they leave residue); stick to dry methods. Also, never run without filters, as it can overload the sensor.
- Optimize Performance: After fixes, enable Night Mode for sensitive sleep environments—the sensor adjusts without lights or noise.
- Extend Sensor Life: Place in low-traffic areas to minimize dust exposure; consider a pre-filter screen for pet-heavy homes.
- Monitor with Add-Ons: Pair with smart home integrations like Alexa for alerts on sensor anomalies.
- Backup Data: Export app logs before resets to track long-term air quality trends.
These tips can cut troubleshooting time in half and boost overall efficiency.
When to Call Professional Help for Dyson Air Purifier Sensor Issues
While DIY fixes resolve 80% of cases, some situations warrant experts. Signs include persistent error codes after all methods, burning smells, or if your model is under warranty (1-2 years standard, up to 5 with registration).
Look for certified Dyson technicians via their official service locator on dyson.com—avoid third-party shops to preserve warranty. Expect costs of $100-200 for diagnostics and repairs, or $150-300 for full sensor replacement out-of-warranty. Always check warranty status first; Dyson offers free shipping for covered repairs. If buying extended coverage, opt for plans from authorized sellers like Best Buy.
FAQ
Q: Why is my Dyson air purifier sensor showing inaccurate readings even after cleaning?
A: Inaccurate readings post-cleaning often stem from incomplete recalibration or environmental factors like high VOCs from new furniture. Perform a full reset (Method 1) and relocate the unit. If it persists, update firmware or test with a known clean air source. According to Dyson’s support docs, sensors need 1-2 hours post-reset to stabilize.
Q: Can a power outage cause my Dyson sensor to stop working?
A: Yes, surges from outages can disrupt firmware. Unplug for 2 minutes and reset as in Method 1. Dyson’s internal battery (in some models) protects against brief outages, but frequent ones may require a surge protector.
Q: How do I know if the sensor is completely broken versus just dirty?
A: A dirty sensor shows fluctuating but delayed readings; a broken one gives no response or constant errors. Use the app’s diagnostic tool—if it reports “Sensor Offline,” it’s likely hardware. Cleaning first rules out debris.
Q: Is it safe to disassemble my Dyson purifier myself?
A: For basic access like filters, yes—but internal sensor work risks warranty voidance. Follow Dyson’s videos and unplug first. If unsure, contact support; they guide via chat.
Q: Does humidity affect Dyson air purifier sensors?
A: Absolutely—excess moisture (over 70%) can fog the optical sensor. Use in well-ventilated rooms and dehumidify if needed. Dyson’s formaldehyde models have humidity sensors that alert you.
Q: How often should I replace the sensor in my Dyson purifier?
A: Sensors aren’t user-replaceable like filters but last 3-5 years. Dyson recommends professional checks every 2 years. If under warranty, replacements are free for defects.
Q: Can I fix sensor issues on older Dyson models like the TP01?
A: Yes, but steps vary—older units lack app support, so rely on manual resets. Cleaning and placement fixes work universally, but parts may be discontinued; check Dyson’s legacy support.
Q: What if my Dyson purifier works but the app doesn’t show sensor data?
A: This is a connectivity issue—re-pair via Bluetooth/Wi-Fi in the app settings. Ensure your phone’s OS is compatible (iOS 14+ or Android 8+). Restart your router if needed.
Alternative Solutions for Dyson Air Purifier Sensor Problems
If DIY fixes don’t work or you prefer non-invasive options, consider these alternatives. They’re useful when hardware replacement is too costly.
| Solution | Pros | Cons | Best For |
|---|---|---|---|
| Full Unit Reset via Dyson Support | Free, official guidance; resolves software deep issues | Requires calling support (wait times); no hardware fix | Software glitches without disassembly |
| Third-Party Air Quality Monitor Add-On (e.g., Awair Element) | Affordable ($100-150); independent verification | Doesn’t fix Dyson sensor; extra device clutter | Users wanting backup data while troubleshooting |
| Professional Calibration Service | Precise tuning; extends life | Costs $75-150; travel fees | High-end models like HP09 in commercial spaces |
| Upgrade to Newer Model (e.g., Purifier Big+Quiet) | Built-in redundancies; better sensors | Expensive ($600+); wasteful if old unit is fine | Frequent issues or outdated tech |
Weigh these based on your budget—starting with support is often the smartest non-DIY path.
Get Your Dyson Air Purifier Sensor Working Again
Following this guide, you now have everything to tackle a Dyson air purifier sensor not working issue head-on:
- Detailed causes like dust buildup and glitches for quick diagnosis
- Four step-by-step fix methods, from resets to replacements
- Prevention strategies and pro tips for long-term reliability
- Options for professional help and alternatives if needed
Armed with these actionable solutions, you’re equipped to restore accurate air quality monitoring and enjoy the full benefits of your Dyson purifier without frustration. Start with the quick reset today, and breathe easier knowing cleaner air is just steps away.
Have you fixed your Dyson air purifier sensor using these tips? Share your experience in the comments below to help fellow readers! If issues persist, describe your model and symptoms for tailored advice.


