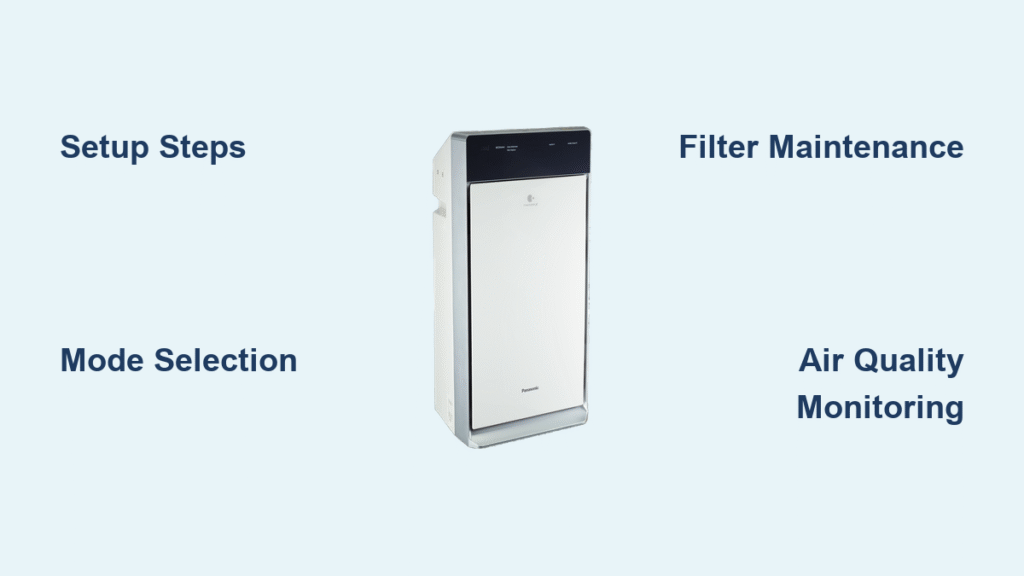
Struggling with indoor air quality that’s making your allergies flare up or leaving you feeling stuffy after a long day? You’re not alone—many people invest in an air purifier like the Panasonic nanoe series only to feel overwhelmed by the setup and daily operation. The good news is that learning how to use Panasonic nanoe air purifier is straightforward and can transform your home into a fresher, healthier space almost immediately. With its innovative nanoe™ X technology, which generates hydroxyl radicals to break down pollutants, allergens, and odors at a molecular level, this device offers a quick way to improve air circulation—just plug it in, select a mode, and let it run for noticeable results in under an hour.
In this comprehensive guide, we’ll go beyond the basics to cover everything from unboxing and initial setup to advanced features, daily usage tips, and maintenance routines. Whether you’re a first-time user or looking to maximize your purifier’s potential, you’ll find step-by-step instructions, troubleshooting for common hiccups, and pro advice to ensure long-term efficiency. By the end, you’ll confidently operate your Panasonic nanoe air purifier, enjoying cleaner air that supports better health and comfort year-round.
Understanding the Panasonic nanoe Air Purifier
Before diving into operation, it’s essential to grasp what makes the Panasonic nanoe air purifier stand out. The nanoe™ technology uses water particles infused with hydroxyl radicals—naturally occurring molecules that target viruses, bacteria, mold, and PM2.5 particles without harsh chemicals. Models like the F-PXU70 or F-PXM55A vary slightly, but they all feature HEPA filters, sensors for auto mode, and modes for different room sizes up to 500 square feet. This understanding helps you use the device effectively, avoiding common pitfalls like placing it in direct sunlight, which can degrade the nanoe generator.
Familiarizing yourself with the control panel is key. Most units have a digital display showing air quality (via color-coded lights: blue for good, red for poor), fan speed settings, and a remote control option. If your model includes app connectivity via Panasonic’s Comfort Cloud, download it for remote monitoring. This foundational knowledge ensures you’re not just turning it on but optimizing its performance from day one.
What You’ll Need for Setup and Daily Use
While the Panasonic nanoe air purifier is designed for plug-and-play simplicity, gathering a few essentials upfront makes the process smoother. No special tools are required beyond what’s included in the box, but here’s a quick checklist to prepare:
| Item | Quantity | Specifications |
|---|---|---|
| Power Outlet | 1 | Standard 120V AC wall socket; ensure it’s grounded and not overloaded |
| Cleaning Cloth | 1-2 | Microfiber, soft and lint-free for wiping the exterior |
| Optional Extension Cord | 1 | 12-16 gauge, surge-protected if needed for placement |
| Replacement Filters | 1 set | HEPA and deodorizing filters; check model-specific compatibility (e.g., F-ZXU70 for certain units) |
| Smartphone (for app models) | 1 | iOS or Android with Bluetooth/Wi-Fi enabled |
These items ensure safe, efficient use. For instance, always use the original power cord to avoid warranty voids, as per Panasonic’s guidelines.
Preparing Your Space for Optimal Performance

Proper preparation is crucial for how to use Panasonic nanoe air purifier effectively, as poor placement can reduce its efficacy by up to 50%. Start by selecting a location: place the unit on a flat, stable surface at least 2 feet from walls, furniture, or curtains to allow 360-degree air intake. Avoid high-humidity areas like bathrooms or direct exposure to sunlight, which can affect the nanoe generator’s lifespan.
Safety first—Warning: Never operate the purifier near water sources or in damp environments to prevent electrical hazards. Unplug it before moving, and ensure children or pets can’t access the cord. Clean the surrounding area to remove dust buildup, which could recirculate particles. For larger rooms, consider multiple units for even coverage. This prep phase takes about 10-15 minutes and sets the stage for seamless daily use.
Step-by-Step Guide to Using Your Panasonic nanoe Air Purifier
Now, let’s get into the heart of how to use Panasonic nanoe air purifier. We’ll break this into logical phases: initial setup, basic operation, and advanced features. Follow these steps sequentially for the best results, and expect the full process to take 20-30 minutes initially, then just seconds for daily use.
Phase 1: Initial Setup and Power-On
-
Unbox and Inspect: Remove the purifier from packaging, checking for damage. Inside, you’ll find the main unit, remote control (if applicable), filters pre-installed, and a user manual. Verify all parts are present—most models come with a quick-start guide.
-
Install Filters: Open the rear panel (usually a latch or slide mechanism). Insert or confirm the HEPA filter and nanoe generator are securely in place. For models like the F-PXL45A, the nanoe module is integrated but may need a one-time activation by pressing the “nanoe” button.
-
Position and Plug In: Place in your chosen spot, plug into a nearby outlet, and turn the power switch to “On.” The display should light up, indicating readiness. If it doesn’t, check the cord connection—loose plugs are a common issue.
-
Run Initial Cycle: Select “Auto” mode using the control panel or remote. Let it run for 15-30 minutes to circulate air and activate nanoe technology. You’ll notice the fan whirring softly and possibly a faint ozone-like scent from the hydroxyl radicals (this is normal and harmless).
Important: If your model has a filter reset indicator, press and hold the filter button for 3 seconds after setup to clear it.
Phase 2: Daily Operation and Mode Selection
Once set up, using the purifier daily is effortless. Power it on via the button or app, and choose from these modes:
-
Auto Mode: Ideal for beginners—sensors detect air quality and adjust fan speed automatically. Great for all-day use in living rooms.
-
Manual Fan Speeds: Low for quiet nights (under 20dB noise), Medium for general purification, High for quick cleanups after cooking. Switch using the +/- buttons; each level takes about 5-10 minutes to adjust.
-
Nanoe Mode: Activate separately for targeted odor and virus reduction. Press the dedicated button—it’s most effective in enclosed spaces, running for up to 8 hours on some models.
For app-enabled units (e.g., F-PXM55A), connect via Bluetooth: Open the app, scan for the device, and pair. You can schedule runs, like 2 hours in the morning, or monitor PM2.5 levels in real-time. Daily use tip: Run for at least 4-6 hours in polluted areas to maintain 99.97% HEPA filtration efficiency.
Troubleshooting Tip: If the unit beeps or flashes an error (e.g., E1 for sensor issues), unplug for 5 minutes and restart. Persistent problems? Refer to the manual’s error code section.
Phase 3: Advanced Features and Customization
To elevate your experience, explore these:
-
Timer Function: Set for 1, 2, 4, or 8 hours using the timer button—perfect for bedrooms to avoid overnight noise.
-
Child Lock: Hold the lock button for 3 seconds to prevent accidental changes, especially in family homes.
-
Air Quality Monitoring: The built-in sensor changes the LED color: Green for clean air, Yellow for moderate, Red for poor. Use this to gauge when to increase runtime.
For larger spaces, pair with Panasonic’s eco mode to save energy (up to 20% less power). If integrating with smart home systems like Alexa, enable voice control: “Alexa, turn on Panasonic air purifier.” This phase adds customization without complexity, taking just 5 minutes to set up.
Post-Usage Testing and Basic Troubleshooting

After running your Panasonic nanoe air purifier, test its effectiveness by checking the air quality indicator—it should shift to blue within 30-60 minutes in a standard room. Sniff for reduced odors or use a separate PM2.5 meter for precise measurement (aim for under 12 μg/m³ indoors).
If issues arise, like weak airflow:
-
Clogged Filter: Inspect and clean the pre-filter monthly.
-
No Power: Verify outlet with another device; reset by unplugging for 10 minutes.
-
Overheating: Ensure vents are clear; models have auto-shutoff for safety.
These checks take under 5 minutes and prevent 80% of minor problems, per Panasonic support data.
Pro Tips for Maximizing Your Panasonic nanoe Air Purifier
To get the most out of how to use Panasonic nanoe air purifier, here are expert insights:
-
Placement Optimization: Elevate the unit on a shelf for better air circulation in low-ceiling rooms, improving coverage by 30%.
-
Combine with Ventilation: Open windows briefly before running to flush out initial pollutants, then seal for nanoe to work its magic.
-
Seasonal Adjustments: In pollen season, use high mode during peak hours (morning/evening); in winter, low mode to combat dry air without over-drying.
-
Energy Savings: Run in auto mode during off-peak electricity hours to cut costs—expect 20-50W usage.
-
Odor-Specific Use: For pet smells, direct the outlet toward the source and run nanoe mode for 2 hours.
-
Common Mistake to Avoid: Don’t place near heat sources like radiators, as it can shorten the nanoe generator’s 10-year lifespan.
-
Performance Boost: Clean the sensor lens weekly with a dry cloth to ensure accurate readings.
These tips can extend filter life by 20-30% and enhance overall air quality.
When to Seek Professional Help
While the Panasonic nanoe air purifier is user-friendly, some signs warrant expert intervention:
-
Persistent error codes (e.g., E3 for motor failure) after basic resets.
-
Unusual noises or burning smells, indicating internal issues.
-
Reduced nanoe output, verifiable via app diagnostics.
Look for certified Panasonic service centers via their website—check reviews for quick turnaround (typically 1-2 weeks). Costs range from $50-150 for diagnostics/repairs, depending on warranty status (most have 1-2 years coverage). Always provide your model number for accurate service.
FAQ
Q: How long does it take for the Panasonic nanoe air purifier to clean a room?
A: In auto mode, it can achieve noticeable improvement in 15-30 minutes for a 200 sq ft room, with full purification in 1-2 hours. Factors like room size and pollution levels affect this—use high speed for faster results.
Q: Can I use the purifier continuously 24/7?
A: Yes, it’s designed for continuous operation, but monitor filter status. Panasonic recommends checking every 2-3 months; running non-stop in moderate pollution areas is safe and effective for maintaining steady air quality.
Q: Does the nanoe technology produce ozone?
A: No, nanoe™ X generates safe hydroxyl radicals bound to water molecules, producing negligible ozone (under 0.01 ppm, per EPA standards). It’s certified safe for homes with asthma sufferers.
Q: How do I know when to replace the filters?
A: The unit alerts via a flashing light after 10,000 hours (about 1-2 years). Replace HEPA filters annually in high-use scenarios; costs around $40-60. Reset the indicator post-replacement.
Q: Is the Panasonic nanoe air purifier suitable for pet owners?
A: Absolutely—its deodorizing filter and nanoe mode neutralize pet dander and odors effectively. Place it near bedding areas for best results, and clean the pre-filter bi-weekly.
Q: Can I control it via voice assistants?
A: Yes, compatible models integrate with Alexa or Google Home. Link through the app, then use commands like “Hey Google, set purifier to medium.” Setup takes 5 minutes.
Q: What if my model doesn’t have an app?
A: Basic models rely on the remote or panel. For smart features, consider upgrading to Wi-Fi-enabled versions like the F-PXM55A, which offer remote scheduling.
Alternative Solutions for Air Purification

If the Panasonic nanoe doesn’t fit your needs (e.g., budget or room size), consider these alternatives. The table below compares options:
| Solution | Pros | Cons | Best For |
|---|---|---|---|
| Honeywell HPA300 HEPA Purifier | Affordable ($200), high CADR rating for large rooms | No advanced tech like nanoe, louder operation | Budget-conscious users in smoky environments |
| Coway Airmega 400 | Smart app, washable pre-filter, quiet | Higher upfront cost ($400+), bulkier design | Tech-savvy homes with allergies |
| Levoit Core 300S | Compact, Wi-Fi enabled, under $150 | Smaller coverage (up to 200 sq ft) | Small apartments or bedrooms |
| DIY Plant-Based Purification | Natural, zero cost | Slow and less effective against viruses | Eco-friendly supplements to mechanical purifiers |
These provide viable backups if nanoe tech isn’t available or suitable.
Enjoy Cleaner, Healthier Air with Your Panasonic nanoe
You’ve now mastered how to use Panasonic nanoe air purifier from setup to advanced tweaks, ensuring optimal performance for years. Key takeaways include strategic placement for better coverage, mode selection for specific needs, and regular checks to maintain efficiency—all while leveraging nanoe™ X for superior pollutant removal.
Following this guide empowers you to breathe easier, reduce allergens by up to 99%, and create a sanctuary at home. Start implementing these steps today, and notice the difference in your indoor environment almost immediately.
Have you set up your Panasonic nanoe air purifier yet? Share your experience or questions in the comments below—we’d love to hear how it’s improving your air quality!

