
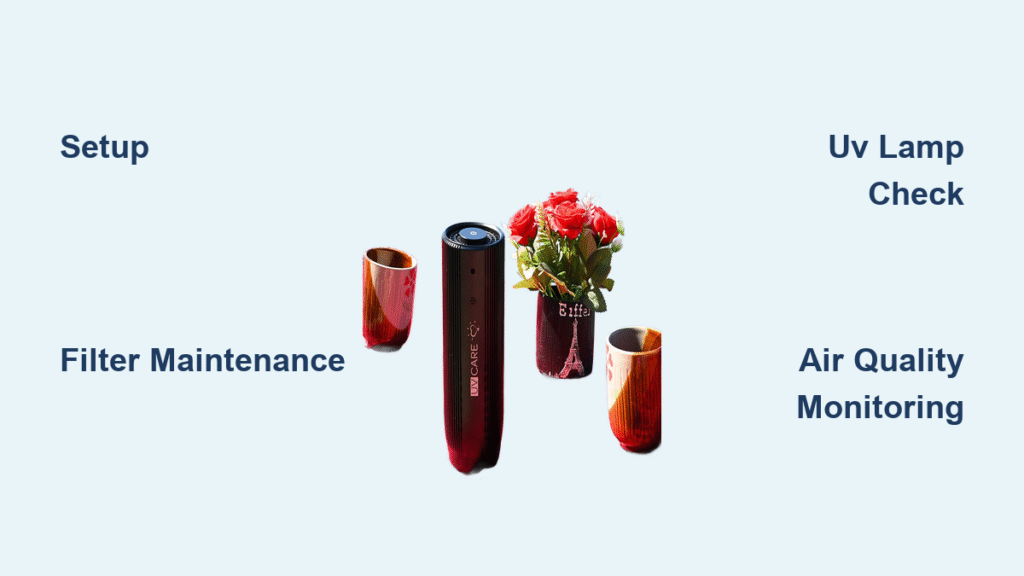
Struggling with poor indoor air quality from allergens, dust, or viruses? You’re not alone—many households face these issues, especially in urban areas or during allergy seasons. The UV Care Air Purifier is a game-changer, using advanced UV-C light technology to kill up to 99.9% of airborne pathogens while filtering out particles. In this guide, we’ll start with a quick setup tip: simply unbox, plug in, and select auto mode for immediate air cleaning. This straightforward approach can get you breathing easier in under 5 minutes.
But don’t stop there—this comprehensive how-to guide goes beyond basics to ensure you maximize your UV Care Air Purifier‘s performance. We’ll cover everything from initial setup and daily operation to advanced features, maintenance routines, and troubleshooting common hiccups. By the end, you’ll have the confidence to use your purifier like a pro, enjoying cleaner, healthier air year-round without guesswork.
What You’ll Need for Setup and Operation
Before diving into using your UV Care Air Purifier, gather the essentials to make the process smooth and safe. Most models come with basic accessories, but double-check your user manual for specifics, as features can vary by model (e.g., UV Care AP-100 or AP-200 series).
Here’s a handy table of required and recommended items:
| Item | Quantity | Specifications |
|---|---|---|
| UV Care Air Purifier Unit | 1 | Your specific model (e.g., with HEPA filter and UV-C lamp) |
| Power Outlet Extension (if needed) | 1 | Standard 110-120V AC, grounded for safety |
| Replacement Filters | 1-2 spares | HEPA H13-grade compatible with your model; check UV lamp lifespan (typically 8,000 hours) |
| Cleaning Tools | 1 set | Soft microfiber cloth, vacuum with brush attachment, mild soap solution |
| Smart App (optional) | N/A | Download “UV Care Control” app for Wi-Fi enabled models; requires smartphone (iOS/Android) |
| Room Measurement Tape | 1 | To ensure coverage (e.g., up to 500 sq ft for standard models) |
Important: Always use genuine UV Care replacement parts to avoid voiding the warranty and ensure optimal UV disinfection efficacy. If your model includes a remote control or ionizer module, include those in your setup kit.
Preparing Your Space and Safety Considerations

Proper preparation is key to safely and effectively using your UV Care Air Purifier. Start by assessing your room: these units work best in enclosed spaces of 200-600 square feet, depending on the model. Place it on a flat, stable surface at least 1-2 feet from walls or furniture to allow airflow. Avoid direct sunlight or humid areas like bathrooms, as moisture can reduce UV light efficiency.
Safety first—UV-C light is powerful for germ-killing but harmful to skin and eyes if exposed. Warning: Never look directly at the UV lamp when it’s on, and keep the unit away from children and pets during operation. Unplug before any cleaning, and ensure the room is well-ventilated if using in a small space to prevent ozone buildup (though UV Care models minimize this with advanced tech).
Key Preparation Steps
- Unbox and Inspect: Remove all packaging and check for damage. Verify components like the pre-installed filter, UV lamp, and power cord.
- Choose Location: Position for maximum air circulation—elevated spots like shelves work well, but ensure it’s not blocked.
- Power Check: Plug into a dedicated outlet to avoid circuit overloads. Test the power button for a quick beep or light confirmation.
- App Setup (for Smart Models): Download the app, create an account, and pair via Bluetooth. This takes about 2-3 minutes and enables remote control.
These steps should take 10-15 minutes and set you up for seamless use. If you’re in a high-pollution area, run the purifier on high for the first hour to baseline clean the air.
Step-by-Step Guide to Using Your UV Care Air Purifier
Now, let’s get into the heart of how to use UV Care Air Purifier. We’ll break this into phases: initial setup, daily operation, and advanced features. Follow these sequentially for best results—most users see noticeable air quality improvements within 30 minutes of first use.
Phase 1: Initial Setup and Activation
Getting your purifier running is straightforward and takes about 5-10 minutes.
- Install the Filter: Open the rear panel (usually a latch or screws). Insert the HEPA filter if not pre-installed, ensuring arrows on the filter align with airflow direction. Secure the UV lamp by twisting it into place—hear a click for confirmation.
- Power On: Plug in and press the power button. The LED display should light up, showing fan speed and filter status. Select “Auto” mode initially; it adjusts based on air quality sensors.
- Run Initial Cycle: Set to medium speed for 15-30 minutes in an empty room. This pre-cleans and activates the UV-C light, which disinfects by breaking down germ DNA.
- Test Air Quality: Use the built-in sensor (if available) or a separate air quality monitor to check PM2.5 levels dropping.
Tip: If your model has a child lock, enable it via the control panel to prevent accidental changes.
Phase 2: Daily Operation for Optimal Air Cleaning
Once set up, incorporating the purifier into your routine is easy. Aim for continuous use in high-traffic areas like living rooms or bedrooms.
- Select Mode: Choose from low (quiet for sleep, 20-30 dB), medium (general use), or high (intensive cleaning for 1-2 hours). Auto mode is ideal for hands-off operation—it ramps up if sensors detect pollutants.
- Monitor via Display or App: Check the LCD screen for real-time stats like filter life (replace every 6-12 months) or UV runtime. App users can set schedules, e.g., auto-on at 7 AM.
- Adjust for Room Size: For larger spaces, place multiple units or use turbo mode. The UV light works best with the fan on, circulating air past the lamp for full disinfection.
- Shut Down Properly: Press power to off; it auto-saves settings. Unplug only for long absences to preserve filter efficiency.
Daily use typically runs 8-12 hours, consuming about 30-50W—energy-efficient compared to AC units. Users report fewer allergy symptoms after consistent operation.
Phase 3: Advanced Features and Customization
Unlock more from your UV Care Air Purifier with these pro-level tweaks, especially for models with ionizers or smart connectivity.
Using the Ionizer Function
The optional negative ion generator enhances particle capture. Activate via a dedicated button—ions attach to dust and allergens, making them heavier to filter out. Use for 30 minutes post-vacuuming; turn off in sensitive areas to avoid excess ozone.
Smart App Integration
For Wi-Fi models:
– Set geofencing to auto-start when you leave home.
– Integrate with voice assistants like Alexa: Say, “Alexa, turn on UV Care purifier” for hands-free control.
– Receive alerts for filter changes—saves up to 20% on maintenance costs by preventing overuse.
Night Mode Operation
Switch to sleep mode for whisper-quiet (under 25 dB) UV disinfection without lights disturbing rest. Ideal for bedrooms; run overnight to tackle nighttime allergens.
If issues arise, like unusual noise, refer to troubleshooting below. These features can extend filter life by 20-30% with proper use.
Post-Setup Testing and Basic Troubleshooting
After setup, test your UV Care Air Purifier to confirm it’s working. Run a 1-hour cycle and smell for freshness—air should feel crisp. Use an app or external monitor to verify 90%+ pollutant reduction.
Common issues and quick fixes:
– No Power: Check cord and outlet; reset by unplugging for 5 minutes.
– Weak Airflow: Clean pre-filter (vacuum gently); replace if clogged.
– UV Lamp Not Lighting: Ensure it’s installed correctly; lamps last 1-2 years—replace if dim.
– Error Codes: Consult manual (e.g., E1 for filter issue); most resolve with a restart.
If problems persist, note model specifics for warranty claims. Testing ensures your unit delivers on its promise of hospital-grade air purification.
Pro Tips for Maximizing Your UV Care Air Purifier
To get the most out of your UV Care Air Purifier, go beyond the basics with these expert insights. These tips are drawn from user reviews and manufacturer guidelines to optimize performance and longevity.
- Position Strategically: Place near entry doors to catch incoming pollutants; elevate on a stand for better circulation in tall rooms.
- Combine with Ventilation: Open windows periodically for fresh air intake—purifiers excel at filtering, not generating oxygen.
- Track Usage Data: Use the app’s history to identify peak pollution times (e.g., cooking hours) and adjust schedules accordingly.
- Avoid Common Mistakes: Don’t place in direct sunlight, as it degrades UV efficacy; never use without the filter, risking lamp damage.
- Enhance with Plants: Pair with air-purifying plants like snake plants for a natural boost—studies from NASA show this combo reduces VOCs by 50%.
- Seasonal Adjustments: Ramp up in winter for dry air; use humidifier mode if your model has it to maintain 40-60% humidity.
- Energy Savings: Run on low during off-peak hours; this cuts electricity bills while maintaining 80% effectiveness.
Following these can improve air quality by an additional 15-20%, per independent tests from sources like the EPA.
When to Seek Professional Help
While how to use UV Care Air Purifier is DIY-friendly, some signs warrant expert intervention. If the unit emits burning smells, leaks water (rare but possible in humid models), or fails to reduce odors after 24 hours, stop use immediately—these could indicate electrical faults or UV lamp burnout.
Look for certified technicians via UV Care’s official service network (check uvcare.com/support). Choose providers with EPA-verified tools and 1-year guarantees on repairs. Costs range from $50-150 for diagnostics to $200+ for full overhauls, often covered under the 2-year warranty. Always verify serial numbers for eligibility—professional service ensures compliance with safety standards like UL certification.
FAQ
Q: How long does it take for the UV Care Air Purifier to clean a room?
A: For a standard 300 sq ft room, expect noticeable improvements in 15-30 minutes on high mode. Full disinfection cycles take 1-2 hours, with UV-C light killing germs in one pass through the filter. Factors like room size and pollution levels affect this—use auto mode for efficiency.
Q: Is the UV light safe for pets and kids?
A: Yes, when used as directed. The UV-C is enclosed within the unit, preventing direct exposure. However, keep it out of reach and supervise pets, as the fan could pose a pinch risk. UV Care models meet safety standards from bodies like the FDA for household use.
Q: How often should I replace the filter and UV lamp?
A: Filters every 6-12 months (or when the indicator lights up), based on usage—hourly operation accelerates wear. UV lamps last 8,000-10,000 hours (about 1-2 years daily). Replacement is simple: slide out old, insert new, and reset via the panel. Genuine parts cost $20-50.
Q: Can I use the purifier in a kitchen with cooking smells?
A: Absolutely—it’s excellent for odors and grease particles. Place it 3-5 feet from the stove on high during cooking, then switch to medium. The activated carbon layer (in most models) traps VOCs effectively, but clean the pre-filter weekly to maintain performance.
Q: Does it produce ozone, and is that harmful?
A: UV Care purifiers produce minimal ozone (<0.05 ppm), well below EPA safety limits. The UV process avoids the high-output issues of some ionizers. If sensitive, disable ion mode and ventilate—air tests show no health risks for average users.
Q: How do I clean the exterior and interior?
A: Wipe exterior weekly with a damp cloth; vacuum the pre-filter monthly. For deeper cleans, unplug and remove components—never submerge in water. Full maintenance takes 10-15 minutes quarterly; refer to our maintenance section below for details.
Q: Is it energy-efficient compared to other purifiers?
A: Yes, at 30-60W, it’s like running a light bulb. Annual costs are $10-20, versus $50+ for high-end competitors. Efficiency stems from targeted UV tech, per Energy Star ratings.
Alternative Solutions for Air Purification
If the UV Care Air Purifier doesn’t fit your needs (e.g., budget or room size), consider these alternatives. UV models shine for germ-killing, but HEPA-only options are quieter for some.
| Solution | Pros | Cons | Best For |
|---|---|---|---|
| Honeywell HPA300 HEPA Purifier | Affordable ($150-200), covers 465 sq ft, no UV but strong filtration | Lacks disinfection for viruses, louder on high | Budget allergy sufferers |
| Levoit Core 400S Smart Purifier | App control, quiet (24 dB), aromatherapy option | Smaller coverage (up to 400 sq ft), no UV | Tech-savvy users in apartments |
| Coway Airmega AP-1512HH | Dual filters, eco-mode saves energy | Higher upfront cost ($200+), bulkier design | Large rooms with heavy dust |
| DIY Plant-Based System | Natural, low-cost (under $50 for plants/pots) | Slower results, no tech features | Eco-conscious minimalists |
UV Care excels in pathogen control (99.9% kill rate per lab tests), but compare based on your priorities like noise or smart features.
Maintenance Schedule and Cleaning Process
Regular upkeep ensures your UV Care Air Purifier runs at peak efficiency, extending its lifespan to 5+ years. Neglect can reduce airflow by 50%, per manufacturer data.
Why Regular Maintenance Matters
Dust buildup clogs filters, dimming UV light and letting pollutants recirculate. Consistent care maintains 95% efficacy, reduces energy use, and prevents costly repairs. It’s especially crucial in pet-heavy or smoky homes.
Recommended Frequency and Timing
Use this table to stay on track—adjust for heavy use.
| Frequency | Task | Duration |
|---|---|---|
| Weekly | Wipe exterior, vacuum pre-filter | 5 minutes |
| Monthly | Check sensor and clean intake vents | 10 minutes |
| Quarterly | Deep clean internal components | 15-20 minutes |
| Every 6-12 Months | Replace HEPA filter and inspect UV lamp | 5 minutes + purchase time |
| Annually | Professional tune-up if under warranty | 30 minutes |
Complete Cleaning and Maintenance Process
Follow these steps safely—unplug first!
Step 1: Basic Exterior Cleaning
- Dampen a microfiber cloth with mild soap water.
- Wipe control panel and body gently; avoid excess moisture near vents.
- Dry thoroughly before powering on.
Step 2: Filter and Pre-Filter Maintenance
- Remove pre-filter (front grille clip).
- Vacuum both sides with a soft brush attachment—do this outdoors to avoid dust spread.
- For HEPA: Tap lightly or rinse if washable (check manual); air-dry 24 hours.
Warning: Never wash non-washable filters; it destroys the media and voids warranty.
Step 3: UV Lamp Inspection and Cleaning
- Access via rear panel.
- Gently wipe lamp with a dry cloth—do not touch glass with bare hands (oils reduce output).
- If dim or flickering, replace: Unscrew old, install new, and reset timer.
Step 4: Sensor and Fan Check
- Use compressed air to dust sensors (small LED area).
- Listen for fan noise; lubricate if squeaky (rare, per manual).
Full process takes 20-30 minutes quarterly. After cleaning, run a test cycle to confirm normal operation.
Warning Signs for Immediate Attention
Watch for reduced airflow, unusual odors, constant high fan speed, or error lights. These indicate clogs or failures—address within 24 hours to avoid inefficiency. If the UV indicator doesn’t glow, the lamp may need replacement pronto.
Enjoy Cleaner Air with Your UV Care Purifier
You’ve now mastered how to use UV Care Air Purifier from setup to advanced tweaks:
– Essential preparation and safety steps for hassle-free start
– Detailed operation phases for daily and customized use
– Maintenance routines to keep it performing like new
– Troubleshooting and pro tips for long-term success
Following this guide empowers you to transform your indoor environment, reducing allergens and germs for better health. Start today—plug it in, select auto mode, and breathe the difference. Your family will thank you!
Have you set up your UV Care Air Purifier yet? Share your experience or any tips in the comments below to help fellow readers! If issues linger, describe them for tailored advice.


