
Dealing with a dusty, stuffy home can be frustrating, especially when your Clorox air purifier starts underperforming because of built-up grime and allergens. If you’ve noticed reduced airflow, unusual odors, or indicator lights flashing warnings, it’s time to clean your Clorox air purifier. The good news is there’s a quick fix: a simple wipe-down of the exterior and pre-filter vacuuming can often restore efficiency in under 10 minutes, giving you immediate relief from poor air quality.
In this comprehensive guide, we’ll go far beyond that quick clean to cover everything you need to know about maintaining your Clorox air purifier. You’ll learn the most common causes of buildup, a detailed step-by-step cleaning process, recommended schedules, and pro tips to extend its lifespan. By the end, you’ll have the confidence to keep your unit running at peak performance, ensuring cleaner air for your home without the hassle of frequent replacements or professional calls.
Why Regular Maintenance is Essential for Your Clorox Air Purifier
Your Clorox air purifier is designed to capture dust, pet dander, smoke, and other pollutants, but over time, these particles accumulate inside, reducing its effectiveness and potentially leading to higher energy use or even breakdowns. Neglecting to clean your Clorox air purifier can cause the filters to clog, forcing the fan to work harder and shortening the device’s overall lifespan—some models last up to 5-7 years with proper care, but poor maintenance can cut that in half.
Regular cleaning not only improves air quality but also saves you money on filter replacements. According to the Environmental Protection Agency (EPA), well-maintained air purifiers can remove up to 99.97% of airborne particles when using HEPA filters, but clogged ones drop that efficiency dramatically. Plus, it prevents mold growth in humid environments and keeps your home smelling fresh. Think of it as routine car maintenance: skipping it leads to bigger problems down the road.
Recommended Cleaning Frequency and Schedule

How often you should clean your Clorox air purifier depends on your environment—think high-traffic homes with pets or cooking odors versus a low-dust bedroom. Clorox recommends checking filters monthly, but frequency varies by usage and model (e.g., the Clorox Tabletop or Medium Room models). Over-cleaning can wear out components, so stick to a balanced schedule.
Use this table as a guide for your Clorox air purifier maintenance. Adjust based on the filter indicator light, which many models have to signal when cleaning is needed.
| Frequency | Task | Duration | Notes |
|---|---|---|---|
| Weekly | Wipe exterior and vacuum pre-filter | 5-10 minutes | Ideal for high-dust areas; prevents surface buildup. |
| Monthly | Deep clean pre-filter and check HEPA/carbon filters | 15-20 minutes | Vacuum or rinse pre-filter; inspect for damage. |
| Every 3-6 Months | Replace or wash reusable filters (if applicable) | 20-30 minutes | Follow model-specific instructions; non-washable HEPA filters may need replacement. |
| Annually | Full disassembly and professional inspection | 30-45 minutes | For thorough cleaning of internal components; check fan and sensors. |
Important: Always unplug the unit before any cleaning to avoid electrical hazards. If you live in a smoky or pet-heavy home, bump up weekly tasks to bi-weekly for optimal performance.
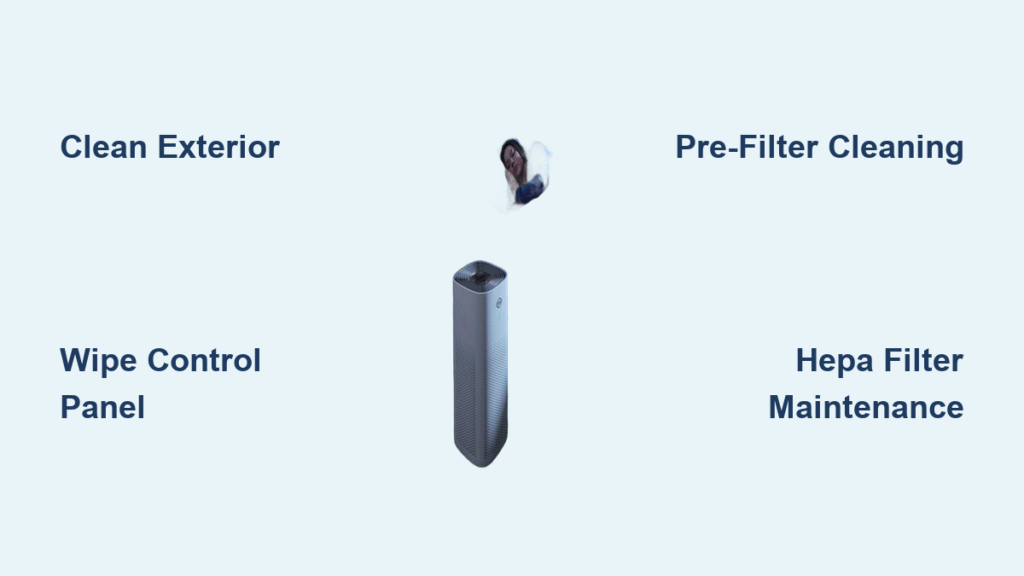
Complete Cleaning Process for Clorox Air Purifier
Cleaning your Clorox air purifier is straightforward and doesn’t require special tools, but following the steps in order ensures safety and effectiveness. This process applies to most Clorox models like the 5-in-1 or Smart Air Purifier series—consult your user manual for model-specific variations, such as washable versus disposable filters. The entire deep clean should take about 20-30 minutes.
Step 1: Preparation and Safety Setup
Before diving in, gather your supplies and create a safe workspace. Preparation prevents damage and keeps things tidy.
- Unplug the unit: Always disconnect from power to avoid shocks—Warning: Water and electricity don’t mix, so never clean while plugged in.
- Choose a workspace: Work on a flat, protected surface like a countertop covered with old towels or newspaper to catch drips.
- Gather tools: You’ll need a soft microfiber cloth, vacuum with brush attachment, mild dish soap (like Dawn), lukewarm water, and a soft brush (optional for crevices). For washable filters, have a sink or basin ready.
Allow 5 minutes for setup. If your model has a filter indicator, note its status for post-clean testing.
Step 2: Exterior Cleaning
Start with the outside to remove surface dust, which can sneak inside if ignored.
- Dampen a microfiber cloth with water and a drop of mild soap—avoid harsh chemicals like bleach, as they can damage the plastic housing.
- Gently wipe the exterior, control panel, and vents. Pay extra attention to the air intake and exhaust grilles, where dust accumulates most.
- For stubborn spots, use the soft brush to loosen debris, then wipe clean.
- Dry immediately with a clean, dry cloth to prevent water spots or corrosion.
This step takes about 5 minutes and should be done weekly. Pro Tip: Use compressed air in a can for hard-to-reach vents if you have it, but hold the can upright to avoid liquid spray.
Step 3: Pre-Filter Removal and Cleaning
The pre-filter catches larger particles like hair and lint, acting as the first line of defense—cleaning it regularly extends the life of inner filters.
- Locate the pre-filter access panel (usually on the back or side—check your manual for your specific Clorox model).
- Gently remove the pre-filter by pulling or unclipping it—handle carefully to avoid bending the mesh.
- Vacuum both sides using the brush attachment on low suction to remove loose debris. Hold the filter over a trash bin to contain dust.
- If washable (most Clorox pre-filters are), rinse under lukewarm water with mild soap. Gently agitate with your hands or a soft brush, then rinse thoroughly until water runs clear.
- Air-dry completely (about 24 hours) on a drying rack—do not use heat sources like hairdryers, as they can warp the material. Never put it back wet, as this promotes mold.
This takes 10 minutes, plus drying time. If the pre-filter is damaged or overly soiled, replace it (Clorox filters cost $20-40).
Step 4: Inner Filter Maintenance (HEPA and Carbon)
The heart of your Clorox air purifier is the HEPA and activated carbon filters, which trap fine particles and odors. These aren’t always fully washable, so focus on gentle cleaning.
- For vacuumable filters: Remove the inner assembly (follow manual for clips or screws). Use the vacuum’s brush attachment to lightly suck dust from the surface—avoid pressing too hard to prevent filter tears.
- For washable carbon filters (select models): Rinse with water only (no soap, as it strips activated carbon). Pat dry and let air-dry fully.
- HEPA filters: These are typically not washable. Just vacuum lightly if dusty, but replace every 6-12 months based on usage. Signs of replacement: Reduced airflow or constant indicator lights.
Warning: Over-vacuuming can dislodge filter media, reducing efficiency. If your model has a True HEPA filter, treat it delicately—Clorox specifies vacuuming only for light maintenance.
Reassemble after drying (10-15 minutes active time). Test by plugging in and running on high for 5 minutes to check airflow.
Step 5: Internal Component Check and Reassembly
For a thorough clean, inspect harder-to-reach areas.
- Use compressed air or a soft brush to clear dust from the fan blades and sensor areas inside the unit (accessible via the filter compartment).
- Wipe any internal plastic parts with a damp cloth if accessible—avoid liquids near electronics.
- Reinsert filters securely, ensuring proper alignment to maintain the seal.
- Plug in, turn on, and monitor for unusual noises or smells.
If you notice persistent issues like rattling, it might indicate deeper buildup—proceed to troubleshooting below.
Post-Cleaning Testing and Troubleshooting
After reassembly, run a test cycle: Set to auto or high speed for 10-15 minutes in a closed room. Check for:
- Improved airflow (feel the vents).
- No error lights or beeps.
- Fresh air output without odors.
If performance hasn’t improved, double-check filter seating or repeat Step 3. Common complications: If filters won’t dry fully, use a fan to speed it up (still 12+ hours). For humid climates, add silica packets near drying filters to absorb moisture.
Pro Tips for Maintaining Your Clorox Air Purifier

To get the most out of your Clorox air purifier beyond basic cleaning, try these expert strategies:
- Position for maximum efficiency: Place it 1-2 feet from walls in the room’s center, away from curtains or furniture that block airflow—this can boost purification by 20-30%.
- Monitor air quality apps: Many Clorox models connect to apps; use them to track filter life and schedule cleans proactively.
- Avoid common mistakes: Don’t use the purifier in extremely humid areas without dehumidifying first, as it can foster bacterial growth. Also, never spray cleaners directly into vents.
- Optimize with room size matching: Ensure your model matches your space (e.g., small room units for bedrooms)—oversized ones clean faster but use more energy.
- Seasonal deep cleans: In spring (pollen season) or fall (dust from open windows), do an extra monthly clean to handle allergens.
- Eco-friendly tweaks: Use reusable pre-filters if available to reduce waste, and clean during off-peak energy hours to save on electricity.
- Track replacement costs: Budget $50-100 yearly for filters; cleaning extends intervals, potentially saving 20-30% on expenses.
These tips can help your unit run 20-50% more efficiently, based on manufacturer data.
When to Seek Professional Help
While most Clorox air purifier cleaning is DIY, some signs mean it’s time for a pro:
- Persistent error codes or failure to turn on after cleaning.
- Visible mold inside filters or unusual burning smells.
- Reduced performance despite new filters (could indicate motor issues).
- Warranty-covered repairs—Clorox offers 2-5 year warranties; contact their support at 1-800-227-1860 or via their website.
Look for certified technicians through Clorox’s authorized service network or local appliance repair shops with air purifier experience. Expect costs of $50-150 for diagnostics and cleaning, depending on location. Always check warranty terms before DIYing internals to avoid voiding coverage.
FAQ
Q: Can I wash the HEPA filter in my Clorox air purifier?
A: No, most Clorox HEPA filters are not washable as water can damage the fine fibers, reducing their ability to trap 99.97% of particles. Instead, vacuum lightly monthly and replace every 6-12 months. Check your model’s manual—some have washable pre-filters, but HEPA is typically disposable.
Q: How do I know when my Clorox air purifier needs cleaning?
A: Watch for indicator lights (if equipped), reduced airflow from vents, or a drop in air quality (stuffier rooms). The filter reset button on many models will light up after 100-200 hours of use. In dusty homes, clean every 2-4 weeks.
Q: What if my Clorox air purifier makes noise after cleaning?
A: This could be loose parts or uneven filter seating. Double-check assembly and run a test cycle. If it persists, dust on the fan blades might be the culprit—use compressed air carefully. For ongoing issues, it may need professional lubrication or repair.
Q: Is it safe to clean the Clorox air purifier with vinegar?
A: Mild vinegar solutions (1:1 water-vinegar) work for the exterior and pre-filter but avoid it on carbon filters, as acidity can deactivate the odor-absorbing material. Stick to mild soap for best results, and always rinse thoroughly.
Q: How long does a full clean take for a Clorox air purifier?
A: Active cleaning is 20-30 minutes, but drying washable parts adds 24 hours. Plan accordingly and clean during low-use times, like overnight.
Q: Can cleaning my Clorox air purifier improve allergies?
A: Yes, regular maintenance removes trapped allergens, restoring filtration efficiency. Users report up to 40% symptom relief in studies from the American Lung Association when purifiers are well-maintained.
Q: What models of Clorox air purifiers have washable filters?
A: Models like the Clorox Medium Room Air Purifier (ACP122) feature washable pre-filters. Always verify in the manual, as True HEPA versions vary.
Alternative Cleaning Solutions
If standard cleaning isn’t cutting it or your filters are beyond DIY, consider these options. For instance, if washable filters aren’t available, third-party cleaners can help.
| Solution | Pros | Cons | Best For |
|---|---|---|---|
| Professional Cleaning Service | Thorough deep clean; handles internals safely | Costs $75-200; requires scheduling | Busy households or complex models |
| Filter Subscription Service (e.g., Clorox or Amazon) | Auto-delivers replacements; ensures compatibility | Ongoing expense ($50/year); no cleaning involved | Frequent users avoiding maintenance |
| Ultrasonic Cleaner for Pre-Filters | Quick vibration-based cleaning; effective for mesh | Requires buying device ($20-50); not for HEPA | Tech-savvy users with washable parts |
| DIY Enzyme Sprays (pet-safe brands) | Breaks down odors naturally | May not remove heavy dust; test for residue | Odor-focused issues in pet homes |
Compare based on your needs—professional help is ideal if warranty is a concern.
Keep Your Clorox Air Purifier Running Smoothly
By following this guide, you’re now equipped to maintain peak performance for your Clorox air purifier:
– Understand why regular cleaning your Clorox air purifier prevents costly issues.
– Stick to a personalized schedule with weekly wipes and monthly deep cleans.
– Master the step-by-step process, from exterior wipes to filter drying.
– Use pro tips and know when to call in experts.
Investing time in these routines will extend your unit’s life, improve indoor air quality, and keep your home healthier. Don’t wait for indicator lights—start with a quick clean today and breathe easier tomorrow.
Have you cleaned your Clorox air purifier using these steps? Share your tips or challenges in the comments below to help fellow readers!


