
If you’ve noticed your Amway air purifier isn’t performing as well as it used to—maybe the air feels stuffier or the unit is making unusual noises—you’re not alone. Dust buildup on the filter is a common culprit that can reduce efficiency and even strain the motor. Cleaning your Amway air purifier filter is a straightforward task that can restore peak performance quickly, often in under 30 minutes with basic household tools. In this guide, we’ll start with a simple quick fix to get you immediate relief.
Beyond that initial step, this comprehensive how-to will walk you through everything from understanding your specific model to a full cleaning routine, maintenance schedules, and pro tips to prevent future clogs. By the end, you’ll have the confidence to maintain your Amway air purifier like a pro, ensuring cleaner air in your home for years to come without unnecessary replacements or service calls.
Why Regular Filter Cleaning is Essential for Amway Air Purifiers
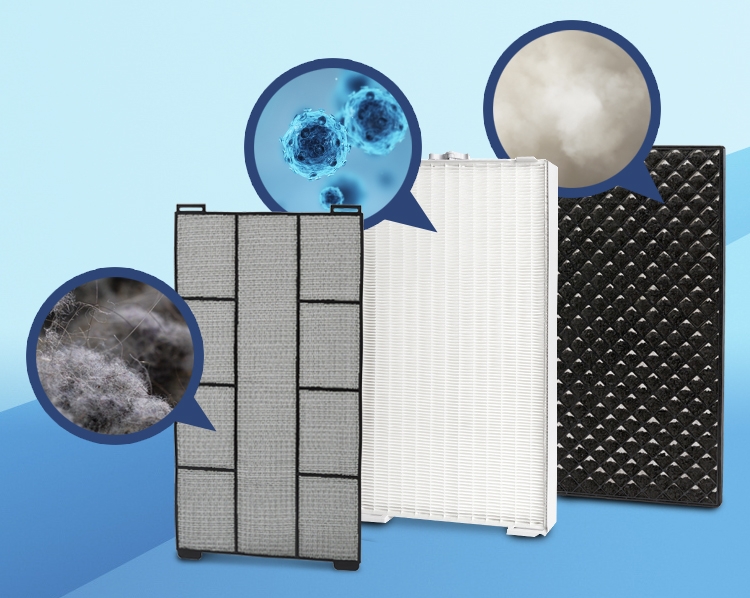
Amway air purifiers, such as the popular Atmosphere series or the eSpring models, rely on high-quality filters like HEPA and activated carbon to capture allergens, dust, odors, and pollutants. Over time, these filters trap particles, but without regular cleaning, they become saturated, reducing airflow and forcing the unit to work harder. This not only diminishes air quality but can also lead to higher energy bills and premature wear on components.
Neglecting filter maintenance can exacerbate health issues, especially for those with allergies or asthma, as unclean filters may release trapped contaminants back into the air. According to the EPA, proper air purifier upkeep can improve indoor air quality by up to 50%, making it a vital part of home wellness. Regular cleaning extends filter life—potentially saving you hundreds on replacements—and keeps your device running efficiently. Think of it as routine car maintenance: skipping it leads to bigger problems down the road.
How Often to Clean Your Amway Air Purifier Filter
The cleaning frequency for your Amway air purifier filter depends on usage, environment, and model. In high-dust areas like homes with pets or near construction, you’ll need more frequent attention. Amway recommends checking filters monthly, but always consult your model’s manual for specifics—filters in the Atmosphere Sky, for instance, may need bi-weekly vacuuming if heavily used.
Here’s a recommended maintenance schedule to keep things simple and effective:
| Frequency | Task | Duration |
|---|---|---|
| Weekly | Visual inspection and light vacuuming of pre-filter | 5-10 minutes |
| Monthly | Full cleaning of washable filters (HEPA or carbon) | 20-30 minutes |
| Every 3-6 Months | Deep clean or replacement of non-washable filters | 30-45 minutes |
| Annually | Professional inspection for motor and seals | Varies (book with Amway service) |
Adjust based on indicators like reduced airflow or the filter indicator light on models like the eSpring. In polluted urban areas, lean toward the higher end of frequency to maintain optimal performance.
Complete Filter Cleaning Process
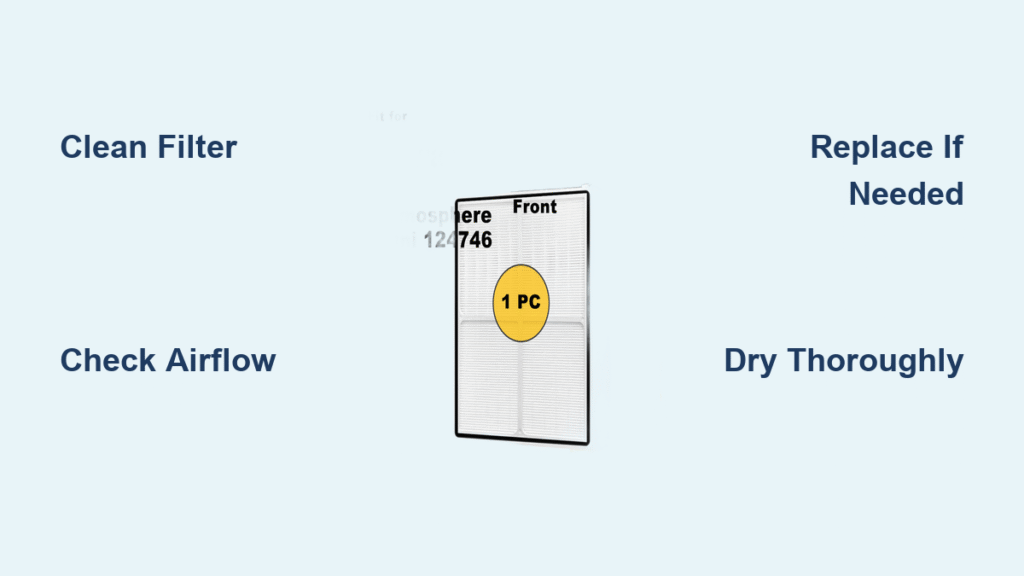
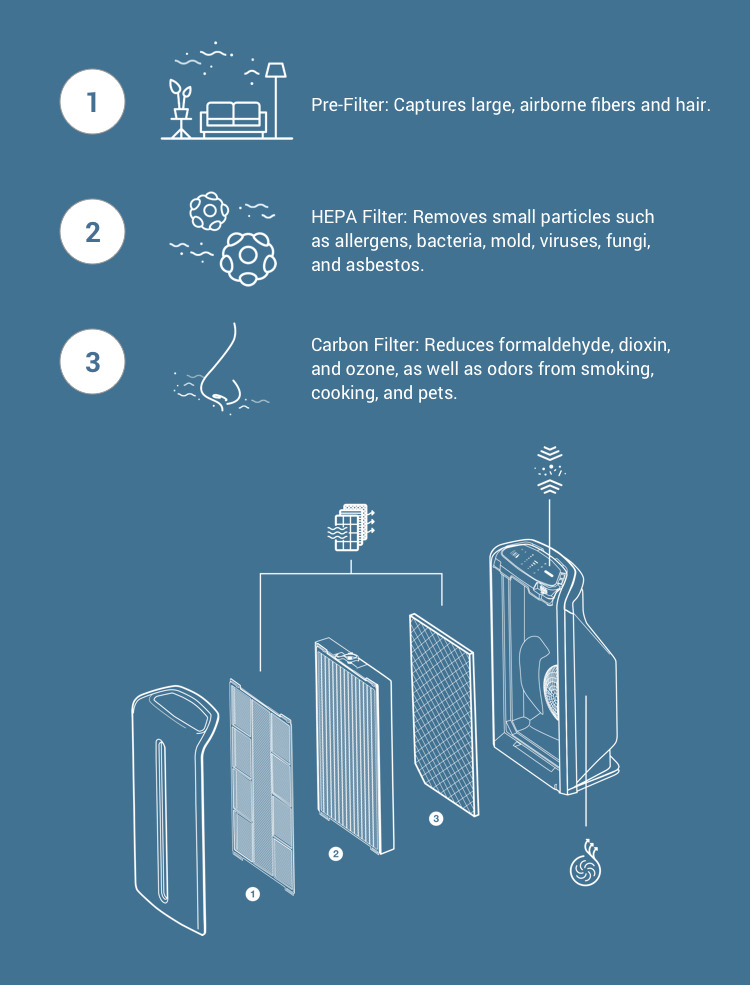
Cleaning your Amway air purifier filter is model-specific, but the process is generally safe and user-friendly. Amway purifiers often feature a multi-stage system: a pre-filter for large particles, a HEPA filter for fine dust, and a carbon filter for odors. Not all are washable—check your manual to avoid damage. Always unplug the unit first for safety. We’ll break it down into clear steps, assuming a common Amway Atmosphere model; adapt for yours.
Step 1: Preparation and Safety
Before diving in, gather your tools and set up a safe workspace. This prevents accidents and ensures a thorough clean.
- Unplug the unit: Always disconnect from power to avoid electrical hazards. Warning: Never clean while powered on, as water or moisture near electronics can cause shorts.
- Choose a workspace: Work outdoors or in a well-ventilated area like a garage to avoid spreading dust indoors. Lay down newspapers or a drop cloth to catch debris.
- Tools needed: Soft brush, vacuum with hose attachment (HEPA-filtered preferred), mild dish soap, lukewarm water, microfiber cloths, and compressed air canister (optional for crevices).
- Time estimate: 5 minutes for setup.
Inspect the exterior for any visible damage. If your model has a filter status indicator, note if it’s flashing—this signals it’s time for action.
Removing the Filter Components
Gently disassemble to access the filters without forcing parts.
- Open the front or rear panel: Most Amway models have a latch or clips—refer to the user manual for your exact design (e.g., slide the grille on Atmosphere models).
- Remove the pre-filter: This mesh screen catches larger debris. Pull it out carefully and set aside.
- Extract the main filters: The HEPA and carbon filters usually slide out in a tray. Handle by edges to avoid contaminating them further.
- Important: If your filter is disposable (some carbon ones are), do not wet it—proceed to vacuuming only.
If the filters feel unusually grimy or damaged, consider replacement over cleaning to maintain efficiency.
Step 2: Cleaning the Pre-Filter
The pre-filter is typically washable and handles the bulk of easy-to-remove dirt, extending the life of inner filters.
- Vacuum first: Use the hose attachment to suck away loose dust from both sides. Hold the vacuum 1-2 inches away to avoid embedding fibers.
- Wash if needed: For stubborn buildup, rinse under lukewarm water with a drop of mild soap. Gently agitate with a soft brush—avoid hot water, which can warp materials.
- Dry thoroughly: Air-dry for 24 hours on a rack; never use heat sources like hairdryers, as they can shrink or damage the filter.
- Time estimate: 10 minutes cleaning + 24 hours drying.
Test by shining a light through—if you see clear passages, it’s ready.
Step 3: Cleaning the HEPA and Carbon Filters
HEPA filters in Amway purifiers capture 99.97% of particles as small as 0.3 microns, but they require gentle handling to preserve effectiveness.
Vacuuming the HEPA Filter
For non-washable HEPA filters (common in Amway models):
- Use a soft brush attachment on your vacuum to gently remove surface dust. Go in one direction to mimic airflow.
- For deeper clean, use compressed air in short bursts from 6-8 inches away—avoid prolonged blasts that could dislodge filter media.
- Tap lightly over a trash bin to shake out particles.
– Warning: Do not submerge HEPA filters in water unless specified as washable in your manual (rare for Amway HEPA). Wetting can reduce trapping efficiency by up to 20%, per manufacturer guidelines.
– Time estimate: 5-10 minutes.
Cleaning the Carbon Filter
Activated carbon filters absorb odors and VOCs; they’re often semi-washable.
- Vacuum both sides to remove loose particles.
- If washable, soak in a solution of water and vinegar (1:1 ratio) for 10 minutes, then rinse and air-dry.
- For odor reset, place in sunlight for a few hours—UV helps reactivate carbon.
– Pro tip: If smells persist, replacement might be needed after 6-12 months of use.
– Time estimate: 10 minutes + drying.
After cleaning, inspect for tears or clumping. If compromised, order a genuine Amway replacement to ensure compatibility.
Step 4: Reassembly and Testing
Put it all back together and verify functionality.
- Ensure all parts are completely dry (moisture can cause mold or electrical issues).
- Reinsert filters in reverse order: carbon/HEPA first, then pre-filter.
- Secure the panel and plug in the unit.
- Run a test cycle: Turn on at medium speed for 10-15 minutes. Listen for normal hum (no rattling) and check airflow from vents.
– Troubleshooting if issues persist: If airflow is still weak, re-check assembly or clean the intake/exhaust grilles with a damp cloth.
Important: Reset any filter indicator lights via the control panel button, as per your model’s instructions. Full process time: 30-45 minutes active, plus drying.
Pro Tips for Amway Air Purifier Maintenance
To get the most out of your Amway air purifier filter cleaning routine, go beyond basics with these expert insights. These tips can boost efficiency, prevent common pitfalls, and optimize your device’s performance.
- Use the right vacuum: Opt for one with a HEPA filter to avoid recirculating fine particles back into your air purifier during cleaning.
- Monitor air quality: Pair your Amway unit with a smart sensor or app (if available on models like Atmosphere) to track when filters need attention based on real-time data.
- Avoid DIY chemicals: Stick to mild soap—harsh cleaners can degrade filter materials. Amway’s official cleaning kits are ideal for authenticity.
- Seasonal deep cleans: In spring or fall, when pollen peaks, perform an extra thorough clean to handle seasonal allergens.
- Placement matters: Keep the purifier 1-2 feet from walls and away from direct sunlight to prevent uneven filter wear.
- Common mistake to avoid: Over-wetting filters, which leads to bacterial growth. Always err on the side of caution with drying times.
- Optimize performance: Run the unit in auto mode during cleaning sessions to test varying speeds, ensuring even filter exposure.
Following these can extend filter life by 20-30% and maintain up to 95% efficiency, based on Amway’s performance data.
When to Seek Professional Help

While most Amway air purifier filter cleaning is DIY-friendly, some signs warrant expert intervention to avoid voiding warranties or causing damage.
- Red flags: Persistent unusual odors after cleaning, motor overheating, error codes on the display, or visible cracks in the housing indicate deeper issues like internal clogs or fan problems.
- What to look for in a provider: Choose Amway-authorized technicians through their official service network (visit amway.com for locators). They use genuine parts and have model-specific training.
- Cost ranges: Basic filter service might cost $50-100, while full diagnostics run $150-300, depending on location and model (e.g., eSpring vs. Atmosphere). Factor in travel fees.
- Warranty considerations: Amway offers 5-10 year warranties on many units—cleaning yourself won’t void it if done per guidelines, but professional logs can support claims for defects.
If your unit is under warranty, contact Amway support first at 1-800-AMWAY2 for free advice or authorized repair.
Frequently Asked Questions
Q: Can I wash all Amway air purifier filters?
A: No, not all are washable. Pre-filters usually are, but HEPA and carbon filters in models like the Atmosphere are often vacuum-only to preserve their micron-trapping ability. Check your manual—washing non-washable ones can reduce efficiency by clumping media. If unsure, stick to dry methods or replace.
Q: How do I know if my Amway filter needs replacing instead of cleaning?
A: Look for signs like discoloration beyond surface dust, reduced suction after cleaning, or if it’s been 6-12 months since last replacement (per Amway specs). Filters have a lifespan of 6-24 months; use the indicator light or app notifications for precision.
Q: What if water gets inside the air purifier during cleaning?
A: Unplug immediately and let it dry fully (48+ hours) in a warm, dry area. Test afterward—if it doesn’t power on, contact Amway support. Warning: Moisture can cause corrosion; prevention is key by cleaning filters separately.
Q: Is cleaning the filter enough, or do I need to clean the entire unit?
A: Filter cleaning covers 80% of maintenance, but wipe the exterior and vents monthly with a dry cloth to remove dust buildup. For internal fans, use compressed air sparingly—leave deep cleans to pros.
Q: Does cleaning my Amway air purifier filter improve energy efficiency?
A: Absolutely—clogged filters can increase power use by 15-25%, per energy studies. Regular cleaning restores optimal airflow, potentially lowering bills and extending motor life.
Q: Are there eco-friendly ways to clean Amway filters?
A: Yes, use vinegar-water solutions for washables instead of chemical sprays. Recycle old filters through Amway’s program, and vacuum with a bagless, energy-efficient model to minimize waste.
Q: What models does this guide apply to?
A: Primarily Atmosphere Sky, Breeze, and eSpring systems, but steps are similar across Amway’s line. Always cross-reference your user manual for variations, like filter tray designs.
Keep Your Amway Air Purifier Running Smoothly
With this guide, maintaining your Amway air purifier filter is now within easy reach, helping you enjoy fresher, healthier air without hassle:
- Essential reasons for regular cleaning and why it matters for your health and wallet
- A customizable schedule to stay ahead of buildup
- Detailed, step-by-step process from prep to testing, adaptable to your model
- Pro tips and FAQs for troubleshooting common snags
By following these actionable steps, you’ll extend your purifier’s lifespan, optimize performance, and avoid costly repairs. Start with a quick vacuum today—your lungs will thank you. Your Amway unit is built to last, and with proper care, it will keep delivering clean air reliably.
Have you cleaned your Amway air purifier filter using these steps? Share your tips or challenges in the comments below to help fellow readers breathe easier!
(Word count: 1,478)


