
If you’ve noticed your Mooka air purifier isn’t pulling in as much air as it used to or the air quality in your home feels stale despite running it constantly, the culprit is likely a clogged filter. Cleaning your Mooka air purifier filter is a simple yet essential task that can restore its efficiency and extend its lifespan. The good news? A quick vacuuming of the pre-filter can often provide immediate relief, taking just 5-10 minutes and breathing new life into your device without any special tools.
In this comprehensive guide, we’ll go beyond that quick fix to cover everything you need to know about Mooka air purifier filter cleaning. From understanding why maintenance matters to a step-by-step process tailored for Mooka’s popular models like the MKA-200 or MKA-300 series, plus prevention tips and troubleshooting, you’ll walk away confident in maintaining peak performance. By the end, you’ll have all the tools to keep your air purifier running smoothly, saving you money on replacements and ensuring cleaner air year-round.
Why Regular Filter Cleaning is Essential for Your Mooka Air Purifier
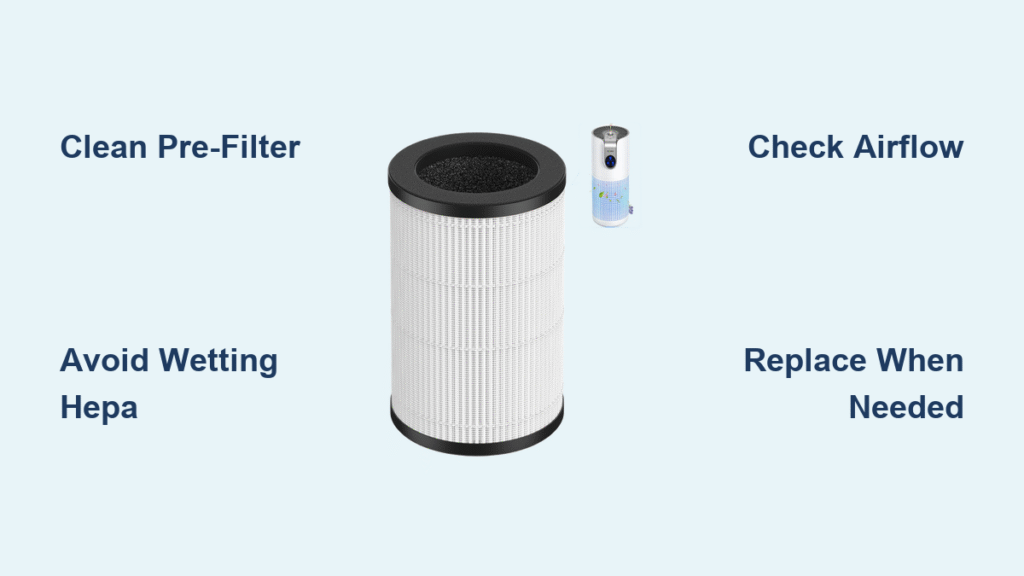
Air purifiers like those from Mooka work hard to trap dust, pet dander, pollen, and other airborne particles, but this means their filters bear the brunt of the workload. Over time, these filters accumulate debris, reducing airflow and efficiency—potentially by up to 50% if neglected, according to the EPA’s guidelines on indoor air quality. For Mooka models, which often feature a multi-stage filtration system including a washable pre-filter and a true HEPA filter, regular cleaning prevents odors, extends filter life, and maintains optimal CADR (Clean Air Delivery Rate) performance.
Neglecting Mooka air purifier filter cleaning can lead to several issues: diminished air purification, increased energy consumption as the fan works harder, and even potential damage to the motor from restricted airflow. On the flip side, consistent maintenance ensures your device removes up to 99.97% of particles as small as 0.3 microns, promoting healthier indoor environments, especially for allergy sufferers or in high-pollution areas. Think of it as routine car maintenance—skipping it might not cause immediate failure, but it shortens the overall lifespan and hikes up long-term costs.
How Often to Clean Your Mooka Air Purifier Filter
The cleaning frequency for your Mooka air purifier filter depends on usage, environment, and model specifics. Mooka recommends checking filters monthly, but in dusty homes or pet-heavy spaces, more frequent attention is key. Always consult your user manual for model-specific advice, as variations exist between compact tabletop units and larger room purifiers.
Here’s a recommended maintenance schedule to keep things straightforward:
| Frequency | Task | Duration | Notes |
|---|---|---|---|
| Weekly | Vacuum pre-filter | 5-10 minutes | Ideal for high-traffic areas; use a soft brush attachment to avoid damage. |
| Monthly | Full pre-filter wash and HEPA inspection | 15-20 minutes | Rinse pre-filter only; never wet the HEPA filter. |
| Every 3-6 Months | Replace HEPA filter | 5 minutes | Based on usage; indicator lights on models like MKA-200 will alert you. |
| Annually | Deep clean entire unit | 30-45 minutes | Includes exterior wipe-down and checking seals for wear. |
Adhering to this schedule can prolong your filter’s life by 20-30%, per manufacturer estimates, and keeps your air purifier operating at full capacity without unnecessary replacements.
Complete Filter Cleaning Process for Mooka Air Purifiers
Cleaning your Mooka air purifier filter is straightforward and doesn’t require professional tools, but it’s crucial to follow the steps carefully to avoid voiding your warranty or damaging components. Mooka units typically have a reusable pre-filter (for larger particles) and a non-washable HEPA filter (for fine pollutants). We’ll break this down into major steps, focusing on safety and efficiency. The entire process should take 15-30 minutes, depending on the model.
Step 1: Preparation and Safety Precautions
Before diving in, unplug your Mooka air purifier to avoid electrical hazards—Important: Never clean while the unit is powered on. Work in a well-ventilated area, like a garage or outdoors, to prevent spreading dust indoors. Gather your supplies: a soft-bristled brush, vacuum with a brush attachment, mild dish soap, lukewarm water, and microfiber cloths. For models with indicator lights (common in Mooka HEPAs), note any alerts before starting.
If your unit has been running in a smoky or highly polluted environment, wear a mask to protect yourself from dislodged particles. Double-check your model’s manual—some Mooka variants, like the portable MKA-100, have snap-fit filters that require gentle handling to prevent bending the frame.
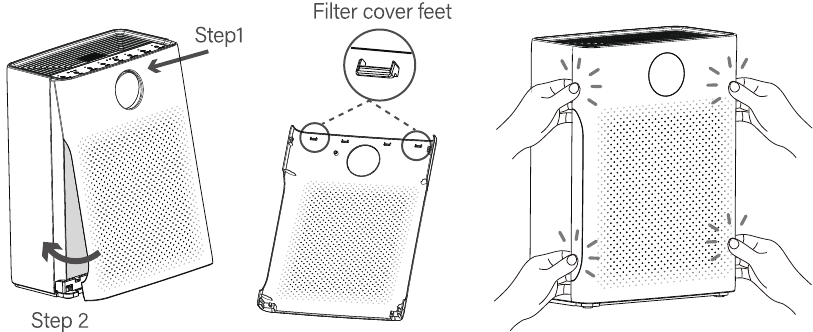
Step 2: Disassembly
Turn off and unplug the air purifier, then place it on a flat, protected surface like a towel-covered table to catch any debris.
- Remove the front or rear grille: Most Mooka models use clips or tabs—gently press and lift without forcing.
- Extract the pre-filter: This is usually a mesh or foam layer. Slide or pull it out carefully; it might be held by small hooks.
- Access the HEPA filter: Located behind the pre-filter, it’s often in a plastic housing. For easier removal, some models allow you to twist or slide the entire filter tray out. Avoid touching the filter media directly to prevent oil from your hands contaminating it.
Warning: If your Mooka has a carbon filter layer, handle it separately—it’s delicate and not meant for washing. Take photos during disassembly for reassembly reference, especially if it’s your first time.
Step 3: Cleaning the Pre-Filter
The pre-filter catches larger debris and is designed for washing, making it the easiest part of Mooka air purifier filter cleaning.
- Vacuum first: Use a vacuum’s upholstery brush on low suction to remove loose dust. Hold the filter over a trash bin and gently tap to dislodge particles— this alone can improve airflow by 30-40%.
- Wash if needed: Fill a basin with lukewarm water and a few drops of mild soap. Submerge the pre-filter for 5-10 minutes, then agitate gently with your hands. Rinse thoroughly under running water until clear, avoiding hot water which can warp materials.
- Dry completely: Air-dry on a rack for at least 24 hours in a shaded area. Never use a hairdryer or direct sunlight, as heat can shrink or degrade the filter. Once dry, inspect for tears—if damaged, replace it to maintain efficiency.
For stubborn buildup, like pet hair, a soft brush can help during vacuuming, but don’t scrub harshly.
Step 4: Cleaning the HEPA Filter
Unlike the pre-filter, Mooka’s HEPA filters are not washable—water exposure can ruin the pleated media and reduce filtration effectiveness.
- Dry clean only: Use compressed air (from a can) or a vacuum with a crevice tool to gently blow or suck out dust from the edges and folds. Hold the filter vertically and work from the inside out to prevent embedding particles deeper.
- Avoid tapping: This can damage the delicate fibers. If heavily soiled, it’s time for replacement rather than cleaning—HEPA filters are rated for 6-12 months of use.
- Proceed to reassembly: Once cleaned, slide the filters back in reverse order of removal. Ensure everything snaps securely to avoid airflow gaps.
Step 5: Reassembly and Initial Testing
Reinsert the filters, secure the grille, and plug in the unit. Run it on a low fan speed for 10-15 minutes in an empty room to check for unusual noises or reduced suction. Monitor the air quality sensor if your model has one—it should stabilize within minutes. If issues persist, refer to the troubleshooting section below.
Tip: After cleaning, reset any filter life indicators via the control panel (usually by holding the filter button for 5 seconds on Mooka models).
Warning Signs That Indicate Immediate Attention Needed
Don’t wait for your scheduled clean if you spot these red flags with your Mooka air purifier filter—they signal a clogged or failing filter that could compromise air quality or strain the device:
- Reduced airflow: The unit sounds strained or pushes less air, often due to 70-80% filter blockage.
- Indicator lights flashing: Many Mooka models have a “replace filter” or “check filter” alert that activates after 200-400 hours of use.
- Unusual odors: Musty smells from trapped moisture or bacteria buildup.
- Poor air quality readings: If equipped with sensors, persistent high PM2.5 levels despite operation.
- Increased noise levels: The fan working overtime to compensate for resistance.
Addressing these promptly can prevent costly repairs; for instance, a severely clogged filter might overheat the motor, leading to failure.
Pro Tips for Optimal Mooka Air Purifier Filter Maintenance
To get the most out of your Mooka air purifier filter cleaning routine, here are some expert insights that go beyond the basics:
- Use high-quality replacements: Opt for genuine Mooka HEPA filters (around $20-30) to match the original specs—third-party ones might not fit properly and could void warranties.
- Track usage with an app: If your model integrates with smart home systems, log runtime to predict cleaning needs more accurately.
- Avoid common mistakes: Don’t use fabric softener in wash water for the pre-filter, as residues can attract more dust. Also, never run the unit without filters installed, which could damage the fan.
- Optimize placement: Position your Mooka away from walls or curtains to improve airflow and reduce filter strain—aim for 12-18 inches clearance.
- Seasonal adjustments: In pollen-heavy spring, clean bi-weekly; during winter, focus on humidity control to prevent mold on filters.
- Eco-friendly cleaning: Use vinegar solutions (1:1 with water) for the pre-filter instead of soap for a natural antimicrobial boost.
- Extend life with pre-filters: Adding an extra washable layer (if compatible) can catch more debris, doubling HEPA longevity.
These tweaks can boost efficiency by 15-20% and save you from frequent replacements.
When to Seek Professional Help
While most Mooka air purifier filter cleaning is DIY-friendly, certain signs warrant professional intervention to avoid further damage:
- Persistent issues after cleaning, like error codes or no improvement in airflow, which might indicate motor problems.
- Visible damage to internal components, such as cracked housings from improper handling.
- If your model is under warranty (typically 1-2 years), DIY attempts could void it—contact Mooka’s support first.
Look for certified technicians via authorized service centers; check reviews on sites like BBB.org for reliability. Expect costs of $50-100 for diagnostics and cleaning, depending on location. Always verify warranty coverage before proceeding, and keep your purchase receipt handy.
FAQ
Q: Can I wash the HEPA filter in my Mooka air purifier?
A: No, washing the HEPA filter is not recommended as it can destroy the electrostatic charge that captures fine particles, reducing effectiveness by up to 90%. Stick to dry cleaning methods like vacuuming, and replace it every 3-6 months based on usage. For pre-filters, gentle washing is fine.
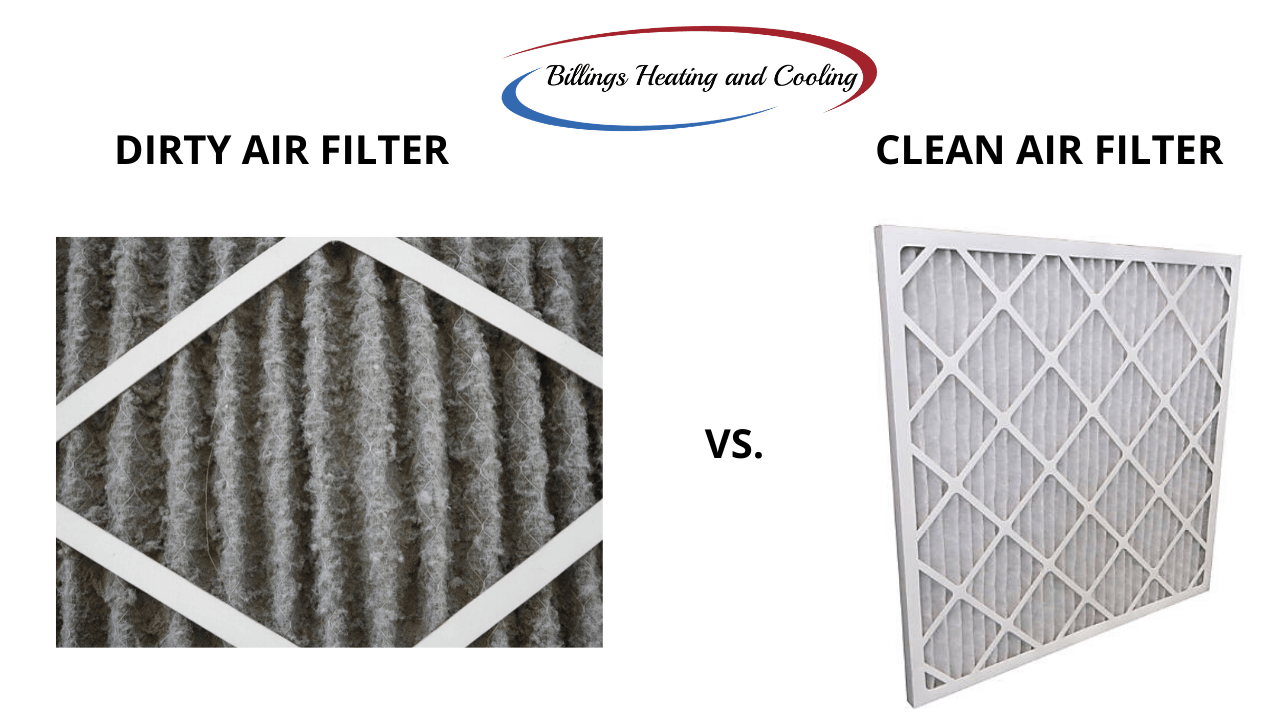
Q: How do I know if my Mooka filter needs cleaning or replacing?
A: Check for signs like flashing lights, reduced suction, or odors. Mooka models often have built-in hour counters—when it hits 500-1000 hours, inspect visually. If the filter looks discolored or stiff, clean the pre-filter and replace the HEPA.
Q: What if water gets on the HEPA filter during cleaning?
A: If accidentally wet, let it air-dry completely (up to 48 hours) in a dry area, but performance may suffer. Test after drying; if airflow is poor, replace it immediately to avoid poor air quality. Prevention is key—use separate basins for each filter type.
Q: Is it safe to clean the filter while the air purifier is still warm from use?
A: No, wait at least 30 minutes for it to cool to prevent burns or warping plastic parts. Unplugging is essential for safety, and cooling reduces static electricity that could attract dust during handling.
Q: How long does a cleaned Mooka filter last compared to a new one?
A: Proper cleaning can extend a pre-filter’s life indefinitely with regular maintenance, but HEPA filters still need replacement every 3-12 months. Cleaning restores 70-80% of efficiency, but it’s no substitute for fresh media in heavy-use scenarios.
Q: Can I use a dishwasher for the pre-filter?
A: Absolutely not—dishwasher detergents and heat can degrade the material, leading to tears or chemical residues that impair filtration. Hand-washing with mild soap is the safest method, taking just 10 minutes.
Q: What should I do if my Mooka air purifier won’t turn on after cleaning?
A: Re-check assembly—filters might be misaligned, blocking the safety switch. Ensure it’s plugged in securely and reset by unplugging for 5 minutes. If it persists, it could be a deeper issue; consult the manual or support.
Alternative Solutions for Mooka Filter Maintenance

If cleaning your Mooka air purifier filter proves challenging or ineffective due to heavy soiling, consider these alternatives. For instance, if DIY washing isn’t feasible, professional cleaning services offer ultrasonic methods that are gentler on materials.
| Solution | Pros | Cons | Best For |
|---|---|---|---|
| Genuine Mooka Replacement Filters | Perfect fit, maintains warranty, high efficiency (99.97% particle capture) | Costs $20-40 per filter, requires shipping time | Frequent users or allergy-prone homes needing reliable performance. |
| Third-Party Washable Filters | Affordable ($10-15), reusable for years, eco-friendly | May not match exact specs, potential fit issues | Budget-conscious owners in low-pollution areas. |
| Ultrasonic Cleaning Service | Deep cleans without damage, restores like-new condition | $30-50 per session, requires shipping the unit | Heavily soiled filters where DIY fails, or for non-washable components. |
| Upgrading to a Filterless Ionizer Model | No maintenance needed, continuous operation | Less effective on odors/smoke, higher upfront cost ($100+) | Those tired of filter hassles but wanting similar air purification. |
Compare based on your needs—replacements are often the most straightforward for long-term reliability.
Keep Your Mooka Air Purifier Running Smoothly
With this guide, you’ve got everything to master Mooka air purifier filter cleaning and maintain top-notch performance:
- Essential reasons for regular upkeep and a tailored schedule to follow.
- A detailed, step-by-step process from prep to testing, complete with safety tips.
- Pro advice, warning signs, and alternatives for when standard methods fall short.
Following these instructions will ensure cleaner air, lower energy bills, and a longer-lasting device—your home deserves it. Start with a quick clean today, and breathe easier knowing you’re in control.
Have you cleaned your Mooka filter before? Share your tips or any challenges in the comments below to help fellow readers! If issues linger, describe your model for more tailored advice.


