Struggling to get your new Aroeve air purifier up and running smoothly? You’re not alone—many users unbox their sleek device only to feel overwhelmed by the buttons, filters, and setup options. The good news is that using an Aroeve air purifier is straightforward once you know the basics. In this guide, we’ll walk you through a quick start method to have it purifying your air in under 10 minutes, tackling common allergens and odors right away.
Beyond the initial setup, this comprehensive how-to will dive deep into advanced features, maintenance routines, and troubleshooting tips to ensure your Aroeve air purifier performs at its peak. By the end, you’ll be confident in operating it for any room size, from bedrooms to offices, and maximizing its HEPA filtration for cleaner, healthier air all year round.
What You’ll Need for Aroeve Air Purifier Setup
Before diving into the Aroeve air purifier how to use process, gather a few essentials. Most models, like the popular Aroeve MK01 or MK06, come ready-to-use out of the box, but having the right items ensures a hassle-free start. This isn’t a complex installation like wiring a solar panel—it’s plug-and-play with minimal tools.
Here’s a quick checklist in table form for clarity:
| Item | Quantity | Specifications |
|---|---|---|
| Aroeve Air Purifier Unit | 1 | Your specific model (e.g., MK01 for small rooms up to 215 sq ft; check the manual for CADR rating) |
| Power Outlet Adapter | 1 | Standard AC wall outlet (110-240V compatible; extension cord if needed for placement) |
| Clean Cloth or Microfiber Towel | 1 | For wiping down the exterior and air intake grille before first use |
| Optional: Essential Oil Diffuser Pad (for aroma models) | 1 pack | If your model supports aromatherapy; use only compatible, non-toxic oils |
| User Manual | 1 | Included in box; download digital version from Aroeve’s official site if lost |
| Smartphone (for smart models) | 1 | For app connectivity on Wi-Fi enabled versions like the MK06 |
Important: Ensure your power outlet is grounded and away from water sources to prevent electrical hazards. No special tools like screwdrivers are required—Aroeve designs emphasize user-friendliness.
Preparing Your Space and Safety Considerations
Proper preparation is key to getting the most out of your Aroeve air purifier how to use routine. Think of this as setting the stage for optimal air flow and longevity. Start by choosing the right location: Place the unit on a flat, stable surface at least 1-2 feet away from walls, curtains, or furniture to allow unrestricted airflow. Ideal spots include tabletops, nightstands, or floors in bedrooms, living rooms, or home offices. Avoid direct sunlight, heat sources like radiators, or high-traffic areas where it could be knocked over.
Safety first—always unplug the device before handling filters or moving it. For households with pets or children, position it out of reach to prevent tampering with the controls. If you have allergies or respiratory issues, test the air quality in your chosen room using a basic sensor app on your phone to baseline improvements. Preparation time: About 5 minutes.
Warning: Never operate the purifier in damp environments or near flammable materials, as this could pose a fire risk. Consult the user manual for model-specific voltage requirements to avoid damage.
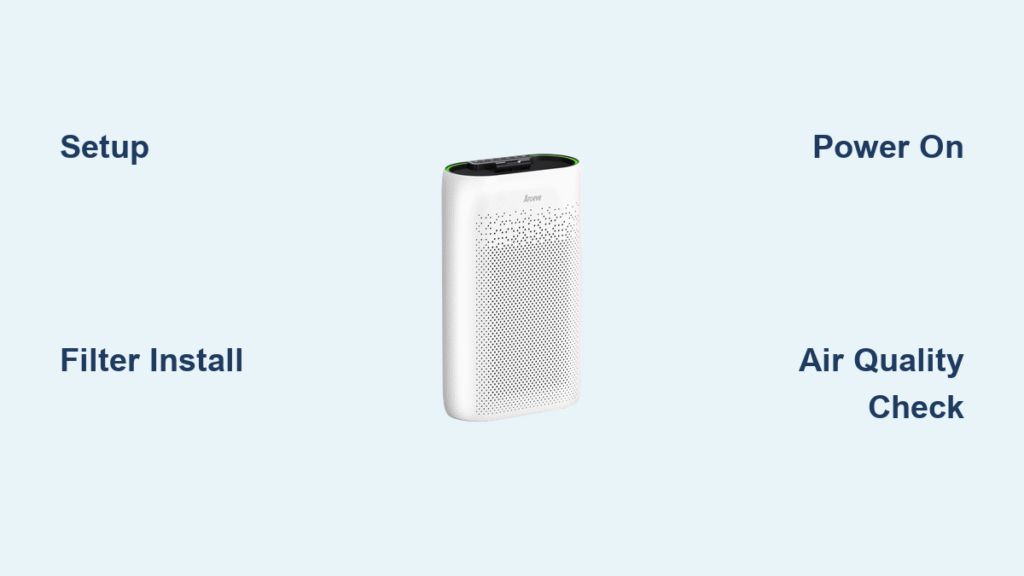
Step-by-Step Process to Use Your Aroeve Air Purifier

Now, let’s get into the heart of the Aroeve air purifier how to use guide: the setup and operation. We’ll break this into logical phases, from unboxing to daily use. Each step is designed for beginners, with approximate times noted. Most models share similar interfaces, but refer to your manual for variations (e.g., the MK01 has touch controls, while the MK06 adds smart app integration).
Phase 1: Unboxing and Initial Setup (10-15 Minutes)
Unboxing your Aroeve air purifier is exciting—it’s compact and lightweight, typically weighing under 3 pounds for easy portability.
- Remove Packaging: Carefully cut open the box and lift out the unit, filter, and accessories. Dispose of plastic wraps responsibly.
- Inspect Components: Check for the pre-installed HEPA filter (H13-grade in most models, capturing 99.97% of particles down to 0.3 microns). If not pre-installed, gently slide it into the base compartment until it clicks.
- Wipe Down the Unit: Use a dry microfiber cloth to remove any dust from shipping. Focus on the air intake grille and outlet vents—avoid using water or chemicals to prevent moisture damage.
- Plug In: Connect the power cord to the unit and a nearby outlet. The LED indicator should light up briefly, signaling readiness.
Pro Tip: If your model has a protective film on the display, peel it off now for clear visibility.
Phase 2: Powering On and Basic Operation (5 Minutes)
With setup complete, powering on is as simple as pressing a button. This phase gets your Aroeve air purifier circulating clean air immediately.
- Turn It On: Locate the power button (usually a large circular icon on the top panel). Press it once—the fan will start at auto mode, adjusting speed based on air quality sensors.
- Select Mode: Use the mode button to cycle through options:
– Auto Mode: Ideal for everyday use; the built-in sensor detects pollutants like PM2.5 and adjusts fan speed automatically (quiet at 24dB on low).
– Sleep Mode: For nighttime—dims lights and runs silently for undisturbed rest.
– Manual Speeds: Low, Medium, High for targeted purification (e.g., high for cooking odors). - Set Timer (If Available): Press the timer button to run for 1, 4, or 8 hours, conserving energy when you’re away.
The unit’s display will show air quality via color-coded lights (green for good, red for poor). Expect noticeable freshness within 15-30 minutes in small rooms.
Testing Note: Run it empty for 10 minutes to “prime” the filter before placing in a lived-in space.
Phase 3: Advanced Features and Daily Use (Ongoing, 2-5 Minutes Per Session)
Once basics are mastered, unlock more from your Aroeve air purifier how to use experience. Models like the MK06 offer smart connectivity for hands-free control.
- App Setup (For Smart Models): Download the “Smart Life” or Aroeve app from the App Store/Google Play. Create an account, scan the QR code on the unit, and connect via 2.4GHz Wi-Fi. Now, monitor air quality remotely, set schedules, or integrate with voice assistants like Alexa.
- Aromatherapy (If Equipped): Insert a diffuser pad into the designated slot and add 3-5 drops of essential oil (e.g., lavender for relaxation). This enhances mood while purifying—replace pads monthly.
- Filter Monitoring: The display shows filter life (typically 6-8 months). When it blinks, it’s time for replacement—order genuine Aroeve filters online for compatibility.
- Daily Routine: Turn on upon entering the room, select auto mode, and let it run 24/7 for best results in polluted areas. Empty the optional pre-filter tray weekly if your model has one for larger particles like pet hair.
Complication Handling: If the unit doesn’t respond, ensure it’s not in child lock mode (hold power button for 3 seconds to toggle). For variations, like the portable MK01, battery operation allows cordless use for up to 8 hours on low.
Phase 4: Post-Setup Testing and Initial Troubleshooting (10 Minutes)
After setup, verify everything works to avoid future headaches. Place the purifier in your target room and run it for 30 minutes.
- Air Quality Check: Use the built-in sensor or a separate device to measure before/after PM2.5 levels—expect a 50-70% drop in allergens.
- Noise and Vibration Test: Listen for unusual rattles (indicating loose parts) and ensure it’s under 50dB on high for quiet operation.
- Basic Troubleshooting: If it won’t turn on, check the power cord for frays or try a different outlet. For error codes (e.g., E1 for filter issue), reset by unplugging for 5 minutes.
If issues persist, note the model number and contact Aroeve support via their website. This phase confirms your Aroeve air purifier how to use setup is optimized.
Pro Tips for Maximizing Your Aroeve Air Purifier

To elevate your experience beyond the basics, here are 5-7 expert tips tailored for Aroeve users. These draw from user reviews and manufacturer guidelines to optimize performance and avoid pitfalls.
- Placement Optimization: Elevate the unit on a stool for better circulation in larger rooms (up to 215 sq ft for MK01)—this can improve efficiency by 20-30% per Aroeve’s airflow studies.
- Combine with Ventilation: Run the purifier alongside open windows during low-pollen seasons to flush out VOCs faster, but close them in high-smog areas.
- Filter Care Hack: Gently vacuum the pre-filter monthly with a soft brush attachment to extend HEPA life—saves $10-20 on replacements annually.
- Energy Savings: Use sleep mode overnight; it consumes just 5W, making it more efficient than larger brands like Dyson for small spaces.
- Pet-Friendly Tweaks: Position away from litter boxes but near bedding to trap dander—users report 40% less sneezing in pet homes.
- Common Mistake to Avoid: Don’t overload with strong scents; stick to recommended oils to prevent filter clogging.
- Performance Boost: Clean the sensor lens with a dry cloth every two weeks for accurate auto-mode readings, preventing unnecessary high-speed runs.
These tips ensure your Aroeve air purifier runs efficiently, potentially lasting 3-5 years with proper care.
When to Seek Professional Help
While the Aroeve air purifier how to use process is DIY-friendly, some issues warrant expert intervention. Signs include persistent error codes (e.g., E3 for motor failure), unusual burning smells, or no improvement in air quality after 24 hours of use—these could indicate internal faults beyond user fixes.
Look for certified technicians via Aroeve’s authorized service network (check their website for local providers). Prioritize those with HVAC experience and positive reviews on sites like BBB. Typical costs range from $50-150 for diagnostics and repairs, depending on warranty status. All Aroeve models come with a 1-year warranty—keep your receipt and register online for free replacements on defective parts. If out of warranty, compare quotes from 2-3 providers to avoid overcharges.
FAQ
Q: How long does it take for the Aroeve air purifier to clean a room?
A: In auto mode, it can significantly reduce pollutants in 15-30 minutes for rooms up to 215 sq ft, based on the model’s CADR (Clean Air Delivery Rate) of around 80-100 CFM. For full purification cycles, run it continuously for 2-4 hours initially, then maintain with 8-12 hours daily.
Q: Can I use the Aroeve air purifier in a bathroom?
A: Yes, but with caution—avoid direct humidity exposure, as excess moisture can damage electronics. Opt for models with IPX4 water resistance if available, and ensure good ventilation to prevent mold buildup inside the unit.
Q: What if my Aroeve air purifier makes a rattling noise?
A: This often stems from a loose filter or debris in the fan. Unplug, remove the filter, and gently shake out dust. If it persists, check for shipping damage and contact support—rattling could indicate a warranty-covered motor issue.
Q: Is the Aroeve air purifier safe for use around babies?
A: Absolutely, as long as it’s placed out of reach. Its ozone-free HEPA filtration is pediatrician-recommended for allergy relief, but monitor for any unusual reactions and consult a doctor for severe asthma cases.
Q: How do I know when to replace the filter?
A: The display alerts you at 80-90% usage (every 6-8 months with moderate use). Replace promptly to maintain 99.97% efficiency—genuine Aroeve filters cost $15-25 and are easy to swap in under 2 minutes.
Q: Does the Aroeve app work with all models?
A: No, only Wi-Fi-enabled ones like the MK06. For non-smart models, manual controls suffice, but you can track air quality via third-party apps like AirVisual for similar insights.
Q: Can I run the Aroeve air purifier 24/7?
A: Yes, it’s designed for continuous operation with low energy use (under 30W on high). This maximizes benefits in high-pollution areas, but unplug during long vacations to save power.
Alternative Solutions for Air Purification
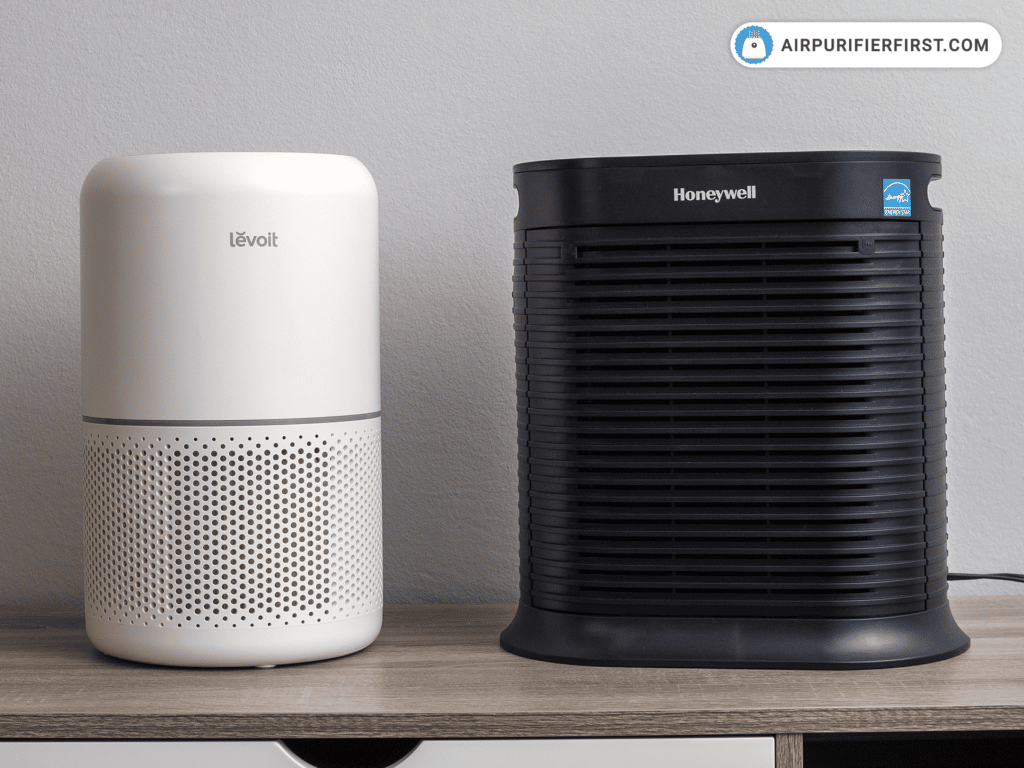
If the Aroeve doesn’t meet your needs (e.g., for larger spaces over 500 sq ft), consider these alternatives. The Aroeve excels in affordability and portability but may lack advanced ionization in premium competitors.
| Solution | Pros | Cons | Best For |
|---|---|---|---|
| Honeywell HPA300 | High CADR (300+ CFM) for big rooms; true HEPA | Bulkier and louder (up to 60dB); higher cost ($200+) | Large living areas with heavy smoke |
| Levoit Core 300S | Smart app with voice control; quiet (24dB) | Smaller coverage (up to 219 sq ft); app glitches reported | Tech-savvy users in apartments |
| DIY Plant-Based Purifier (e.g., NASA-inspired setup) | Natural, low-cost; adds greenery | Less efficient (20-30% particle removal); requires maintenance | Eco-conscious beginners on a budget |
| Coway Airmega AP-1512HH | Washable pre-filter; energy-efficient | No aromatherapy; heavier build | Allergen-heavy homes with pets |
Weigh these based on room size and budget—Aroeve remains a top pick for value under $50.
Start Using Your Aroeve Air Purifier Today
With this guide, you’re equipped to master the Aroeve air purifier how to use process from setup to advanced tweaks:
– Essential preparation and unboxing steps for quick start
– Detailed operation modes, including smart features and daily routines
– Testing methods and pro tips for peak performance
– Troubleshooting and alternatives for any scenario
Following these actionable steps will transform your indoor air quality, reducing dust, allergens, and odors for a healthier home. Don’t wait—plug it in now and breathe easier today.
Have you set up your Aroeve air purifier yet? Share your tips or questions in the comments below to help fellow readers! If issues linger, describe them for personalized advice.