
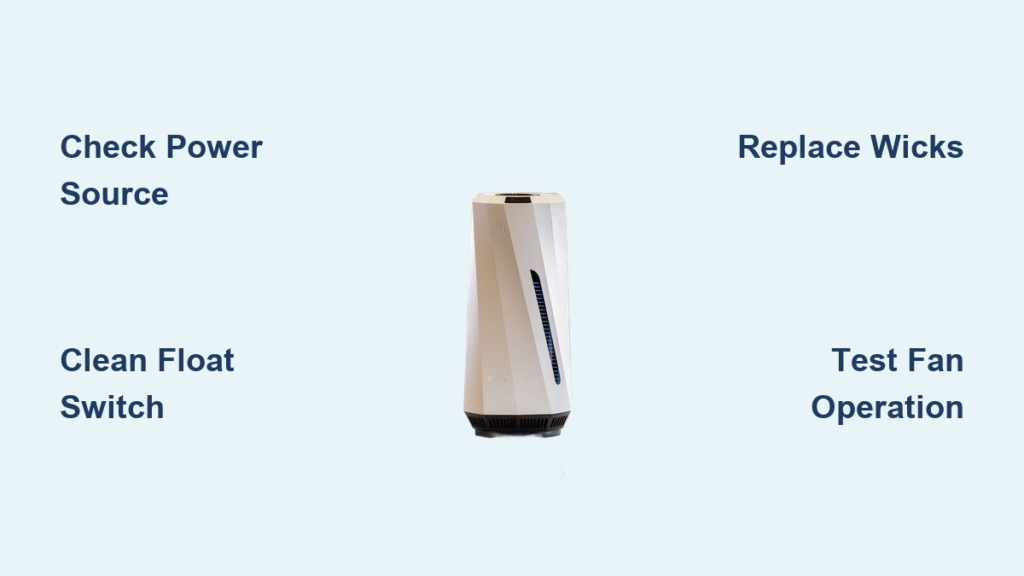
Your evaporative humidifier sits silent while dry air scrapes your throat and static shocks spark from doorknobs. That “evaporative humidifier not working” panic hits—especially when winter air drops below 30% humidity. But before you abandon hope or shell out for a replacement, know this: 90% of humidifier failures stem from five fixable issues. Most require no tools, take under 10 minutes, and cost $0. This guide cuts through the confusion with hands-on diagnostics and proven fixes straight from repair technicians. You’ll restore healthy humidity levels tonight—not next week.
Verify Power at the Source Before Disassembling
Don’t waste time removing screws if the problem is a dead outlet. First, plug a phone charger or lamp into the same socket—if it doesn’t power on, reset the GFCI outlet or circuit breaker. If the outlet works but your humidifier stays dark, inspect the power cord for frayed insulation or melted spots near the plug. Gently bend the cord while plugging in; if the unit flickers, internal wires are broken and the cord needs replacement.
Test the Internal Fuse Safely
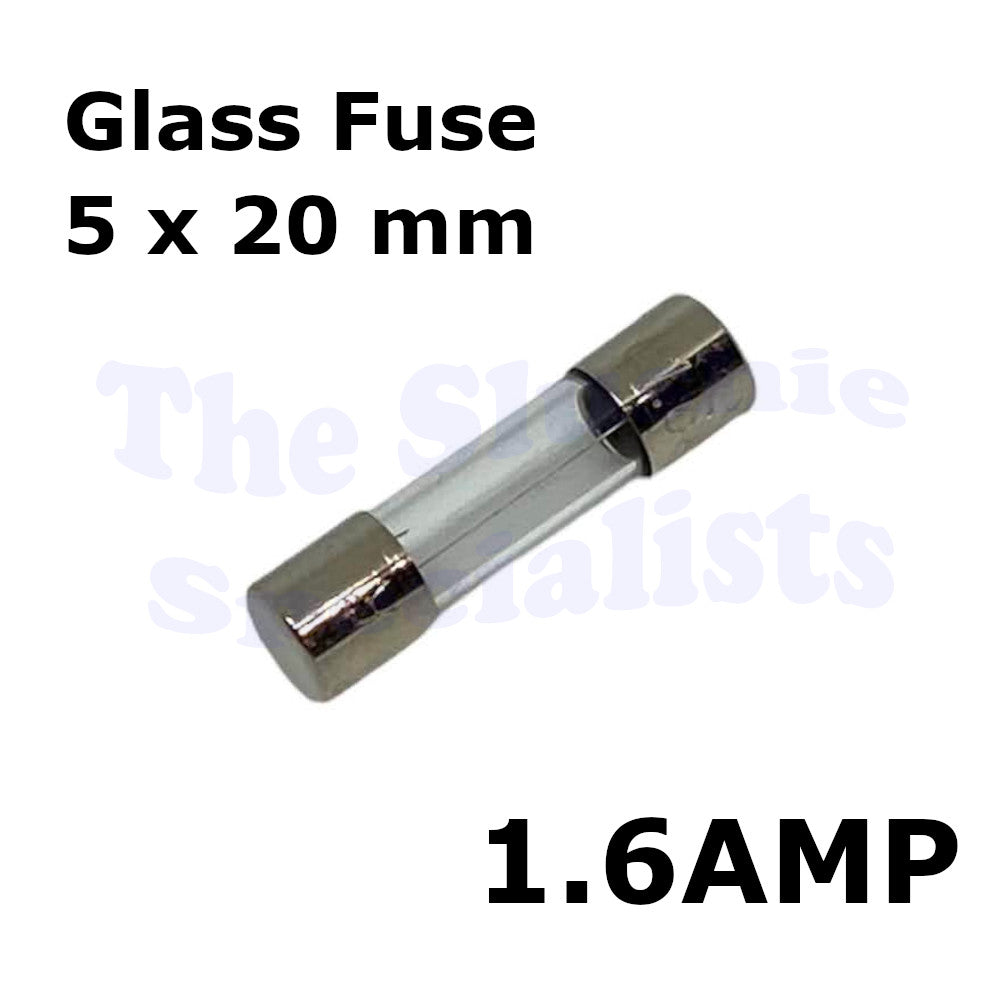
Unplug the unit and remove the back panel (typically 4-6 Torx screws). Locate the glass fuse near the cord entry point—it’s usually 5×20mm. Hold it to light: a blackened interior or broken filament means it’s blown. Critical warning: Only replace with an identical amperage fuse (marked on the end cap). Using a higher-rated fuse risks fire. If you lack a multimeter to test continuity, swap in a known-good fuse of the same rating—this takes 60 seconds and costs $2.
Diagnose Faulty Control Buttons
When lights illuminate but the fan won’t start, the membrane keypad often fails. Press each button firmly—does one feel mushy without a click? Unplug the ribbon cable connecting the keypad to the control board. Set your multimeter to continuity mode and touch probes to the switch contacts on the board. No beep when pressing the button? The keypad is dead. Replacement keypads cost $8-12 online—just unplug the old one and snap in the new.
Unclog the Float Switch Causing False “Empty Tank” Errors
Your humidifier displays “E1” or “–” even with a full tank? This almost always means mineral buildup jamming the float switch. Lift the water reservoir and locate the white or blue stem inside the base—it should slide up and down smoothly. If stuck, mix equal parts white vinegar and distilled water in a bowl. Soak the base for 15 minutes, then scrub the stem with an old toothbrush. Rinse thoroughly and reassemble. Pro tip: Apply a pea-sized dab of silicone grease to the stem monthly to prevent future sticking.
Force-Reset the Humidity Sensor
When the fan spins but humidity doesn’t rise, the internal hygrometer may be coated in dust or minerals. Unplug the unit and locate the sensor—usually a small mesh-covered port near the fan. Dip a cotton swab in 91% isopropyl alcohol and gently wipe the lens. Wait 10 minutes for evaporation, then set your humidistat 10% above your room’s current humidity (use a $10 standalone hygrometer for accuracy). The fan should activate within 30 seconds.
Revive a Bone-Dry Wick Causing No-Mist Conditions
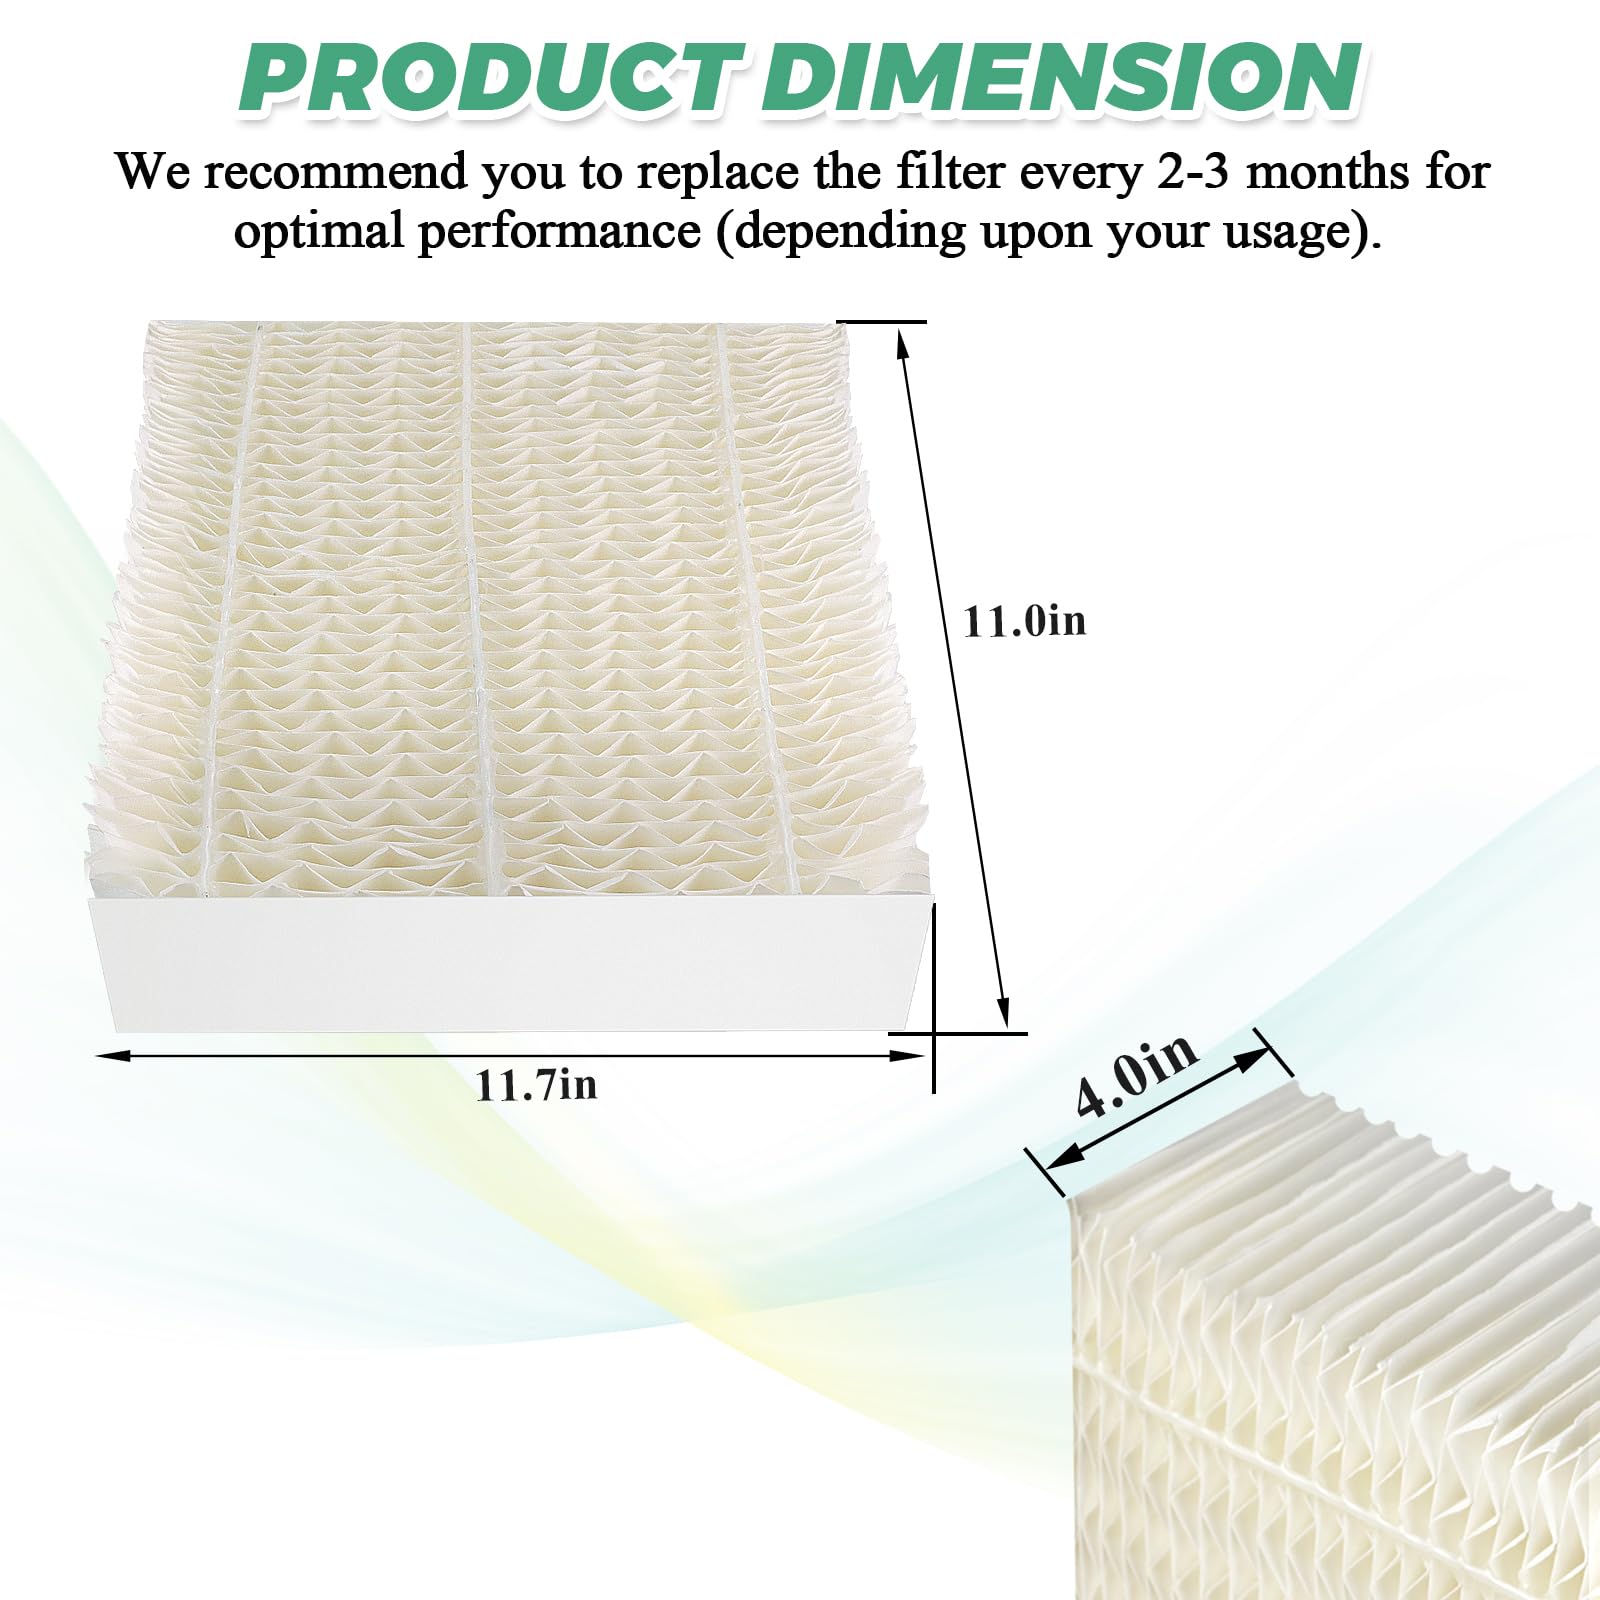
If the fan runs but air stays parched, your wick is likely mineral-clogged or expired. Remove it and squeeze gently—it should feel uniformly damp like a wet sponge. If stiff, crumbly, or covered in white crust, replace it immediately. Critical check: Match the exact dimensions printed on the cardboard frame (common sizes: 8×10×1.5 inches). Using the wrong size causes poor water contact and rapid failure.
Clear the Water Distribution Tray in 5 Minutes
Even with a good wick, clogged trays starve it of water. Pop off the top housing and lift out the white plastic tray. Soak it in 1:1 vinegar solution for 20 minutes, then scrub scale buildup with a bottle brush. Rinse until water runs clear—brown slime or white residue blocks water flow. Reassemble and test: within 10 minutes, the wick should darken as it absorbs water. Time-saver: Run weekly vinegar soaks to prevent future clogs.
Seal Leaks at the Tank Valve or Base Cracks

Puddles under your unit usually trace to three spots. First, test the tank valve: fill the reservoir, cap it tightly, and invert over the sink. Any drip means a failed O-ring. Measure the old ring’s inner diameter and cross-section (e.g., 10mm × 2mm), then install a matching silicone replacement. For base cracks, empty the unit, dry completely, and fill halfway with food-colored water. After 30 minutes, glowing cracks reveal the leak source. Seal hairline cracks with clear epoxy; replace the base if cracks exceed 1 inch.
Fix Tilt-Induced Spills in 60 Seconds
Even a slight slope makes water bypass internal dams. Place a small level on top of the unit—if the bubble isn’t centered, shim the legs with cardboard scraps. Visual cue: Water should pool evenly in the base, not drift toward one side. If leaks happen only when HVAC runs, elevate the unit 2 feet off the floor; cold air returns can freeze the wick, causing overflow when ice melts.
Eradicate Musty Odors with Deep Cleaning Protocol
A sour or fishy smell means bacteria thrive in stagnant water. Disassemble all parts (tank, tray, wick) and soak non-electrical components in 1:1 vinegar for 30 minutes. Scrub every surface with a bottle brush—pay special attention to the fan scroll and float stem. Rinse until vinegar odor vanishes. Never skip this: If mold persists, soak parts in 1 gallon water + 1 tablespoon bleach for 5 minutes, then rinse 3x. Critical warning: Never mix bleach with vinegar—it creates toxic chlorine gas.
Silence Rattling Fans and Grinding Motors
Unplug the unit and remove the housing. Shine a flashlight at the fan blades—if a twist tie or pet hair is lodged, remove it with tweezers. Spin the fan shaft by hand: gritty resistance means dry bearings. Add two drops of 3-in-1 oil to the motor sleeve. If the shaft wobbles excessively or noise exceeds 55 dB (louder than a refrigerator), replace the motor. Quick test: A healthy unit runs at 35-45 dB—hold your phone near it with a sound meter app.
Decode Common Error Codes Instantly
| Code | What It Really Means | Fix in Under 5 Minutes |
|---|---|---|
| E1 | Float switch stuck “empty” | Clean stem with vinegar, re-seat tank |
| E2 | Dirty humidity sensor | Wipe lens with alcohol swab |
| E3 | Fan obstruction | Clear debris, test motor continuity |
| “–“ | Tank misaligned | Remove/re-seat until audible click |
| FL | Overflow detected | Empty base, check for leaks |
Stop White Dust from Hard Water
Minerals in tap water create white powder on furniture. Immediate fix: Switch to distilled water—this eliminates dust completely. For ongoing prevention, install a demineralization cartridge if your model supports it. Clean the wick weekly with vinegar and replace it monthly in hard-water areas (≥7 grains per gallon). Pro tip: Elevate the unit 2 feet off the floor so minerals settle inside the base instead of coating your coffee table.
Weekly Maintenance That Prevents 80% of Failures
Daily (30 seconds): Empty the base, rinse, refill with fresh water—stagnant water breeds bacteria.
Weekly (15 minutes): Soak the wick in vinegar 30 minutes, scrub the tank with a bottle brush, wipe the sensor lens with alcohol.
Monthly: Replace the wick if humidity output drops noticeably. Lubricate the float stem with silicone grease.
Seasonal storage: After winter, run a vinegar cycle, dry all parts 48 hours, and store with silica gel packets to prevent mold.
Decide: Repair This Unit or Buy New?
Repair if parts cost under 50% of a new humidifier (e.g., $12 wick for a $60 unit). Replace immediately if:
– The base cracks reappear after epoxy repair
– Motor noise exceeds 55 dB (measured 3 feet away)
– Control board fails twice in one season
– Unit is over 7 years old with multiple worn parts
Lifespan truth: Entry models last 3-5 years, mid-tier units 5-7 years with wick replacements, premium models 7-10 years with scheduled maintenance.
Final 7-Point Checklist when your evaporative humidifier not working:
1. Outlet power confirmed with test device?
2. Tank filled to MAX line and clicked into place?
3. Float switch stem moves freely after vinegar soak?
4. Wick uniformly damp (not crusty or dry)?
5. Fan spins without obstruction at full speed?
6. Humidistat set 10% above room humidity?
7. Base perfectly level and leak-free?
If all boxes are checked and performance lags, your unit likely needs a wick or motor replacement—both under $20. But 9 times out of 10, these targeted fixes resolve “evaporative humidifier not working” in under an hour. Restore comfort tonight by tackling the float switch or wick first—your dry sinuses will thank you before bedtime.


