
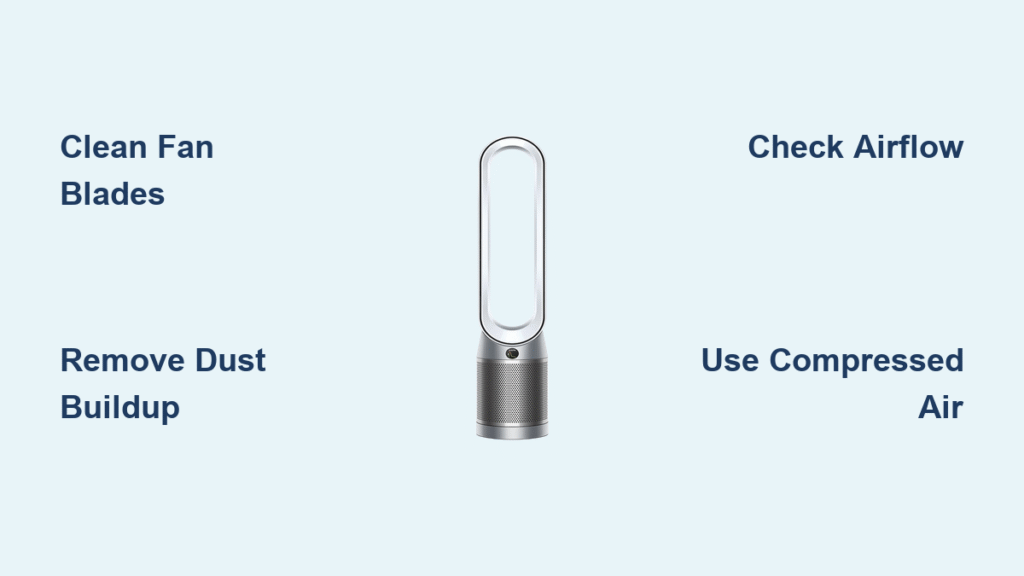
If you’ve noticed your Dyson air purifier isn’t circulating air as effectively as it used to, or it’s making unusual noises, the fan blades might be the culprit. Dust, pet hair, and other airborne particles can build up on the fan over time, reducing performance and efficiency. Don’t worry—cleaning your Dyson air purifier fan is a straightforward process that can restore its power and extend its lifespan. In this guide, we’ll cover a quick fix you can do in under 10 minutes to get immediate relief, plus a deeper clean for long-term results.
Beyond the basics, this comprehensive how-to will walk you through why cleaning is essential, the best schedule to follow, step-by-step instructions tailored to popular Dyson models like the Pure Cool or TP series, and pro tips to avoid common pitfalls. By the end, you’ll have the confidence to maintain your unit like a pro, ensuring cleaner air in your home without the hassle of frequent replacements or professional calls. Let’s dive in and get your Dyson air purifier fan spinning smoothly again.
Why Regular Cleaning of Your Dyson Air Purifier Fan is Important
Regular maintenance of your Dyson air purifier fan isn’t just about keeping things looking tidy—it’s crucial for optimal performance and health benefits. Air purifiers work by drawing in polluted air, filtering it, and pushing clean air back into the room via the fan. When the fan blades accumulate dust, pollen, pet dander, or even mold spores, it can restrict airflow, making the unit less effective at capturing contaminants. This buildup can also strain the motor, leading to louder operation, reduced suction power, and potentially higher energy bills.
From a health perspective, a dirty fan can recirculate allergens and particles back into your space, defeating the purpose of the purifier. According to Dyson’s own guidelines and air quality experts like those from the EPA, uncleaned fans can harbor bacteria, which might exacerbate allergies or respiratory issues. Plus, neglecting this can void your warranty if damage occurs from debris. By cleaning regularly, you not only improve air quality but also prolong the device’s life—many users report their Dysons lasting 5-7 years with proper care. In short, a clean fan means fresher air, quieter operation, and better value from your investment.
Recommended Frequency and Timing for Cleaning Your Dyson Air Purifier Fan
How often you clean your Dyson air purifier fan depends on your environment—think high-traffic homes with pets or in dusty areas versus a low-allergen bedroom. Dyson recommends general maintenance every few months, but for the fan specifically, aim to inspect it monthly and deep clean as needed. Over-cleaning can wear down components, so balance is key.
Here’s a simple maintenance schedule table to guide you. Adjust based on usage; for example, if you run your purifier 24/7 in a pet-heavy home, bump up the frequency.
| Frequency | Task | Duration | Notes |
|---|---|---|---|
| Weekly | Visual inspection and quick wipe-down of exterior | 5 minutes | Check for visible dust on vents; use a dry microfiber cloth. Ideal for light maintenance. |
| Monthly | Full fan cleaning (interior blades and housing) | 15-20 minutes | Unplug and disassemble partially; essential in moderate dust environments. |
| Every 3 Months | Deep clean with tools (vacuuming and mild soap) | 30-45 minutes | For heavy use; replace HEPA filter if indicated by the app or lights. |
| Annually | Professional inspection or full disassembly | 1 hour+ | If under warranty, contact Dyson; check for motor issues. |
Timing tip: Clean during off-peak seasons, like spring before pollen season ramps up, or after major home events like renovations. Always unplug the unit first and let it cool down if it’s been running.
Complete Cleaning Process for Your Dyson Air Purifier Fan
Cleaning your Dyson air purifier fan requires care to avoid damaging sensitive parts like the motor or sensors. This process is designed for most models, such as the Dyson Pure Cool TP04 or HP series, but always consult your user manual for model-specific quirks (downloadable from Dyson’s website). You’ll need basic tools: a soft brush, microfiber cloths, compressed air canister, mild dish soap, and a vacuum with a brush attachment. Total time: 20-45 minutes. Work in a well-ventilated area on a flat surface covered with a towel to catch debris.
Step 1: Preparation and Safety Setup
Before touching anything, safety first—Dyson units have electrical components that can pose shock risks if mishandled.
- Unplug the device: Always disconnect from the power source to prevent accidents. Wait 5-10 minutes for any residual charge to dissipate.
- Gather your workspace: Move to a clean, spacious area like a kitchen table. Lay down newspaper or a drop cloth to contain dust.
- Remove external covers: For most Dyson models, gently twist or unclip the outer grille or loop amplifier (the top part that amplifies airflow). Refer to your manual—some models like the TP07 have a simple release button.
- Warning: Avoid using water directly on electrical parts. If your model has a remote or app, note any error codes before starting.
This prep phase takes about 5 minutes and ensures you don’t void your warranty by forcing components.
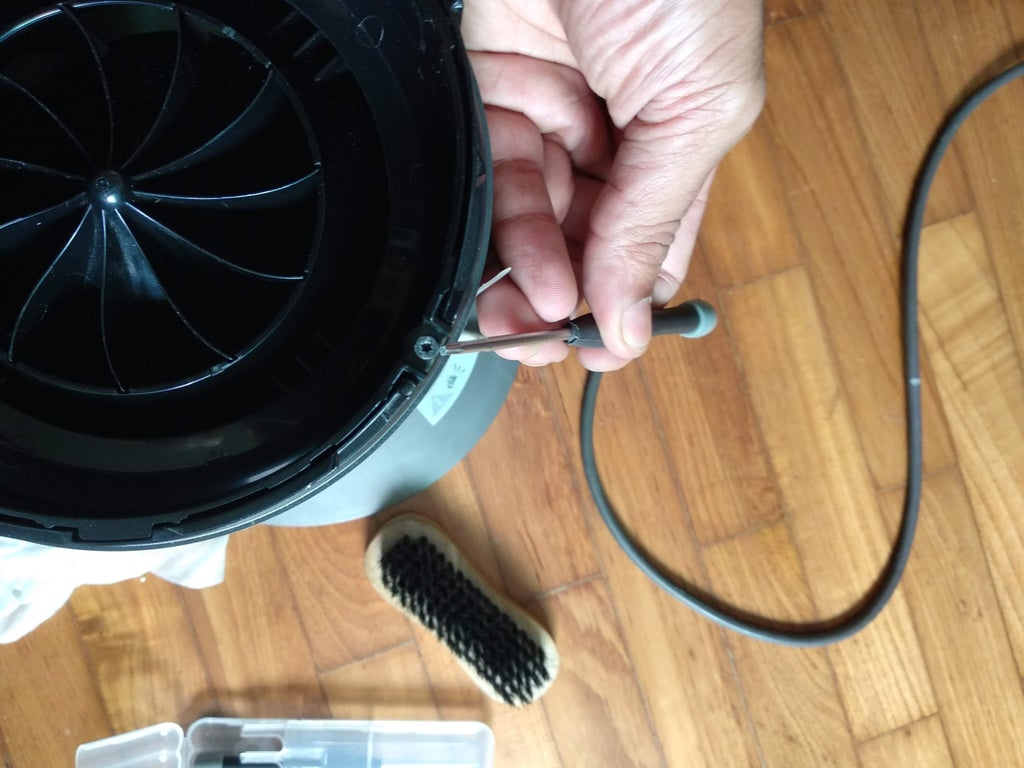
Step 2: Accessing and Removing the Fan Blades

Now, get to the heart of the clean: the fan assembly. Dyson’s fans are impeller-style, not traditional blades, so they’re delicate but accessible.
- Locate the fan housing: On tower models like the Pure Cool, the fan is inside the base or behind the HEPA filter. Slide out the filter tray first (marked on the unit).
- Disassemble carefully: Use a soft tool like a plastic spudger (or your fingernail) to release clips holding the fan cover. For bladeless designs, the “fan” is often a hidden impeller—gently lift the base cover if needed.
- Remove loose debris: Use the vacuum’s brush attachment on low suction to suck away dust bunnies. Hold the vacuum nozzle 1-2 inches away to avoid static buildup.
- Important: Never use sharp objects like screwdrivers, as they can scratch the polycarbonate blades and cause imbalance during spins.
If you’re dealing with a stubborn model like the Dyson Hot+Cool, watch Dyson’s official YouTube tutorial for visuals. This step should take 10-15 minutes.
Step 3: Cleaning the Fan Blades and Surrounding Areas
With access granted, focus on gentle, thorough cleaning to remove grime without residue.
- Dust the blades: Use a soft-bristle brush (like an old toothbrush) to sweep away fine particles. For hard-to-reach spots, a can of compressed air works wonders—short bursts only, holding the can upright to avoid liquid propellant.
- Wipe with solution: Mix warm water with a drop of mild dish soap (pH-neutral, like Dawn). Dampen (not soak) a microfiber cloth and gently wipe the impeller blades in a circular motion, following the fan’s natural direction. For stubborn spots, let the solution sit for 1 minute before wiping.
- Clean the housing and vents: Vacuum the inner housing, then wipe with the same damp cloth. Pay attention to the airflow channels where dust accumulates.
- Dry thoroughly: Use a dry microfiber cloth to remove all moisture. Allow 10-15 minutes of air-drying before reassembly—moisture can cause corrosion or electrical shorts.
- Pro Tip: For pet hair-heavy homes, a lint roller on the blades can pre-remove fur before brushing.
This is the most hands-on part, taking 10-20 minutes. Test spin the fan manually (by hand, unplugged) to ensure it’s balanced and free of wobbles.
Step 4: Reassembly and Post-Cleaning Testing
Putting it back together is reverse of disassembly, but double-check for snug fits.
- Reattach components: Snap the covers and filters back in place. Ensure the HEPA filter is properly seated—misalignment can trigger error lights.
- Power up and test: Plug in, turn on, and run on a medium fan speed for 5 minutes. Listen for unusual noises and check airflow through the vents. Use the Dyson app (if compatible) to monitor air quality metrics—improved readings indicate success.
- Troubleshooting if issues persist: If the fan wobbles or makes grinding sounds, debris might still be inside; repeat Step 2. For error codes like “FF” (fan fault), reset by holding the power button for 10 seconds.
Reassembly and testing take about 5 minutes. If everything runs smoothly, congratulations—your Dyson is refreshed!
Pro Tips for Maintaining Your Dyson Air Purifier Fan
To go beyond the basics and keep your unit performing at peak levels, here are 5-7 expert tips from Dyson technicians and long-time users:
- Use the right tools always: Stick to Dyson’s recommended accessories, like their soft dusting brush, to prevent scratches. Avoid abrasive cleaners like bleach, which can degrade plastics.
- Monitor with the app: Models like the TP09 connect via the MyDyson app—set reminders for cleanings and track filter life to preempt fan clogs.
- Optimize placement: Position your purifier away from walls or curtains to reduce debris intake, minimizing fan buildup by up to 30%.
- Common mistake to avoid: Don’t run the unit on high speed constantly in dusty rooms; it accelerates grime accumulation. Alternate speeds for even wear.
- Enhance performance: After cleaning, run a “deep clean” cycle if your model has one (check manual) to flush out residual particles.
- Seasonal tweaks: In winter, when indoor humidity drops, use a humidifier nearby to prevent static dust from sticking to the fan.
- Long-term maintenance: Annually, lubricate any accessible moving parts with silicone spray (sparingly), but only if specified in the manual.
These tips can cut down on cleaning frequency and boost efficiency, saving you time and energy.
When to Seek Professional Help for Your Dyson Air Purifier Fan
While DIY cleaning handles most issues, some signs scream for pro intervention to avoid costly damage.
- Red flags: Persistent vibrations, burning smells, or the unit shutting off randomly—these could indicate motor failure or bearing issues, not just dirt. If cleaning doesn’t resolve reduced airflow after two attempts, it’s time to call.
- What to look for in a provider: Choose Dyson-authorized service centers (find via their website) with certified techs. Read reviews on sites like Trustpilot for reliability.
- Cost ranges: Basic fan cleaning or repair runs $50-150, depending on location and model. Full motor replacement can hit $200-400, but warranty (usually 2-5 years) might cover it free if maintenance was followed.
- Warranty considerations: Regular cleaning proves you’ve upheld care requirements. Keep records of cleanings and serial numbers handy.
If under warranty, contact Dyson support first—they often send free parts or guide remote fixes.
FAQ
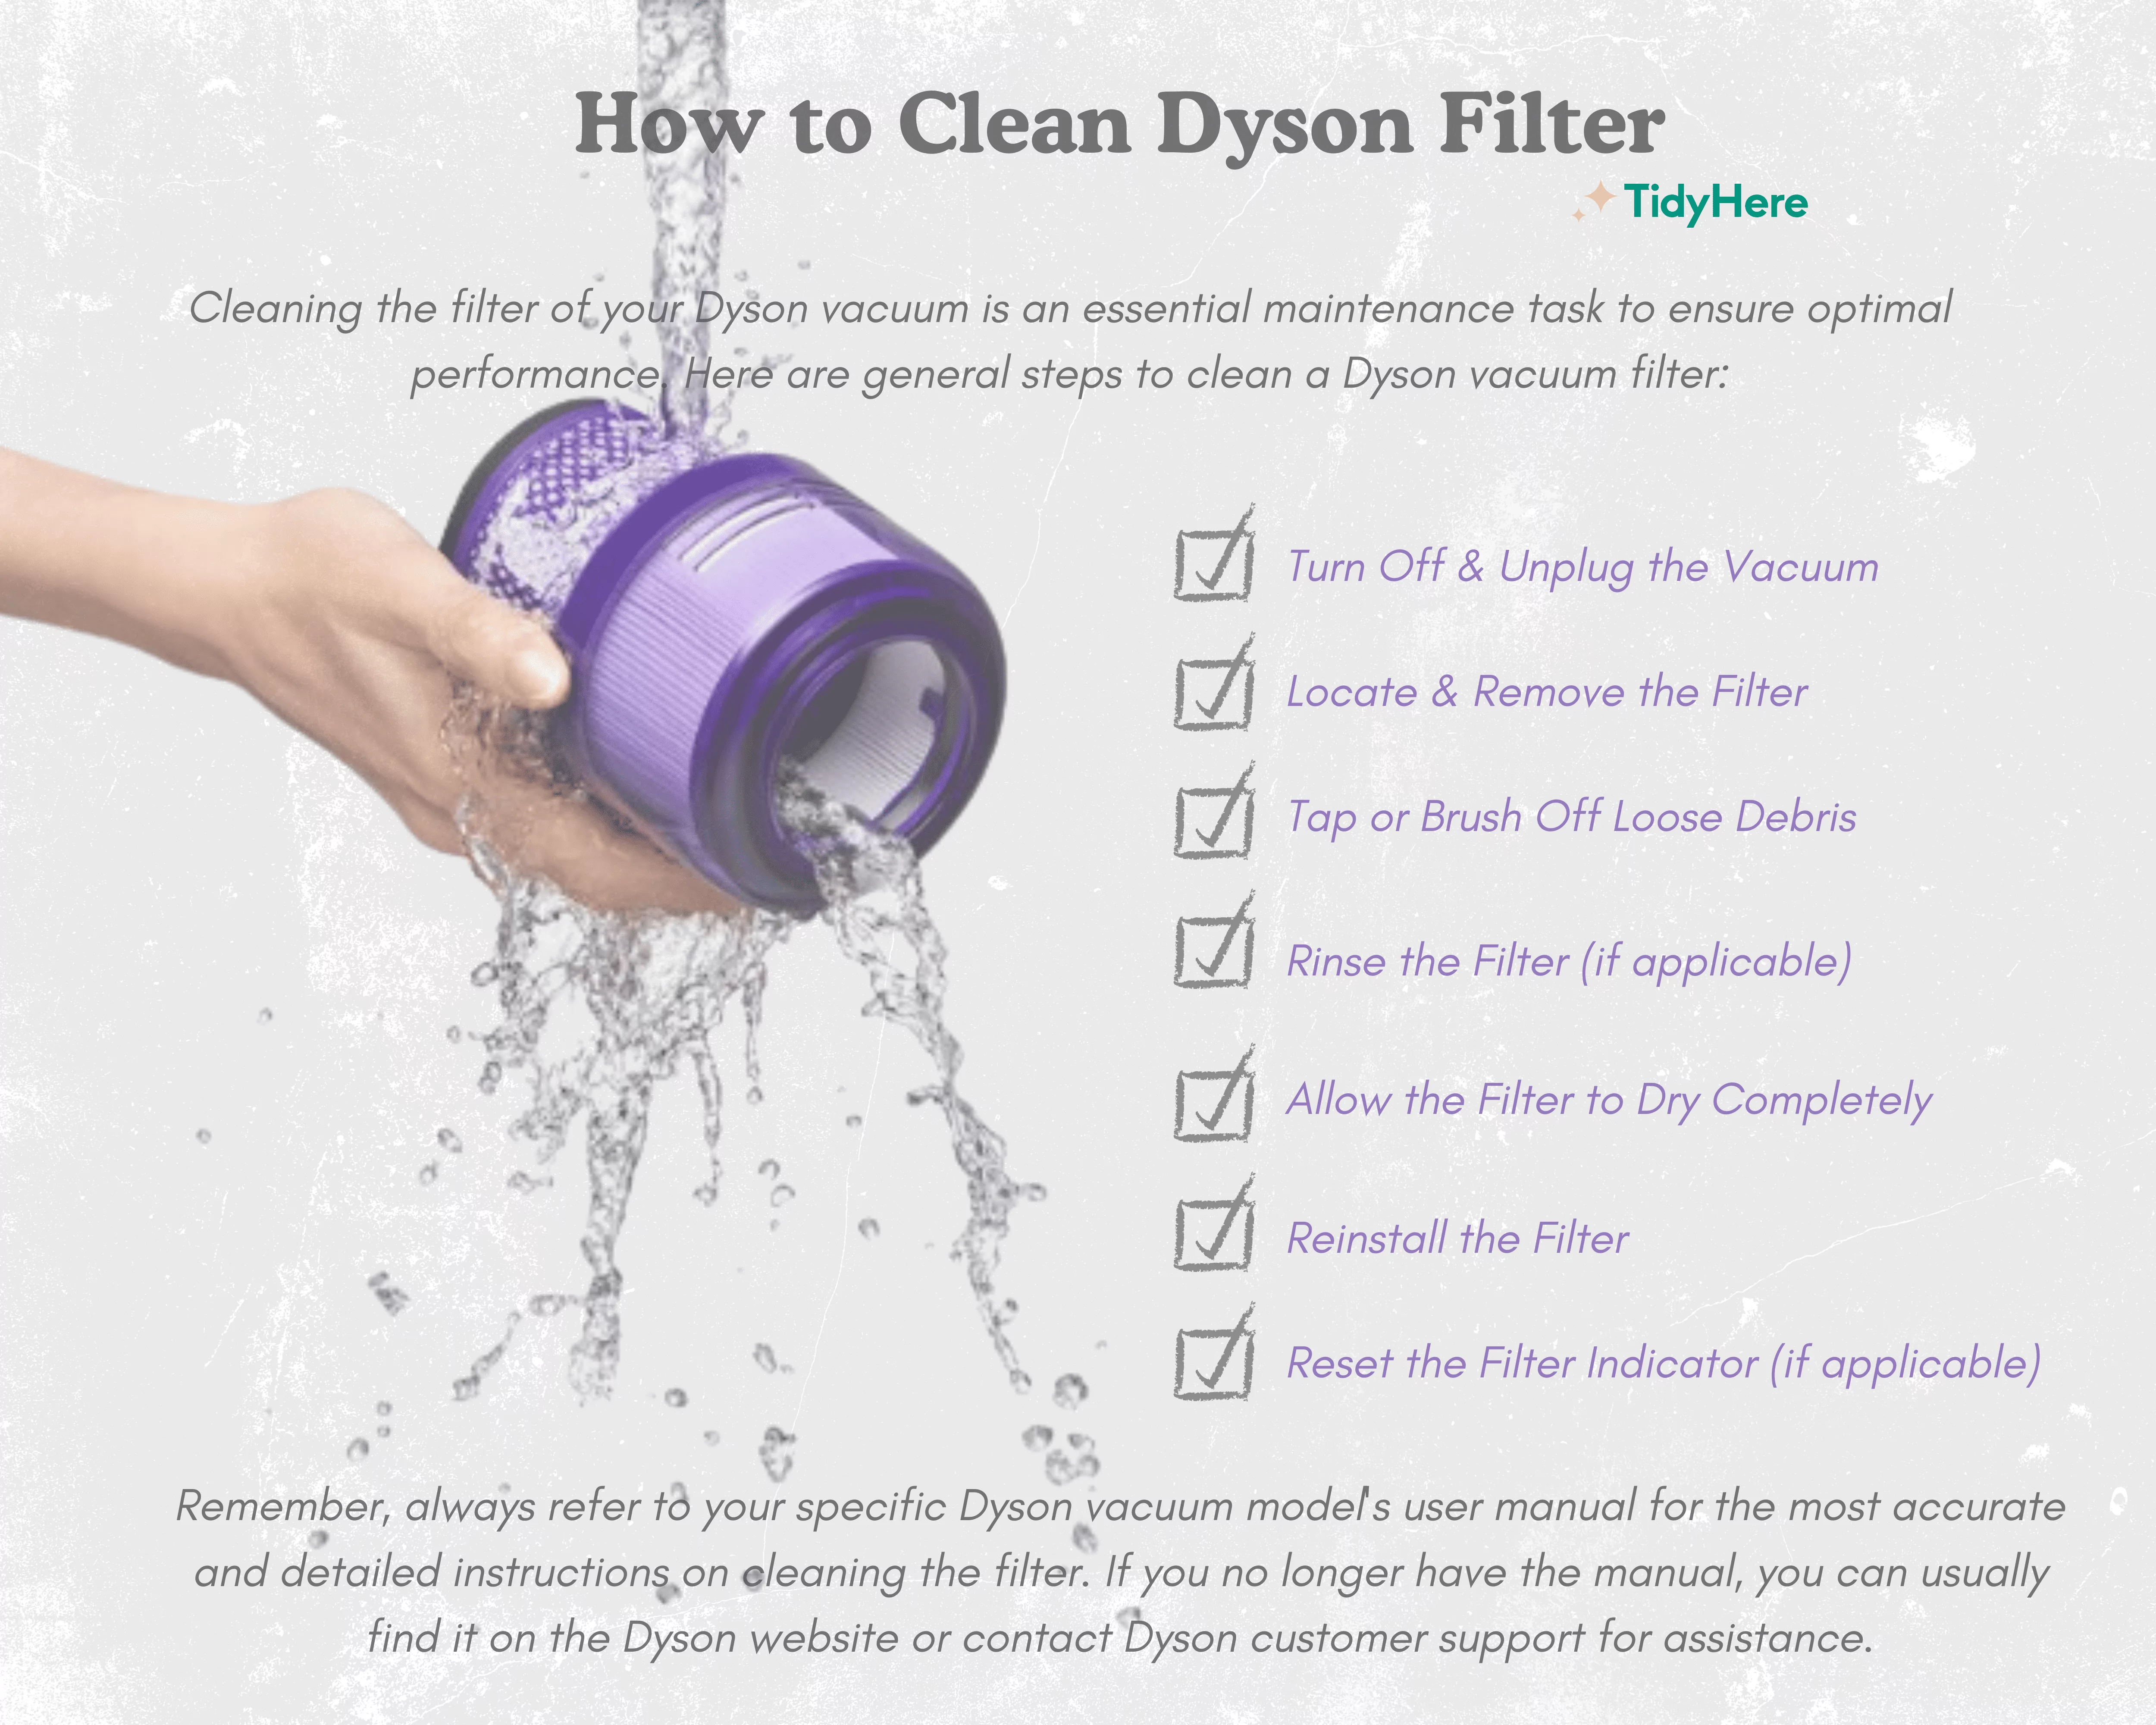
Q: Can I clean the Dyson air purifier fan with water?
A: Only use a lightly damp cloth with mild soap—never submerge the fan or use running water, as it can damage electrical components and lead to short circuits. Always dry completely before powering on. For models like the Pure Cool, Dyson’s manual explicitly warns against water exposure to the impeller.
Q: How do I know if my Dyson air purifier fan is dirty?
A: Look for signs like reduced airflow (weaker breeze from the top), unusual humming or rattling noises, or the air quality indicator staying in the “poor” zone longer than usual. Dust visible on external vents is a giveaway; inside, you’ll see buildup during inspection.
Q: Is it safe to vacuum the fan blades directly?
A: Yes, but use a brush attachment on low suction to avoid pulling the blades out of alignment or creating static. Hold it 1-2 inches away and work in short bursts. Compressed air is safer for delicate Dyson impellers.
Q: What if my model doesn’t have removable fan parts?
A: For sealed units like some older Dysons, stick to external cleaning and use compressed air through vents. If inaccessible, professional service is best—don’t force disassembly, as it could crack the housing.
Q: How long does a clean Dyson air purifier fan last before needing another clean?
A: In average homes, 1-3 months; in high-dust or pet areas, as little as 2-4 weeks. Monitor via the app or by checking airflow weekly to catch buildup early.
Q: Does cleaning the fan void the warranty?
A: No, as long as you follow Dyson’s guidelines—no sharp tools or harsh chemicals. Document your process with photos if concerned, and keep the original manual.
Q: Can I use isopropyl alcohol on the fan?
A: In small amounts on a cloth for greasy spots, yes—but test on a hidden area first. Avoid it on plastic blades, as it can cause clouding over time. Mild soap is safer for most cleanings.
Keep Your Dyson Air Purifier Running Smoothly
By following this guide, you’ve got everything you need to maintain peak performance for your Dyson air purifier fan:
- A clear understanding of why cleaning matters and how often to do it
- Step-by-step instructions for safe, effective cleaning
- Pro tips and when to call in experts for tougher issues
Investing time in regular cleaning not only ensures cleaner air for your home but also saves money on repairs and replacements. Start with a quick wipe-down today, and schedule your next deep clean—your lungs (and your Dyson) will thank you. With these actionable steps, you’ll avoid common frustrations and enjoy reliable purification year-round.
Have you cleaned your Dyson air purifier fan before? Share your tips or any model-specific challenges in the comments below to help fellow readers!


