
Dealing with a stuffy room or noticing your air quality isn’t improving as expected? If you’re an owner of an Instant air purifier, a dirty filter could be the culprit behind reduced performance and that frustrating musty smell. Cleaning your Instant air purifier filter regularly is a simple yet essential task that can restore its efficiency and extend its lifespan. The good news is, there’s a quick fix you can try right now: gently vacuum the pre-filter to remove loose dust, which often takes just 5 minutes and can make an immediate difference in airflow.
In this comprehensive guide, we’ll go far beyond that quick clean-up. You’ll get a full breakdown of why maintenance matters, a recommended schedule, step-by-step instructions for thorough cleaning, and tips to spot issues early. By the end, you’ll feel confident tackling any filter woes, ensuring your Instant air purifier keeps delivering fresh, clean air without the hassle of frequent replacements. Whether you’re a first-time owner or just need a refresher, these actionable steps will help you maintain peak performance year-round.
Why Regular Filter Cleaning is Essential for Your Instant Air Purifier
Your Instant air purifier, like models from the popular Instant Pot brand lineup (such as the Instant Air Purifier with HEPA filter), works hard to capture dust, allergens, pet dander, and pollutants from the air. But over time, these particles build up on the filter, clogging it and reducing its ability to function effectively. A dirty filter not only diminishes air quality but can also strain the unit’s motor, leading to higher energy use and potential breakdowns.
Regular cleaning prevents this buildup, ensuring your purifier operates at optimal efficiency. According to the EPA, maintaining air purifiers can improve indoor air quality by up to 50% in homes with moderate pollution levels. For Instant models, which often feature a multi-layer system including a pre-filter, activated carbon filter, and true HEPA filter, neglecting cleaning can shorten the filter’s life from 6-12 months to just a few weeks in dusty environments. Plus, it saves you money—cleaning extends the need for costly replacements. By staying on top of this, you’ll breathe easier and keep your home healthier without unnecessary expenses.
Recommended Frequency and Timing for Cleaning Your Instant Air Purifier Filter
How often you clean your Instant air purifier filter depends on your environment, usage, and the specific model (e.g., the compact Instant Air Purifier for rooms up to 388 sq ft or larger whole-home units). In general, Instant recommends checking filters monthly, but high-traffic homes with pets or smokers may need more frequent attention. Over-cleaning can damage delicate materials, so stick to a balanced schedule to avoid wear and tear.
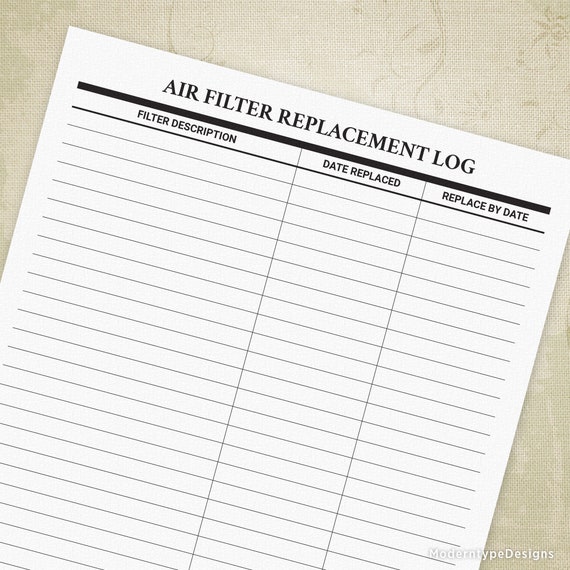
Use this maintenance schedule table as a starting point. Adjust based on your unit’s indicator lights—many Instant models have a filter reset or replacement alert that glows when it’s time.
| Frequency | Task | Duration | Notes |
|---|---|---|---|
| Weekly | Vacuum the pre-filter | 5-10 minutes | Ideal for high-dust areas; removes loose particles without water. |
| Monthly | Full clean of pre-filter and carbon layer | 15-20 minutes | Wipe down and rinse if washable; check HEPA for visible dirt. |
| Every 3-6 Months | Deep clean all layers (if applicable) | 30-45 minutes | Replace non-washable HEPA if clogged; test airflow post-clean. |
| Annually | Professional inspection or full replacement | Varies | Even with cleaning, filters have a lifespan; consult Instant manual. |
Important: Always refer to your model’s user manual (available on Instant’s website) for exact guidelines, as some filters are washable while the HEPA layer typically isn’t. Cleaning at the same time each month, like the first of the month, helps build a routine.
Complete Cleaning Process for Your Instant Air Purifier Filter
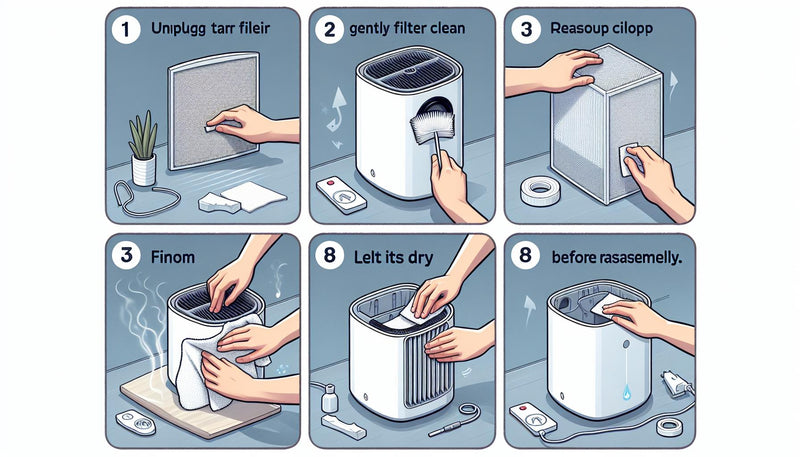
Cleaning your Instant air purifier filter is straightforward and doesn’t require special tools beyond what’s in most homes. The process typically involves the pre-filter (washable mesh), carbon filter (wipes only), and HEPA filter (vacuum or replace). Expect the full routine to take 20-30 minutes. Work in a well-ventilated area, and unplug the unit first for safety.
Warning: Never use water on the HEPA filter unless specified by your model—doing so can ruin its effectiveness and void the warranty. If your filter is heavily soiled or damaged, replace it immediately to avoid health risks from recirculating dirty air.
Step 1: Preparation and Safety Setup
Before diving in, gather your supplies and prepare safely to avoid static shocks or damage to the unit.
- Unplug the purifier: Always disconnect from power to prevent electrical hazards.
- Choose a workspace: Lay down newspapers or a towel on a flat surface outdoors or in a utility room to catch debris.
- Wear protective gear: Use gloves to handle dusty filters and a mask to avoid inhaling particles.
- Gather tools: Soft brush or vacuum with brush attachment, mild dish soap, lukewarm water, microfiber cloth, and compressed air canister (optional for tight spots).
This phase takes about 5 minutes. Double-check your model’s manual for any model-specific warnings, like avoiding direct sunlight during drying.
Step 2: Disassembly
Removing the filters is simple for most Instant air purifiers, designed for easy access.
- Open the front or rear panel: Depending on your model (e.g., the Instant Vortex Air Purifier), press the release latch or slide the cover off gently.
- Locate the filter compartment: It’s usually a pull-out tray or cartridge holding the pre-filter (outer layer), carbon filter (middle), and HEPA (inner).
- Remove filters one by one: Start with the pre-filter by pulling it straight out. Handle the carbon and HEPA layers carefully to avoid bending the pleats.
- Inspect for damage: Look for tears, excessive discoloration, or mold— if present, discard and replace.
Disassembly should take 5-7 minutes. If the filters feel stuck, wiggle gently; forcing them can crack the housing.
Step 3: Cleaning the Filters
This is the core of the process—tailor it to each layer for best results. Focus on gentle methods to preserve the filter’s structure.
Cleaning the Pre-Filter
The pre-filter catches larger particles and is often washable.
- Tap off loose dust outdoors over a trash bin.
- Vacuum both sides using a soft brush attachment on low suction for 2-3 minutes.
- If washable (check manual), rinse under lukewarm water with a drop of mild soap. Gently agitate with your hands—no scrubbing.
- Rinse thoroughly until water runs clear, then shake off excess water.
This step takes 5-10 minutes. Avoid hot water, as it can warp the material.
Cleaning the Carbon Filter
The activated carbon layer absorbs odors and isn’t water-safe.
- Use a dry microfiber cloth to wipe away surface dust.
- For deeper clean, use compressed air or a vacuum on low to dislodge particles without touching the granules.
- If odors persist, let it air out in sunlight for 1-2 hours (UV helps neutralize smells).
Keep this to 3-5 minutes to prevent granule displacement.
Cleaning the HEPA Filter
True HEPA filters in Instant models trap 99.97% of 0.3-micron particles and are rarely washable.
- Never submerge in water—opt for dry methods only.
- Vacuum the exterior pleats gently with a brush attachment, moving in one direction to avoid embedding dirt deeper.
- Use compressed air for crevices if available, holding the can upright to prevent liquid spray.
This takes 5 minutes max. If the filter is over 6 months old or heavily clogged, replacement is recommended (Instant filters cost $20-50).
Step 4: Drying and Reassembly
Proper drying prevents mold and ensures the filter works correctly.
- Air-dry all washed components for 24 hours in a shaded, well-ventilated area. Do not use heat sources like hairdryers, as they can shrink materials.
- Once fully dry (test by ensuring no moisture when squeezed), reassemble in reverse order: Insert HEPA first, then carbon, then pre-filter.
- Secure the panel and plug in the unit.
- Reset the filter indicator: Press and hold the filter reset button (usually on the control panel) for 3-5 seconds until it beeps or the light turns off.
Reassembly and initial test take 5 minutes. Run the purifier on high for 10 minutes to check for unusual noises or reduced airflow—if issues persist, see the troubleshooting section below.
Step 5: Post-Cleaning Testing and Troubleshooting
After reassembly, verify everything’s working.
- Turn on the unit and monitor the air output: It should feel stronger and fresher than before.
- Check the indicator lights: Ensure no error codes appear.
- Run a cycle: Operate for 30 minutes in auto mode and note any changes in room air quality (use an app if your model has smart features).
If airflow is still weak, the filter might need replacement, or there could be internal dust buildup. In such cases, repeat vacuuming or consult Instant support. This testing phase ensures your efforts pay off and catches any oversights early.
Warning Signs That Indicate Immediate Attention Needed

Don’t wait for your scheduled clean if you spot these red flags—they signal a clogged or failing filter that could compromise your health.
- Reduced airflow or unusual noises: The fan sounds strained or pushes less air, indicating blockage.
- Persistent odors: If smells linger despite running the unit, the carbon layer is saturated.
- Filter indicator flashing constantly: Your Instant model will alert you—ignore it, and efficiency drops.
- Visible dirt or discoloration: Black streaks or heavy dust on the exterior mean internal buildup.
- Allergy symptoms worsening: Sneezing or itchy eyes in a “purified” room suggest the filter isn’t trapping allergens.
- Increased energy bills: A clogged filter makes the motor work harder.
Address these promptly to avoid voiding your warranty or releasing pollutants back into the air. If multiple signs appear, skip cleaning and opt for replacement.
Pro Tips for Optimal Instant Air Purifier Filter Maintenance
Go beyond the basics with these expert recommendations to maximize your purifier’s performance and longevity. As someone who’s helped countless users troubleshoot air quality issues, I can tell you these tweaks make a big difference.
- Track usage with an app: Many Instant models integrate with smart home apps—set reminders for cleaning to stay consistent.
- Combine with room habits: Vacuum floors before running the purifier to reduce filter load by up to 30%, per air quality studies.
- Avoid common mistakes: Don’t use harsh chemicals on filters; they can degrade materials and release fumes. Also, never run the unit without a filter installed—it could damage the motor.
- Optimize placement: Position your purifier away from walls or curtains to improve airflow, making filters last longer.
- Seasonal deep cleans: In spring (pollen season) or fall (dust from heating), do an extra thorough clean to handle environmental spikes.
- Store spares wisely: If you buy replacement filters in advance, keep them sealed in a cool, dry place to prevent premature contamination.
- Monitor air quality metrics: Use a separate AQI monitor to measure improvements post-cleaning, helping you fine-tune your routine.
These tips can extend filter life by 20-50%, saving you time and money while enhancing results.
When to Seek Professional Help for Your Instant Air Purifier
While DIY cleaning handles most issues, some situations call for a pro to avoid further damage or health risks.
Signs you need professional service include: persistent error codes after cleaning, visible motor strain (e.g., overheating), or if the unit won’t turn on at all—these could indicate deeper electrical or internal problems beyond filter clogs. Also, if you’re uncomfortable with disassembly or dealing with heavy mold buildup, don’t risk it.
Look for certified technicians through Instant’s authorized service network (find via their website or app). Choose providers with good reviews on sites like BBB, experience with appliance air purifiers, and clear pricing. Typical costs range from $50-150 for a diagnostic and clean, depending on location and model—cheaper than a full replacement unit ($100-300). Check your warranty (usually 1-2 years); cleaning mishaps might void it, but professional service often preserves coverage. If under warranty, contact Instant support first for free or discounted help.
FAQ
Q: Can I wash the HEPA filter in my Instant air purifier?
A: No, most Instant air purifier HEPA filters are not washable as water can damage the fine fibers, reducing their 99.97% particle capture efficiency. Stick to vacuuming or replacement every 6-12 months. Always confirm with your model’s manual, as some budget variants might differ.
Q: How do I know if my Instant air purifier filter needs replacing instead of cleaning?
A: If vacuuming doesn’t improve airflow, the filter is discolored beyond surface dirt, or it’s been 6+ months since purchase, replace it. Instant filters have a lifespan indicator, and overuse leads to poor air quality. Replacements are available on Amazon or Instant’s site for $20-40.
Q: What if my filter is moldy after cleaning?
A: Mold indicates high humidity—dry thoroughly next time and run a dehumidifier nearby. Discard the affected filter immediately, as it can spread spores. Clean the unit’s interior with a vinegar solution (1:1 water) and consider professional mold remediation if persistent.
Q: Is cleaning the filter the same for all Instant models?
A: Mostly yes, but variations exist—e.g., the Instant Air Purifier Pro has a more accessible cartridge than basic models. Download the specific manual from Instantbrands.com using your model number (found on the base) to avoid errors.
Q: Can I use a dishwasher to clean the pre-filter?
A: Absolutely not—dishwasher detergents and heat can degrade the mesh, causing tears. Hand-wash only with mild soap to maintain integrity and warranty compliance.
Q: How long does a cleaned filter last compared to a new one?
A: A well-maintained cleaned filter can perform nearly as well as new for 1-3 months, but efficiency drops over time. Aim for replacement every 6-12 months regardless, as per Instant’s guidelines and independent tests from Consumer Reports.
Q: What household items can I use if I don’t have a vacuum for cleaning?
A: For light dust, use a soft brush or lint roller on the pre-filter. For deeper cleans, borrow a vacuum or use canned air. Avoid improvised water methods on non-washable parts to prevent damage.
Q: Does cleaning the filter improve energy efficiency?
A: Yes, a clean filter reduces motor strain, potentially lowering energy use by 10-20%. Clogged ones force the fan to work harder, spiking bills—regular maintenance pays off quickly.
Alternative Solutions for Instant Air Purifier Filter Maintenance

If cleaning isn’t cutting it due to heavy usage or allergies, consider these alternatives. They might suit if your model has non-washable filters or you want hands-off options.
| Solution | Pros | Cons | Best For |
|---|---|---|---|
| Filter Subscription Service (e.g., Instant’s auto-ship) | Convenient deliveries every 3-6 months; 10-15% discount | Ongoing cost ($15-30 per shipment) | Busy households wanting zero maintenance |
| Third-Party Washable Filters (e.g., from Amazon) | Reusable up to 1 year; eco-friendly and cheaper long-term | May not fit perfectly; lower efficiency than OEM | Budget-conscious users in low-pollution areas |
| Upgrading to a Self-Cleaning Model (e.g., newer Instant with UV) | Automatic filter refresh; less manual work | Higher upfront cost ($150+); not retrofittable | Tech-savvy users with persistent dust issues |
| DIY Filter Frames with Reusable Mesh | Customizable and inexpensive to make | Requires crafting skills; untested efficiency | Creative DIYers experimenting with basics |
Weigh these against your needs—stick to official Instant parts for warranty peace of mind. If alternatives fail, revert to standard cleaning.
Keep Your Instant Air Purifier Running Smoothly
With this guide, you’ve got everything to maintain your Instant air purifier filter like a pro, from quick weekly vacuums to full monthly deep cleans:
- Essential reasons for regular upkeep and a tailored schedule
- Detailed step-by-step process with safety tips and testing
- Pro tips, warning signs, and when to call in experts
- FAQs and alternatives for tricky situations
Following these steps not only restores your purifier’s performance but also ensures cleaner air for your home, potentially reducing allergy flare-ups and energy costs. You’re now equipped to handle maintenance confidently—start with a check today and notice the difference in air quality almost immediately.
Found this Instant air purifier filter cleaning guide helpful? Share your before-and-after results in the comments below to inspire other readers! If you have a specific model issue, drop details for more tailored advice. Breathe easy knowing your purifier is in top shape.


