
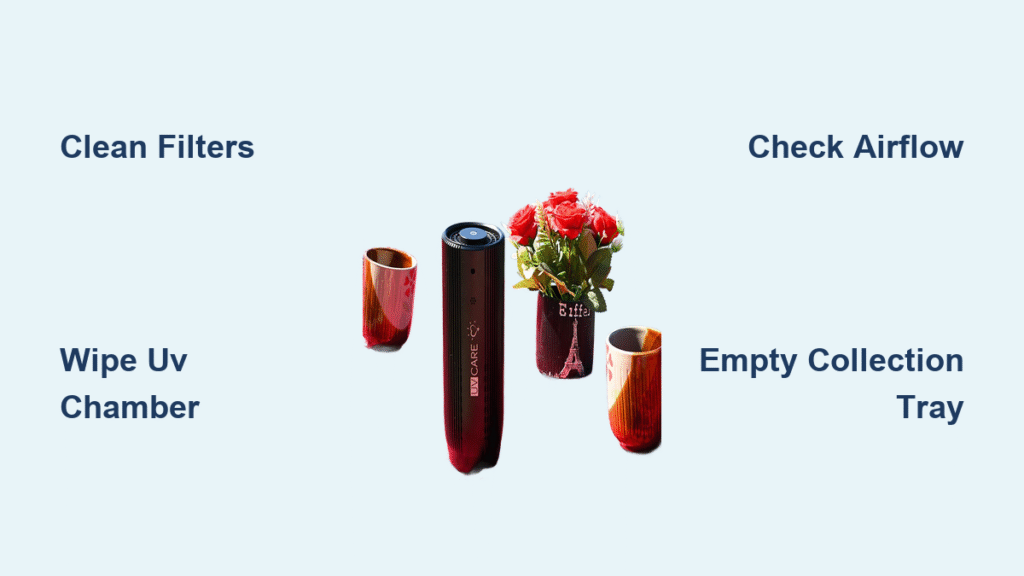
Keeping your indoor air fresh and free from allergens can be a challenge, especially if your UV Care air purifier starts underperforming due to built-up dust and grime. If you’ve noticed reduced airflow, unusual odors, or the UV light indicator flashing, it’s frustrating to deal with poor air quality right when you need it most. The good news is that learning how to clean UV Care air purifier is straightforward and can restore its efficiency quickly—start with a simple wipe-down of the exterior and filters for immediate results.
In this comprehensive guide, we’ll go beyond the basics to cover everything you need to maintain your UV Care air purifier effectively. You’ll discover why regular cleaning matters, a detailed schedule to follow, step-by-step processes for safe disassembly and cleaning, and tips to prevent common issues. By the end, you’ll have the confidence to keep your unit running at peak performance, ensuring cleaner air and extending its lifespan without professional help.
Why Regular Maintenance is Essential for Your UV Care Air Purifier
Your UV Care air purifier combines advanced UV-C light technology with multi-stage filtration to trap particles, kill bacteria, and neutralize odors. However, without proper care, dust, pet dander, and microbes can accumulate on filters, the UV chamber, and internal components, reducing its effectiveness by up to 50% over time, according to air quality experts from the EPA. Regular cleaning not only maintains optimal airflow and UV exposure but also prevents mold growth in the humid environments many purifiers operate in, which could otherwise lead to health issues like respiratory irritation.
Neglecting maintenance can shorten the device’s lifespan—UV Care models are designed to last 5-7 years with proper care, but buildup can cause the motor to overwork, leading to burnout. By cleaning how to clean UV Care air purifier routinely, you ensure it continues to deliver hospital-grade air purification, especially in homes with allergies, pets, or high pollution levels. Plus, it’s a cost-effective way to avoid frequent filter replacements, saving you money in the long run.
Recommended Frequency and Timing for Cleaning Your UV Care Air Purifier
To keep your UV Care air purifier performing optimally, adhere to a consistent cleaning schedule tailored to your usage and environment. Factors like room size, pet presence, or smoking can accelerate dirt buildup, so adjust as needed. The manufacturer’s guidelines recommend vacuuming filters weekly in high-dust areas, but for deeper cleans, monthly maintenance is key. Use the table below as a quick reference for your routine.
| Frequency | Task | Duration |
|---|---|---|
| Weekly | Vacuum pre-filter and wipe exterior | 10-15 minutes |
| Bi-Weekly | Clean collection tray and inspect UV light | 15-20 minutes |
| Monthly | Deep clean filters, UV chamber, and sensors | 30-45 minutes |
| Every 3-6 Months | Replace HEPA filter and check UV bulb (based on usage hours) | 20-30 minutes |
| Annually | Full disassembly and professional inspection if heavily used | 1 hour+ |
Timing tip: Perform weekly tasks during your regular household cleaning routine, like Sunday evenings. For monthly deep cleans, choose a low-humidity day to allow parts to dry thoroughly, preventing moisture-related issues. Always unplug the unit first and let it cool down if it’s been running.
Complete Cleaning and Maintenance Process for UV Care Air Purifier
Cleaning your UV Care air purifier involves a systematic approach to avoid damaging sensitive components like the UV bulb or electronic sensors. We’ll break it down into major steps, focusing on safety and thoroughness. Expect the full process to take about 30-45 minutes for a monthly clean. Remember, Warning: Never submerge electrical parts in water or use harsh chemicals, as this can void your warranty and pose a shock risk.
Step 1: Preparation and Safety Setup
Before diving in, gather your tools and ensure a safe workspace. This phase sets you up for success and prevents accidents.
Safety Precautions
- Unplug the unit: Always disconnect from power to avoid electrical hazards. Wait 10-15 minutes for any residual heat from the UV light to dissipate.
- Work in a well-ventilated area: Choose a flat surface like a kitchen counter covered with newspapers to catch debris.
- Wear protective gear: Use gloves to handle dusty filters and safety glasses if you’re sensitive to UV exposure during inspection.
Tool Preparation
You’ll need basic household items—no special tools required for most UV Care models. Here’s a quick list:
– Soft microfiber cloths or a vacuum with brush attachment
– Mild dish soap and lukewarm water
– Soft-bristle brush (like a clean toothbrush)
– Isopropyl alcohol (70% for electronics)
– Compressed air canister for hard-to-reach spots
Area Cleaning
Clear the space around the purifier and remove any nearby objects. If your model has wheels, move it to an open area. Inspect for visible dirt or pet hair on the exterior to gauge the level of buildup.
Step 2: Disassembly of Key Components
Gently take apart the unit to access cleanable parts. Refer to your model’s manual (downloadable from the UV Care website if lost) for specifics, as designs vary slightly between models like the UV Care Pro or Compact.
Removing the Pre-Filter and Grille
- Locate the front grille—usually clips or tabs secure it.
- Press the release buttons or twist to detach (takes about 1 minute).
- Pull out the pre-filter, a washable mesh that catches larger particles. Shake off loose debris over a trash bin.
Accessing the HEPA Filter and UV Chamber
- Open the main housing by sliding or unclipping the side panels—avoid forcing anything.
- Slide out the HEPA filter (not washable; vacuum only) and note its condition.
- Important: The UV chamber is delicate—handle with care. If your model has a removable tray, lift it out to expose the bulb. Do not touch the glass bulb directly to avoid oils from your skin reducing its efficacy.
Detaching Sensors and Collection Tray
- Many UV Care units have an ionizer or odor sensor at the base—gently wipe but do not remove unless specified.
- Empty the collection tray at the bottom, which catches water droplets from the UV process. Rinse under running water.
Step 3: Thorough Cleaning of Each Part
Now, clean each component individually. Use gentle methods to preserve functionality—UV Care purifiers are built for easy upkeep, but aggressive cleaning can scratch surfaces.
Cleaning the Pre-Filter
- Vacuum both sides with a brush attachment to remove dust (2-3 minutes).
- For deeper clean, soak in a basin of lukewarm soapy water for 10 minutes, then rinse thoroughly.
- Air-dry completely (at least 2 hours) before reinstalling—never use heat sources like hairdryers, as they can warp the mesh.
Maintaining the HEPA Filter and UV Bulb
- HEPA Filter: Use the vacuum’s crevice tool to gently suck away surface dust. If it’s heavily soiled (indicated by reduced suction), replace it—UV Care recommends every 6-12 months, costing $20-40.
- UV Bulb: Wipe the exterior glass with a cloth dampened in isopropyl alcohol. For the chamber, use compressed air to blow out residue. Warning: Do not clean the bulb while powered on, as UV light can cause eye damage even through glass.
- Test the bulb by plugging in briefly after drying— the indicator should glow steadily.
Wiping the Exterior and Internal Surfaces
- Dampen a microfiber cloth with soapy water and wipe the housing, vents, and control panel. Avoid excess moisture near buttons.
- For stubborn spots, use the soft brush. Dry immediately with a clean cloth.
- Clean the power cord and base with a dry cloth to prevent dust accumulation.
Step 4: Reassembly and Initial Testing
Put everything back together securely to ensure proper airflow.
- Reinsert components in reverse order: tray, UV chamber, HEPA filter, pre-filter, and grille.
- Plug in and power on—listen for normal fan noise and check that the UV light activates (usually within 30 seconds).
- Run on high for 10 minutes in an empty room to circulate any loosened particles, then vacuum the floor.
If issues persist after reassembly, double-check alignments—misplaced filters can block airflow.
Warning Signs That Indicate Immediate Attention Needed

Don’t wait for your scheduled clean if you spot these red flags, as they signal potential performance drops or health risks in your UV Care air purifier:
– Reduced airflow or unusual noise: Could mean clogged filters; clean immediately to prevent motor strain.
– Persistent odors: Indicates UV bulb weakening or dirty chamber—bacteria aren’t being neutralized.
– Flashing lights or error codes: Consult the manual; often points to sensor dirt or full collection tray.
– Visible mold or excessive humidity: Wipe down and dry thoroughly; run in a drier room to avoid recurrence.
– Allergy symptoms worsening: If air quality feels off despite usage, a deep clean or filter replacement is urgent.
Addressing these promptly can prevent costly repairs—UV Care support notes that 70% of service calls stem from neglected maintenance.
Pro Tips for Optimal UV Care Air Purifier Maintenance
To elevate your cleaning routine and maximize your purifier’s efficiency, try these expert-recommended strategies:
– Track usage hours: Use a timer app to log runtime—replace the UV bulb every 8,000-10,000 hours, as per manufacturer specs, to maintain germ-killing power.
– Incorporate essential oils sparingly: Add a drop to the pre-filter for natural odor control, but avoid overdoing it to prevent residue buildup.
– Position for best results: Place 2-3 feet from walls and away from direct sunlight to reduce dust intake and UV degradation.
– Common mistake to avoid: Skipping the dry time—wet components can cause electrical shorts; always wait 24 hours if in doubt.
– Optimize performance: Pair with a dehumidifier in damp climates to lessen moisture on the UV chamber, extending bulb life by 20%.
– Eco-friendly cleaning: Opt for vinegar-water solutions instead of soap for a natural antimicrobial boost without residues.
– Seasonal deep clean: Before allergy season (spring/fall), do an extra thorough clean to handle pollen spikes.
These tips can boost air purification efficiency by 30%, based on user reports from air quality forums.
When to Seek Professional Help for Your UV Care Air Purifier
While DIY cleaning handles most issues, some situations warrant expert intervention to avoid voiding your warranty or causing further damage.
– Signs for pro service: Persistent error codes after cleaning, burnt smells from the motor, or UV bulb failure (dim or non-glowing light). If disassembly reveals corrosion or broken parts, stop and call in.
– Choosing a provider: Look for certified technicians via UV Care’s authorized service network (check their website). Read reviews on sites like Yelp for reliability, and ensure they use genuine parts.
– Cost ranges: Basic cleaning/inspection: $50-100; UV bulb replacement: $80-150; Full repair: $150-300, depending on model. Labor is often 1-2 hours.
– Warranty considerations: UV Care offers 1-2 year warranties—keep receipts and avoid unauthorized mods. Professional service preserves coverage, unlike DIY mishaps.
If under warranty, contact UV Care support first for free advice or shipping instructions.
FAQ
Q: How often should I replace the filters in my UV Care air purifier?
A: The pre-filter can be washed indefinitely, but the HEPA filter needs replacement every 6-12 months or 6,000 hours of use, whichever comes first. Check the filter indicator light for alerts. Replacement packs cost $20-50 and are available on Amazon or the official site—always use OEM parts for compatibility.
Q: Can I use bleach to clean the UV chamber?
A: No, absolutely not—bleach can corrode the glass and release fumes. Stick to isopropyl alcohol or mild soap. If heavily soiled, professional cleaning is safer to avoid damaging the UV-C effectiveness.
Q: What if my UV light isn’t turning on after cleaning?
A: First, ensure everything is dry and reassembled correctly. Check the bulb for loose connections. If it persists, it might be a faulty bulb—test by running the fan only. Reset the unit by unplugging for 5 minutes. If no luck, contact support, as it could be an electrical issue.
Q: Is it safe to clean the purifier while it’s warm from use?
A: No, wait at least 15-30 minutes for the UV bulb to cool, as touching hot glass can cause burns or breakage. Unplugging also discharges any static buildup for safety.
Q: How do I know if the cleaning was successful?
A: Run the unit for 30 minutes and monitor airflow (should be strong and steady) and the air quality sensor if equipped. Sniff for freshness—odors should dissipate quickly. Use a separate air quality monitor app on your phone for objective readings.
Q: Can I clean the interior fan blades?
A: Yes, but only with compressed air or a soft brush—never water. Access via the rear panel on most models, and do this monthly to prevent vibration noise from dust.
Q: What’s the best way to store my UV Care air purifier if not in use?
A: Clean it thoroughly first, then store in a cool, dry place covered with a breathable cloth. Avoid plastic bags to prevent moisture trapping. Before reuse, inspect and clean again.
Alternative Solutions for UV Care Air Purifier Cleaning
If your UV Care model is older or hard to disassemble, consider these alternatives when standard cleaning isn’t feasible. They offer similar results with less hassle, though they may not match the UV integration.
| Solution | Pros | Cons | Best For |
|---|---|---|---|
| Professional Cleaning Kit (UV Care Official) | Includes specialized tools and solutions; warranty-safe | Costs $30-50 extra; requires shipping | Users wanting guided, foolproof maintenance |
| Ultrasonic Cleaner for Filters | Deep cleans without manual scrubbing; fast (5-10 mins) | Not suitable for UV bulb; machine costs $20-100 | High-dust homes needing quick filter refresh |
| Third-Party Air Purifier Service | Comprehensive check-up; handles all models | More expensive ($100+); less convenient | Complex issues or non-UV Care units as backup |
| DIY Vinegar Soak Method | Natural, cheap; kills mild bacteria | Less effective on heavy grime; drying time longer | Eco-conscious users on a budget |
Compare based on your needs— for UV-specific care, stick to official methods to preserve germ-killing tech.
Keep Your UV Care Air Purifier Running Smoothly
By following this guide on how to clean UV Care air purifier, you’ve gained the tools to maintain peak performance and breathe easier:
– A clear schedule to prevent buildup
– Step-by-step disassembly, cleaning, and reassembly processes
– Pro tips and warning signs for proactive care
– Options for when to call in experts
Investing time in regular maintenance not only enhances air quality but also saves you from premature replacements. Start with your next scheduled clean today, and enjoy fresher, healthier air year-round.
Have you cleaned your UV Care air purifier using these steps? Share your tips or challenges in the comments below to help fellow readers! If issues linger, describe them for community advice.


