That persistent scratchy throat, shocking doorknobs, and creaking wooden floors aren’t winter quirks—they’re your home screaming for moisture. When indoor humidity crashes below 30%, every breath feels like sandpaper and your furniture starts cracking. While humidifiers promise relief, they cost hundreds, demand constant cleaning, and often break down when you need them most.
The truth? Your kitchen, bathroom, and living room already contain everything needed to transform parched air into comfortable humidity. From simmering pots to sun-warmed windowsills, ordinary household items can boost moisture levels naturally and safely. You’ll learn exactly how to humidify a room without a humidifier using methods that cost nothing and work immediately—no gadgets required.
Boil Water for Instant Room-Wide Steam

Skip the appliance store and head straight to your kitchen. Heating water releases vapor faster than any store-bought humidifier, with immediate results you can feel within minutes. A single 6-quart pot simmering uncovered for 2 hours pumps nearly 1.5 cups of moisture into dry air—enough to noticeably ease throat irritation in a 200-square-foot room.
Stovetop Steam Powerhouse
– Fill a large pot with water (add citrus peels or cinnamon sticks for natural fragrance)
– Bring to a gentle simmer on low heat—never a rolling boil to prevent scalding
– Place near air vents to distribute vapor through your home
– Critical safety rule: Keep water level above 1 inch to avoid damaging your stove
Rice Cooker Overnight Hack
– Fill your rice cooker with 4 cups of water
– Set to “cook” mode until boiling, then switch to “keep warm”
– Releases moisture steadily for 8+ hours while you sleep
– Pro tip: Position near your bed for overnight respiratory relief—just monitor humidity to avoid window condensation
Capture Shower Steam Like a Professional
Leaving your bathroom door sealed during showers wastes a massive moisture source. Hot showers generate 2-3 gallons of vapor, but exhaust fans and closed doors trap it where it can’t help you. The solution? Redirect that steam intentionally.
Door Crack Technique
– Position a rolled towel at the bathroom threshold to block water leakage
– Crack the door open 2-3 inches during and for 30 minutes after showering
– Crucially: Turn OFF exhaust fans—this counterintuitive move boosts adjacent room humidity by 5-10%
– Best for: Hallways, bedrooms, and living areas connected to your bathroom
Tub Water Retention Method
– After bathing, leave 2-3 inches of water in the tub
– Let it cool completely (2-3 hours) to maximize evaporation
– Time-saving hack: Drain during your next bathroom visit—no extra effort needed
Dry Laundry Indoors for All-Day Moisture

Your washing machine is a hidden humidifier. Wet fabrics release moisture as they dry, with one full load emitting approximately 1.5 gallons of water vapor—enough to noticeably increase humidity in small spaces. Skip the dryer and harness this free resource.
Optimal Drying Setup
– Place a collapsible rack 2-3 feet from radiators or sunny windows
– Prioritize high-absorbency fabrics: towels, cotton sheets, and denim jeans
– Rotate clothes every few hours to accelerate drying and vapor release
– Warning: Never dry synthetics indoors—they shed microplastics and dry too quickly to help
Pro Moisture-Boosting Move
– Dampen (don’t soak) heavy cotton towels before hanging
– Mist fabrics lightly with water if air feels extremely dry
– Key safety note: Ensure complete drying within 24 hours to prevent musty odors
Strategic Water Bowl Placement for Silent Humidification
Decorative bowls of water aren’t just pretty—they’re precision humidity tools. Surface area and heat exposure determine evaporation speed, with shallow containers releasing moisture 2-3x faster than narrow vases. Place them where warmth and airflow maximize results.
High-Impact Locations
– Radiator tops: Use ceramic or metal bowls (never plastic) filled within 1 inch of the rim
– Sunny windowsills: South-facing spots accelerate evaporation 4x in winter sunlight
– Near heat vents: Warm airflow carries vapor deeper into your space
Container Hacks
– Fill wide bowls (12+ inches diameter) with water and decorative stones
– Add 5-10 drops of essential oil for subtle fragrance
– Maintenance must: Replace water daily and scrub mineral deposits weekly with vinegar
Houseplants as Living Humidifiers
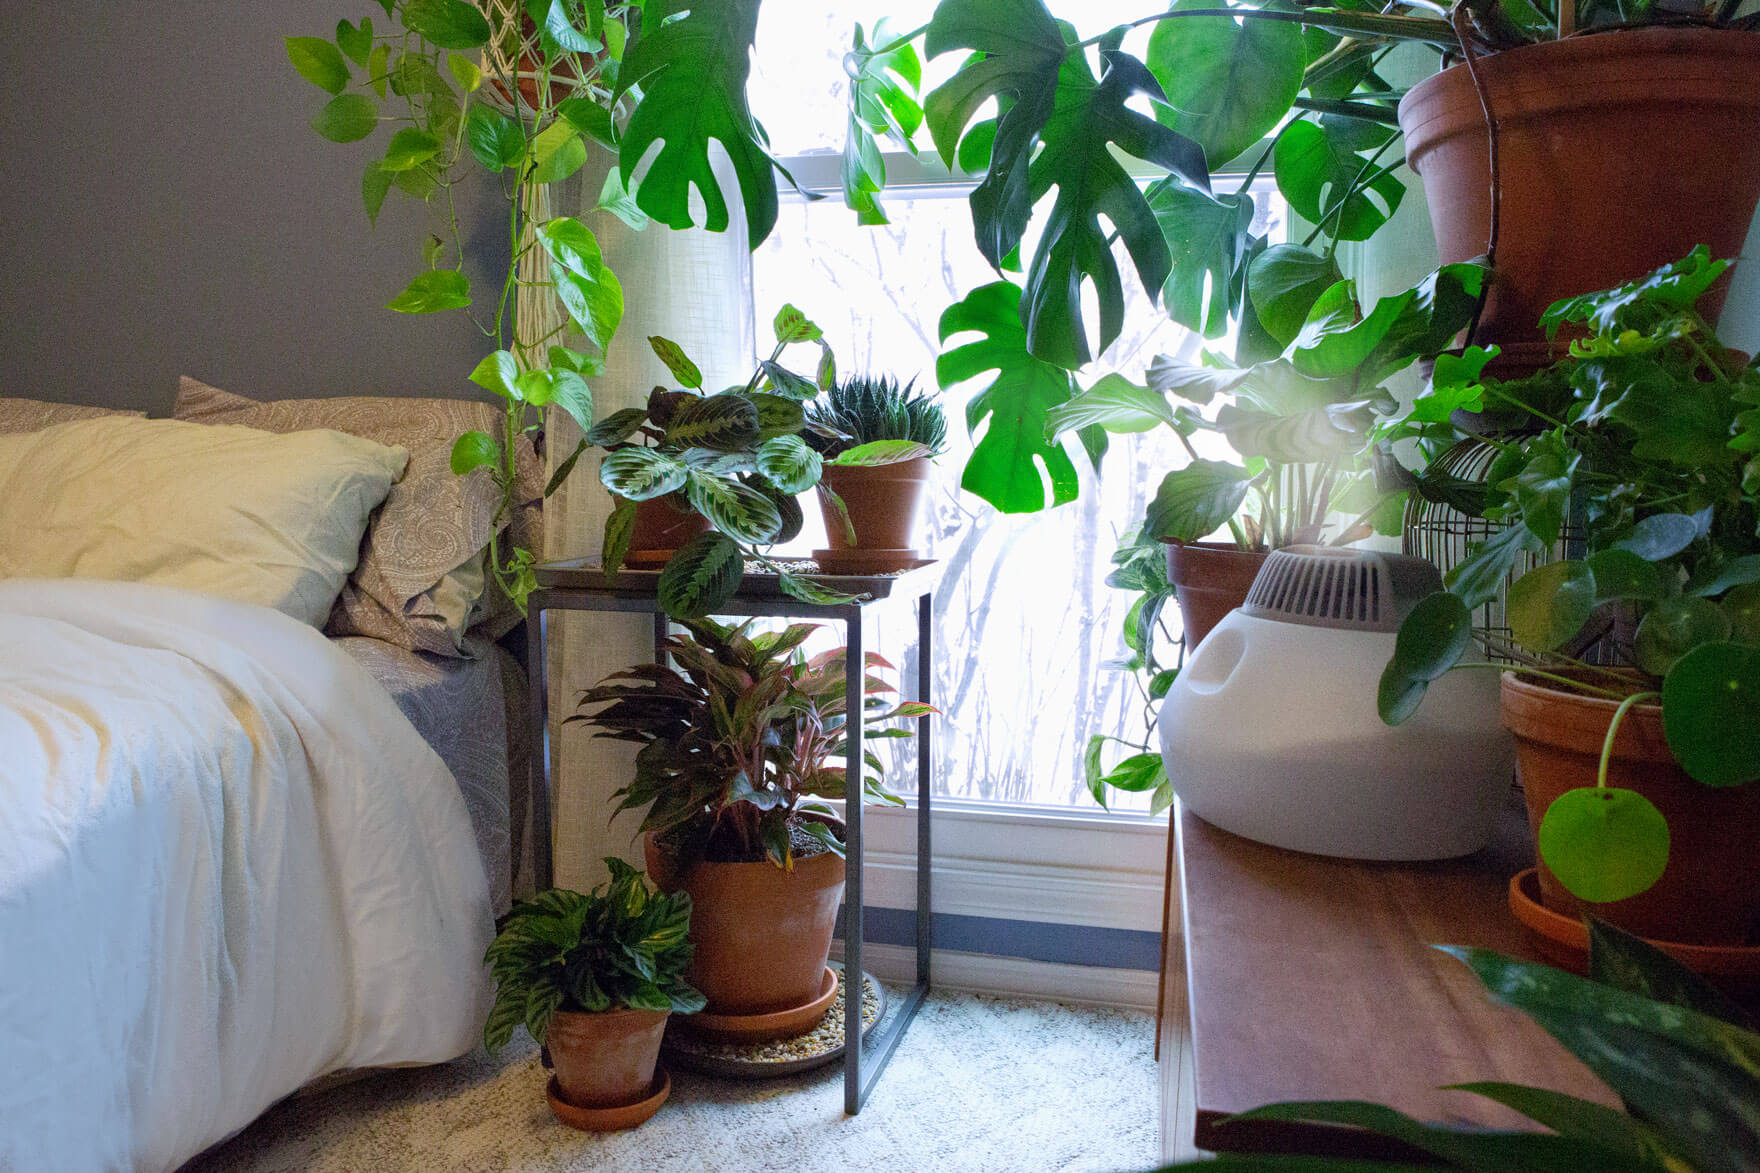
Forget gadgets—real plants outperform most humidifiers through transpiration. A single Boston fern releases 1 pint of moisture daily, while a mature Areca palm outputs over 1 liter. These living systems humidify while purifying air, making them dual-purpose solutions.
Top 3 Moisture-Producing Plants
– Peace Lily: Releases 1/4 cup vapor daily—ideal for nightstands
– Spider Plant: Thrives in dry air while steadily adding humidity
– Bamboo Palm: Group 3+ plants for noticeable moisture in living rooms
Pro Placement Strategy
– Cluster plants within 2 feet of each other for synergistic effects
– Water thoroughly every 3-4 days (moist soil = maximum output)
– Position near electronics to combat static electricity damage
DIY Fan-Powered Humidification Systems
Combine airflow with water sources for targeted relief. These setups cost less than $5 and work faster than passive methods—perfect for quick fixes in bedrooms or home offices.
Sponge Wick System
1. Cut a large sponge to fit a glass container widthwise
2. Submerge the bottom 2 inches in water
3. Position a fan 6 inches behind it on low speed
4. Output: Boosts humidity 10-15% in 30 minutes
Critical Safety Steps
– Keep water level 3+ inches below fan base
– Use only battery-operated fans to eliminate shock risk
– Never leave unattended for more than 2 hours
Combine Methods for Maximum Results
Single tactics help, but stacking techniques creates dramatic improvements. Target 40-50% relative humidity—the sweet spot for health and home protection—by matching solutions to your space.
Bedroom Overnight Protocol
– Rice cooker with water on “keep warm” mode
– Peace lily on nightstand + 2 water bowls on windowsill
– Damp towel draped over radiator (re-wet every 3 hours)
– Expected result: 25% → 45% RH by morning
Large Room Strategy
– Simmer pot on stove during cooking hours
– Indoor laundry drying rack near heat source
– Cluster of 5+ moisture-producing plants
– Pro tip: Run methods 2 hours before bedtime for all-night comfort
Safety Essentials You Must Know
Humidity above 50% invites mold, while improper setups risk electrical hazards. Protect your home with these non-negotiable rules.
Mold Prevention Thresholds
– Immediate action required if:
– Windows fog for more than 10 minutes
– Musty smells develop near water containers
– Fix fast: Open windows for 15 minutes daily to exchange air
Water Container Safety
– Keep all bowls 6+ inches from outlets and electronics
– Use only ceramic/metal containers on radiators (glass may shatter)
– Never place water near space heaters or electric baseboards
10-Minute Humidity Rescue Checklist
Right Now (0-10 minutes)
– Start simmering water on stove with orange peels
– Take a hot shower with door cracked and fan off
– Dampen two towels and place on radiators
This Week
– Add 3 high-transpiration plants (Peace Lily, Spider Plant, Boston Fern)
– Begin air-drying one laundry load indoors daily
– Position 4-5 decorative water bowls in dry zones
Pro Long-Term Move
– Buy a $10 hygrometer to monitor levels
– Rotate methods seasonally (more plants in summer, simmer pots in winter)
– Critical: Never exceed 50% RH to protect your home
By implementing these zero-cost strategies, you’ll maintain healthy humidity levels using items already in your home. No expensive equipment, no maintenance headaches—just smarter use of daily routines. Within hours, that scratchy throat will ease, static shocks will vanish, and your wooden floors will stop protesting. Start with one method today, and you’ll feel the difference before bedtime.