
Dry winter air turning your home into a static-charged desert? Cracked wood floors, bloody noses, and parched skin signal your HVAC system needs moisture help. Installing a whole house humidifier solves this by integrating with your furnace to distribute balanced humidity through every vent—no more portable units fighting single rooms. Most homeowners complete this project in one weekend, saving $300-$1,200 over professional installation while protecting health and home. This guide delivers precise steps to select, mount, and activate your system safely using standard tools.
Match Your Humidifier to Home Size and Layout
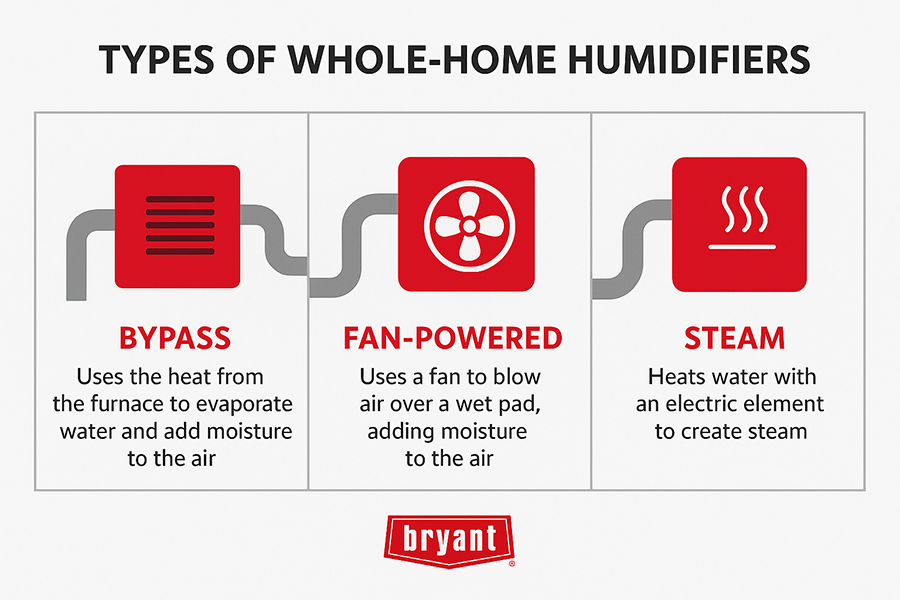
Bypass Units: Standard Homes Under 2,000 Square Feet
Select bypass humidifiers if your home has conventional ductwork. These rely on your furnace blower to pull air through a water panel, requiring a bypass duct connecting supply and return plenums. They deliver 17-18 gallons daily—ideal for compartmentalized layouts under 2,000 sq ft. Confirm you have 12+ inches of clearance near the plenum for the required duct connection.
Fan-Powered Models: Limited Duct Access Solutions
Choose fan-powered units when ductwork access near your furnace is restricted. An internal fan forces air through the water panel independently, eliminating bypass duct needs. These handle 2,000-4,000 sq ft effectively in open-concept homes. Verify you can mount the unit directly on the supply plenum with drain access below—no secondary duct cutting required.
Steam Systems: Large Homes Over 4,000 Square Feet
Opt for electric steam humidifiers only if your home exceeds 4,000 sq ft or has sprawling open layouts. These generate 34+ gallons daily by boiling water but demand dedicated 120V circuits and professional electrical upgrades. Critical warning: DIY installation voids most steam unit warranties—hire a pro unless you’re experienced with high-voltage HVAC work.
Prepare Workspace with Precision Measurements
Locate Water and Drain Lines Within 6 Feet
Identify the nearest ½-inch cold water line within 6 feet of your furnace—kitchen or bathroom supply lines work best. For drainage, confirm a floor drain exists within 10 feet or budget for a condensate pump ($50). Measure distances with a tape measure before buying tubing to avoid kinks that cause leaks.
Verify Electrical Compatibility at Furnace Panel
Check for a 24V transformer near your furnace control board. If absent, you’ll need to install one ($25) to power the humidistat. Use a non-contact voltage tester to confirm existing transformer output before wiring. Never skip this step—incorrect voltage damages control boards.
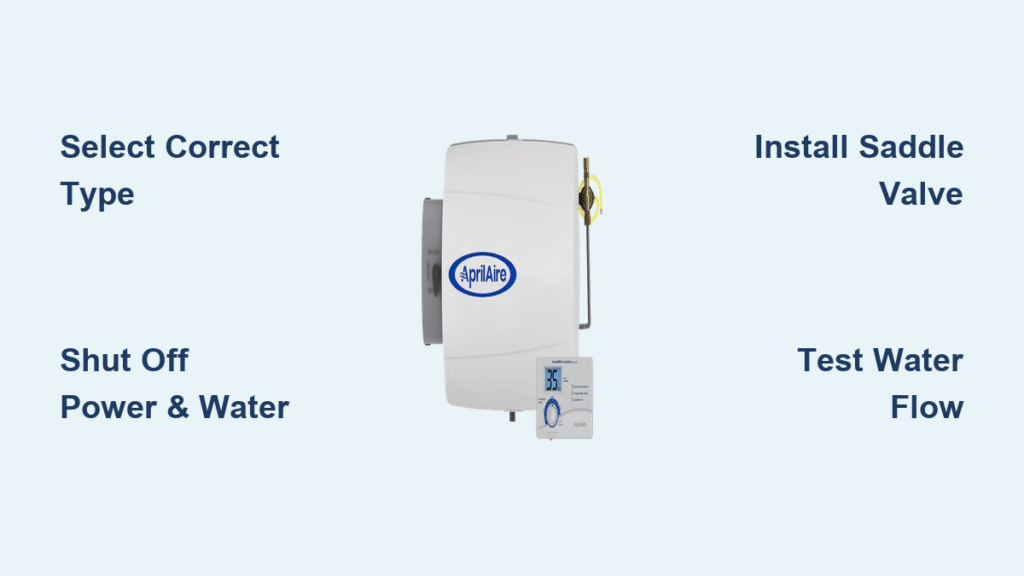
Power Down HVAC System Completely
Cut Electricity at the Source
Turn off your thermostat, then flip the furnace breaker at your main electrical panel to “OFF.” Test wires with a non-contact voltage tester to confirm zero power—one live wire could cause electrocution. Close the main water shutoff valve and drain nearby lines to prevent flooding during connections.
Gear Up for Metal and Water Work
Wear cut-resistant gloves and safety glasses before handling ductwork. Metal snips create sharp edges that cause severe cuts. Lay drop cloths under your work area to catch metal shavings that could damage furnace components. Keep a bucket nearby for accidental water spills.
Cut and Secure Humidifier Opening Correctly
Trace and Cut Supply Plenum Hole
Position the manufacturer’s template on your supply air plenum 12+ inches from bends. Drill ¼-inch pilot holes at corners, then insert aviation snips to cut along lines. File rough edges smooth—jagged metal tears the foam gasket, causing air leaks. Vacuum all metal debris from the duct before proceeding.
Mount Unit with Level Alignment
Press the foam gasket around the plenum opening, then insert the mounting plate. Drive screws through pre-drilled holes while holding a level against the unit—improper leveling traps water, causing mold. Tighten screws just enough to compress the gasket without crushing it. Recheck level after each screw.
Connect Water Supply Without Leaks

Install Saddle Valve on Cold Water Line
Shut off main water supply before attaching a saddle valve to a horizontal pipe section. Tighten the piercing screw slowly until water flows—over-tightening cracks pipes. Route ¼-inch copper tubing to the humidifier with gentle curves (no sharp bends). Secure tubing with pipe straps every 18 inches.
Test for Drip-Free Connections
Turn water on slowly while inspecting all joints. A single drip wastes 20+ gallons daily. If leaks persist, tighten compression fittings ⅛ turn max—excessive force strips threads. Pour vinegar down the drain line to clear mineral buildup before final testing.
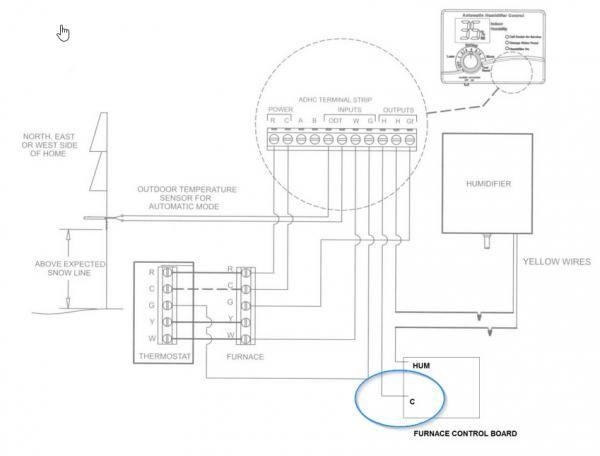
Wire Humidistat for Accurate Control
Mount Control on Return Duct at Eye Level
Install the humidistat on the return air duct 4-5 feet high using the template. Avoid locations near heat sources that skew readings. Run low-voltage wire through the wall to the furnace, leaving 6-inch service loops at both ends for future adjustments.
Connect to Furnace Control Board Safely
Link humidistat wires to the “W” (heat) and “C” (common) terminals on your furnace control board. Double-check polarity—reversed wires prevent activation. For steam units, connect the pressure switch per the diagram to halt operation if drainage fails. Restore power and set humidistat to 35% for initial testing.
Test System Before Seasonal Use
Verify Water Flow and Drainage
Run the furnace for 15 minutes while checking:
– Steady water trickling over the evaporator pad
– Drain line discharging freely (no pooling)
– Humidifier cycling on/off with the blower
Immediate red flags: Standing water in the unit (clogged drain) or dry pads (water supply issue).
Calibrate for Optimal Home Comfort
Monitor humidity levels with a digital hygrometer placed away from vents. Adjust settings in 5% increments:
– Start at 35% during first cold snap
– Lower to 30% if window condensation appears
– Increase to 45% during extreme cold (below 20°F)
Pro tip: Place hygrometers in bedrooms and living areas—rooms furthest from the furnace often need 5% higher settings.
Prevent Costly Failures with Monthly Checks
Replace Evaporator Pads Before Mineral Clogs
Check pads monthly during heating season. If white crust covers 30% of the surface, replace immediately—mineral buildup blocks moisture output. Turn off water and power, slide out the old pad, and insert a new one with the label facing up. Discard used pads; cleaning them spreads bacteria.
Flush Drain Lines with Vinegar Every 60 Days
Prevent algae clogs by pouring 1 cup of white vinegar down the drain tube monthly. For severe buildup, disconnect the line and soak it in vinegar for 30 minutes. Reconnect ensuring a ¼-inch-per-foot downward slope—stagnant water breeds mold spores that circulate through ducts.
Troubleshoot Emergencies in Minutes
Stop Leaks from Saddle Valves Instantly
If water sprays from a saddle valve connection:
1. Shut off main water supply
2. Unscrew the valve’s piercing screw completely
3. Wipe pipe dry and re-pierce at a new spot 2 inches away
4. Tighten screw just until dripping stops
Never use thread sealant—it contaminates drinking water lines.
Fix “No Humidity” When Furnace Runs
When the humidifier won’t activate:
– Check humidistat setting exceeds current room humidity
– Test transformer output with a multimeter (should read 24V)
– Inspect bypass damper position (must be open in winter)
– Replace clogged water inlet screens with a paperclip
Maximize Long-Term Value with Smart Settings
Save Heating Costs Through Humidity Tuning
Maintain 35% humidity to feel 3-5°F warmer, slashing heating bills by 5-15%. Lower settings 5% for every 10°F drop in outdoor temperature—exceeding 40% when below 0°F causes window condensation. Pair with a smart humidistat that auto-adjusts based on outdoor sensors.
Extend Home Lifespan with Consistent Moisture
Wood floors and furniture crack when humidity dips below 30%. Run your humidifier whenever heating season lasts more than 3 days. For pianos or antique woodwork, place a hygrometer nearby and maintain 45% humidity—this prevents $500+ repair bills from seasonal warping.
Your whole house humidifier installation is complete! Expect relief from dry skin and static within 24 hours as moisture stabilizes. Monitor window condensation closely during the first cold snap—it’s your instant indicator of over-humidification. Remember: Consistent 30-50% humidity protects health, saves energy, and preserves your home’s value. Schedule pad replacements every 2 months during peak use for uninterrupted comfort all winter.


