
That dry, scratchy throat hits every winter when your heating system kicks into high gear. You finally bought a humidifier, but now you’re staring at it wondering exactly how much water goes where, and whether tap water will ruin the thing. The good news? Filling a humidifier correctly takes less than two minutes once you know the steps—and getting it wrong can lead to everything from white dust coating your furniture to potentially harmful bacteria blowing through your home.
Most humidifier failures stem from improper water handling. Pouring straight from the tap without checking your model type risks mineral buildup that clogs internal components within weeks. Overfilling causes leaks that damage floors, while skipping daily water changes creates breeding grounds for mold. This guide walks through the exact filling process for every major humidifier type, plus the water choices that prevent problems before they start. You’ll learn why distilled water matters, how to seat tanks properly, and the critical safety checks that keep your unit running smoothly all season.
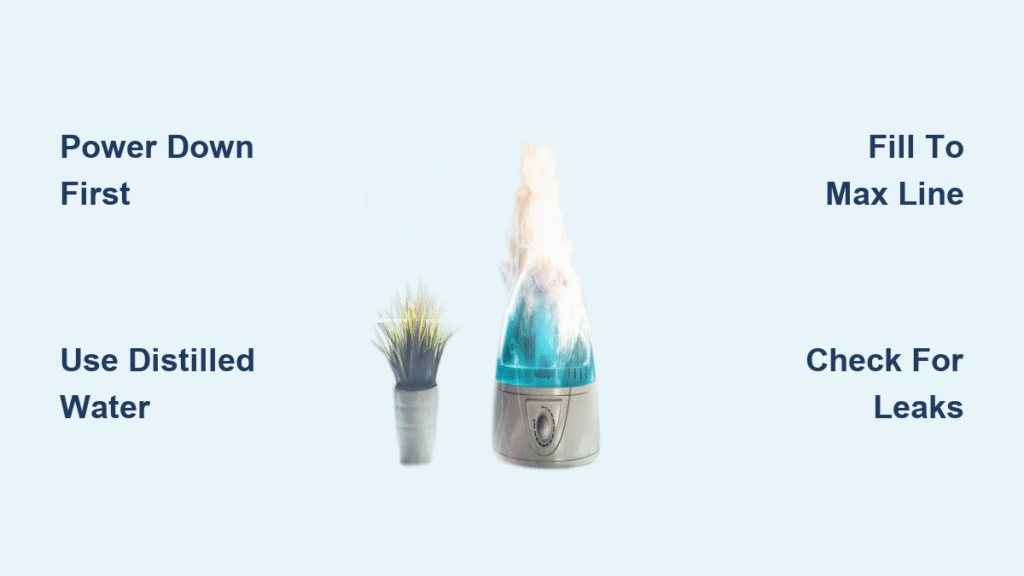
Power Down Before Adding Water
Turn Off and Unplug First
Never handle water near an active electrical unit. Always flip the power switch to OFF before touching the reservoir, then physically unplug it from the wall outlet. This eliminates shock risks when opening tanks or cleaning components. Skipping this step could cause severe electrical hazards if water spills onto live terminals during filling.
Locate Your Model Type
Identify your humidifier’s fill mechanism before proceeding:
– Removable tank: The reservoir lifts straight off the base (common in bedside units)
– Top-fill: Features a hinged door on the upper housing (no tank removal needed)
– Bottom-fill: Requires sliding out a drawer or opening a lower compartment (typical in console models)
Misidentifying your type leads to forced handling that cracks plastic components. Check your manual if unsure—forcing a top-fill door on a removable-tank model can snap internal latches.
Water Types That Prevent Problems
Choose Distilled for Best Results
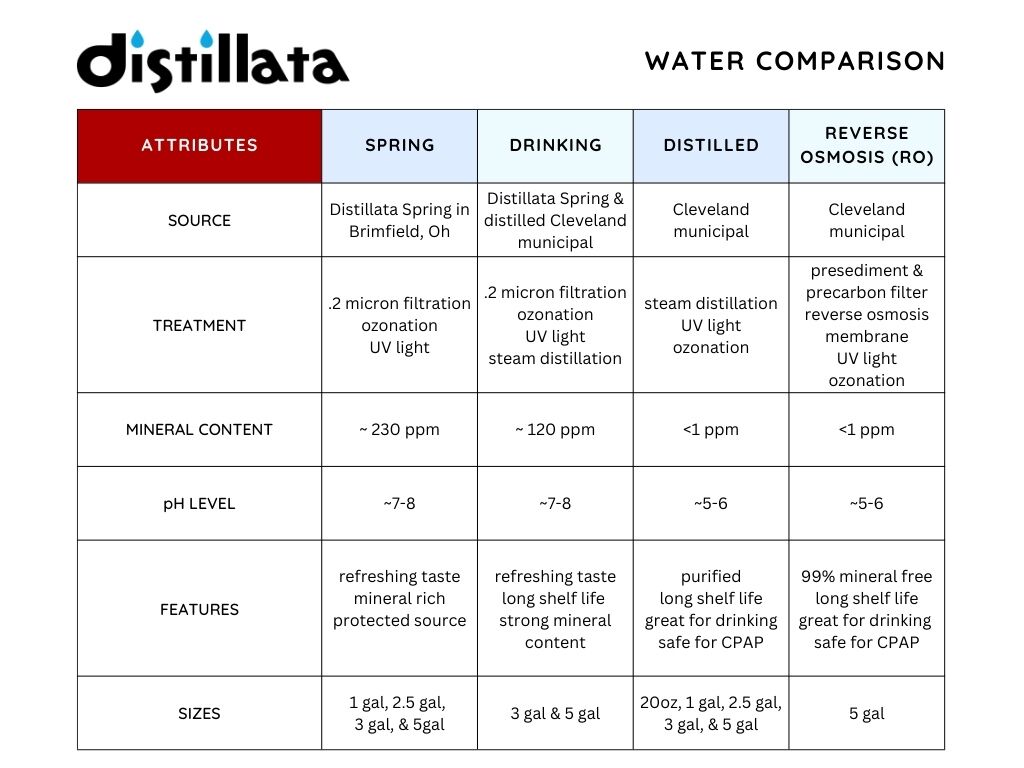
Distilled water contains zero minerals, making it essential for ultrasonic humidifiers that vaporize water into fine mist. Without it, calcium and magnesium in tap water create white dust that coats furniture and irritates lungs. Distilled water also prevents chlorine corrosion in internal parts, extending your unit’s lifespan by years. For health-sensitive households (infants, asthma sufferers), it’s non-negotiable—it eliminates microbial risks from contaminated municipal water.
When Tap Water Works
Cool tap water runs safely only if:
– Your manual explicitly permits it (many evaporative models allow this)
– Your water tests below 85 ppm hardness (check local water reports)
– The unit has built-in filters or demineralization cartridges
Never use hot water—it warps plastic tanks within weeks and risks scalding when handling. Room-temperature distilled remains the universal safe choice.
Removable Tank Filling Steps

Remove and Position Tank
Grip the tank firmly with both hands and lift straight up—no twisting. Immediately flip it upside-down over a sink so the fill opening faces skyward. This traps residual water inside, preventing spills. Hold it inverted while checking for cracks near the valve stem; hairline fractures cause leaks even with perfect reseating.
Fill to Exact Line
Look for the MAX FILL marking inside the tank (usually 0.5–1.5 gallons depending on size). Pour slowly until water reaches this line—never above. Overfilling forces water into the base unit during reassembly, triggering immediate leaks. Use a narrow-spout pitcher for precision; splashing introduces contaminants that accelerate mold growth.
Secure the Cap Properly
After removing the cap counterclockwise, inspect the rubber O-ring for cracks or mineral crust. Replace damaged gaskets immediately—they cost under $5. When reinstalling, align threads perfectly and twist clockwise until snug. Do not over-tighten; this strips plastic threads, causing persistent leaks. Hand-tight is always sufficient.
Reinstall with Confidence
Carry the filled tank upright to the base. Center the valve stem over the docking port and lower straight down until you hear a distinct click. This confirms the internal valve opened. If you don’t hear it, lift and retry—partial seating causes continuous water flow that floods your floor within minutes.
Top-Fill Systems Made Simple
Open the Fill Door
These models eliminate tank removal. Lift the top cover or slide the access panel—some have spring-loaded flaps that auto-open when you insert a pitcher spout. Never force stiff doors; this cracks plastic hinges. If resistance occurs, power down and check for mineral buildup around the seal.
Pour Directly and Close
Add water while watching the internal MAX line, filling to that mark only. Close the cover firmly until it latches with an audible snap. A partially closed door causes two problems: water evaporates prematurely, reducing runtime, and condensation drips onto electronics below. Always verify full closure before powering on.
Bottom-Fill Console Units
Access the Water Drawer
After unplugging, slide out the bottom drawer or open the hinged reservoir door. Console units hold 3–6 gallons, so use a garden hose adapter or large pitcher. Fill slowly to avoid splashing contaminants into the pump chamber. Never submerge the entire unit—this damages internal motors.
Close Securely
Push the drawer shut until you feel magnetic resistance or hear a latch engage. A gap of even 1/8 inch prevents operation; most units have safety switches that kill power if not fully closed. Test by gently tugging the drawer—it shouldn’t budge.
Post-Fill Safety Checks
Immediate Leak Inspection
Run fingers around the base and tank seams before plugging in. Any dampness means:
– Cross-threaded cap
– Cracked O-ring
– Misaligned tank
Wipe spills immediately—water near electrical components risks short circuits. If leaks persist, disassemble and reseat components; never operate a leaking unit.
Filter and Cartridge Placement
Evaporative models: Insert a clean, pre-soaked wick filter until it clicks into its slot. A dry filter won’t absorb water, causing overflow.
Ultrasonic units: Snap demineralization cartridges firmly into place. Loose cartridges allow mineral-rich mist to blow into your room.
Always verify no parts rattle inside—this indicates improper assembly.
First Start-Up Test
Power on and watch for mist within 60 seconds. The humidity display should show ambient levels (typically 20–30% in winter) and rise steadily. No mist? Immediately unplug and reseat the tank—delaying risks water damage to internal electronics.
Daily and Weekly Maintenance
Empty Every 24 Hours
Stagnant water breeds bacteria in under 12 hours. Every morning:
1. Unplug and empty remaining water
2. Rinse the tank with clean water
3. Refill with fresh water (never top off old water)
This simple step prevents musty odors and biofilm buildup that clogs sensors.
Weekly Deep Clean Routine
Once weekly:
1. Disassemble all parts (tank, base, filter)
2. Wash with mild soap and soft brush
3. Soak 15 minutes in 1:1 white vinegar/water solution
4. Rinse until vinegar smell vanishes
5. Air-dry 30+ minutes before reassembly
Skipping deep cleans causes mineral scale that reduces mist output by 40% within months.
Troubleshooting Filling Problems
When Water Leaks Immediately
Fix: Remove the cap, inspect the O-ring for tears, and reinstall evenly. Cross-threading is the #1 cause—start threads by hand before tightening.
No Mist After Refilling
Fix: Lift the tank straight up, then reseat it with firm downward pressure until you hear the valve click. Misalignment blocks water flow to the misting chamber.
White Dust Everywhere
Fix: Switch to distilled water immediately. Tap water minerals vaporize into airborne particles that settle on surfaces. Demineralization cartridges won’t fix this once dust appears.
Musty Odor from Mist
Fix: Empty the tank, deep-clean with vinegar, and replace water daily. Lingering odors mean mold has colonized internal parts—prolonged exposure risks respiratory issues.
Special Considerations
High-Mineral Water Areas
If your tap water leaves crusty spots on faucets, expect rapid scale buildup. Install an inline demineralization filter or use refrigerator-filtered water. Replace filters every 4–6 weeks (instead of 3–4 months) to maintain performance.
Essential Oil Compatibility
Never add oils directly to the water tank unless your manual states compatibility. Most units lack oil-resistant seals—oils degrade rubber gaskets and clog ultrasonic discs. Use manufacturer-approved oil trays only.
Travel and Storage Prep
Before moving:
– Empty all water completely
– Air-dry components for 24 hours
– Store disassembled to prevent mildew
Never transport a humidifier with residual water—it leaks during transit and breeds mold in storage.
Optimal Placement Tips
Position your unit 12 feet from walls for proper air circulation and 6 feet from beds to avoid damp pillows. Always place it on a waterproof tray to protect floors from accidental spills. Keep it away from wood furniture and electronics—excess moisture warps surfaces and corrodes circuitry.
Health-Conscious Practices
Pregnant women, infants, and asthma sufferers must use distilled water and change it daily. This eliminates microbial risks while maintaining the ideal 30–50% humidity range. Units running on contaminated water can aerosolize bacteria like Legionella, triggering respiratory infections in vulnerable groups.
Master these filling techniques and your humidifier becomes a silent health ally rather than a maintenance headache. The two-minute daily routine of emptying and refilling prevents every major problem—white dust, bacteria growth, and mineral buildup—while keeping your air comfortably moist all winter long. Proper water handling isn’t just about function; it’s your frontline defense against airborne health hazards in heated indoor spaces.


