Setting up an air purifier can feel overwhelming if you’re dealing with poor indoor air quality, especially in a dusty home or during allergy season. You might be staring at a box of parts, wondering where to start, but don’t worry—air purifier setup is simpler than it seems. This guide will walk you through a quick initial setup that gets your device running in under 15 minutes, providing immediate relief from allergens, odors, and pollutants.
Beyond the basics, this comprehensive air purifier setup guide dives deeper into preparation, detailed steps, testing, and tips to ensure optimal performance. By the end, you’ll have your purifier up and running efficiently, improving your home’s air quality and your overall well-being. Whether it’s a compact model for a bedroom or a whole-room unit, we’ll cover everything to build your confidence and avoid common pitfalls.
What You’ll Need for Air Purifier Setup
Before diving into the air purifier setup process, gather the right tools and materials to make things smooth and efficient. Most air purifiers come with everything you need out of the box, but having a few extras on hand can prevent delays. This list assumes a standard plug-in model like those from brands such as Honeywell, Levoit, or Coway—check your model’s manual for specifics, as smart features might require additional apps or Wi-Fi.
Use this table to organize your essentials:
| Item | Quantity | Specifications |
|---|---|---|
| Air Purifier Unit | 1 | Your specific model (e.g., HEPA filter type for allergens) |
| Power Outlet Extension | 1 (optional) | Surge-protected, 6-10 ft cord for flexible placement |
| Screwdriver or Allen Wrench | 1 | Phillips or hex head, size matching assembly instructions (usually small) |
| Cleaning Cloth | 1 | Microfiber, lint-free for wiping surfaces |
| Smartphone or Tablet | 1 (for smart models) | iOS or Android compatible with the purifier’s app |
| User Manual | 1 | Included in box; download digital version if lost |
| Filters (pre-installed or spare) | As needed | HEPA or carbon filters; ensure they’re the correct size for your model |
These items should cover 95% of setups. If your air purifier requires wall mounting (rare for most home units), add brackets and a level tool. Pro tip: Always verify compatibility with your room size—aim for a purifier rated for 200-500 sq ft for medium rooms to ensure effective air cleaning.
Preparing for Air Purifier Setup
Proper preparation is key to a hassle-free air purifier setup, minimizing risks like electrical issues or poor placement that could reduce efficiency. Start by choosing the right location: Place the unit in a central spot with good airflow, away from walls, curtains, or furniture that might block intake vents. For optimal performance, select a room where you spend the most time, like a living room or bedroom, and ensure it’s on a flat, stable surface at least 1-2 feet from walls.
Safety comes first—Warning: Never plug in the unit near water sources like sinks or humidifiers to avoid electrical hazards. Unbox carefully to avoid damaging filters, which are delicate and expensive to replace (typically $20-50 each). Inspect for any shipping damage; if you spot cracks or missing parts, contact the manufacturer immediately for a replacement. Allow the unit to acclimate to room temperature for 30 minutes if it’s been in a cold garage, as extreme temps can affect electronics.
Clean the area around the setup spot to remove dust buildup—ironic, but it prevents the purifier from working overtime right away. If your model has wheels, test them for smooth movement. For smart air purifiers, download the companion app (e.g., VeSync for Levoit models) and create an account ahead of time. This prep phase should take about 10-15 minutes and sets the foundation for long-term air quality improvement.
Step-by-Step Air Purifier Setup Process

Now that you’re prepared, let’s break down the air purifier setup into logical phases. This process is designed for most tabletop or floor-standing models and typically takes 20-45 minutes total, depending on features like app integration. Follow these phases sequentially, and refer to your manual for model-specific variations. We’ll use numbered steps for clarity within each phase.
Phase 1: Unboxing and Initial Inspection
Unboxing is your first hands-on step in air purifier setup, ensuring all components are intact.
- Open the box using scissors or a box cutter, and remove the purifier unit carefully—lift by the base to avoid straining the top vents.
- Check for included items: filters, power cord, manual, and any remote or adapters. Lay them out on a clean surface.
- Inspect the unit for damage: Look at the filter slots, power port, and control panel. If filters are wrapped in plastic, remove it now but don’t install yet.
- Wipe the exterior with a dry microfiber cloth to remove any manufacturing residue. Important: Do not use water or cleaners, as they can seep into electronics.
This phase takes about 5 minutes and prevents issues like voided warranties from mishandling.
Phase 2: Filter Installation and Assembly
Filters are the heart of your air purifier, so proper installation is crucial for effective air purifier setup.
- Locate the filter compartment—usually on the back or bottom; slide or twist to open.
- If pre-installed filters are present, remove any protective coverings. For new filters, slide them into place, ensuring the airflow arrow matches the unit’s direction (check the manual for diagrams).
- Secure any additional components, like a pre-filter screen or carbon layer, by snapping or screwing them in. Use the provided screwdriver if needed for tight fits.
- Close the compartment firmly—listen for a click to confirm it’s sealed. Warning: Loose filters can cause vibrations or reduced suction, leading to noisy operation.
For models with washable pre-filters (e.g., some Honeywell units), rinse under lukewarm water now and air-dry for 24 hours before reinstalling. This phase usually takes 10 minutes and directly impacts air purification efficiency.
Phase 3: Placement and Power Connection
Positioning affects how well your purifier circulates air, making this a pivotal part of air purifier setup.
- Move the unit to your chosen spot, ensuring at least 12 inches of clearance around vents for intake and exhaust.
- Plug the power cord into the unit’s port, then into a grounded outlet. Use an extension only if it’s surge-protected to avoid power fluctuations.
- For smart models, connect to Wi-Fi: Power on the unit, open the app, and follow prompts to pair via Bluetooth or QR code scanning. This might involve entering your home network credentials.
- Adjust any physical settings, like fan speed or timer, using the control panel buttons.
If your room has high humidity, consider elevating the unit slightly for better airflow. This phase should wrap up in 5-10 minutes, getting you closer to clean air.
Phase 4: Initial Power-On and Basic Testing
With everything assembled, it’s time to activate your air purifier setup and verify functionality.
- Press the power button—most units will beep or light up, indicating startup.
- Run on auto or medium fan speed for 5-10 minutes to circulate air. Listen for unusual noises like rattling, which could mean loose parts.
- Check the display: If it has an air quality sensor (common in mid-range models like the Coway Airmega), it should show initial readings—green for good, red for poor.
- For app-enabled units, monitor real-time data and set schedules, like running overnight.
If the unit doesn’t power on, double-check the outlet with another device. This final phase takes about 10 minutes and confirms your setup success.
Post-Completion Testing and Troubleshooting
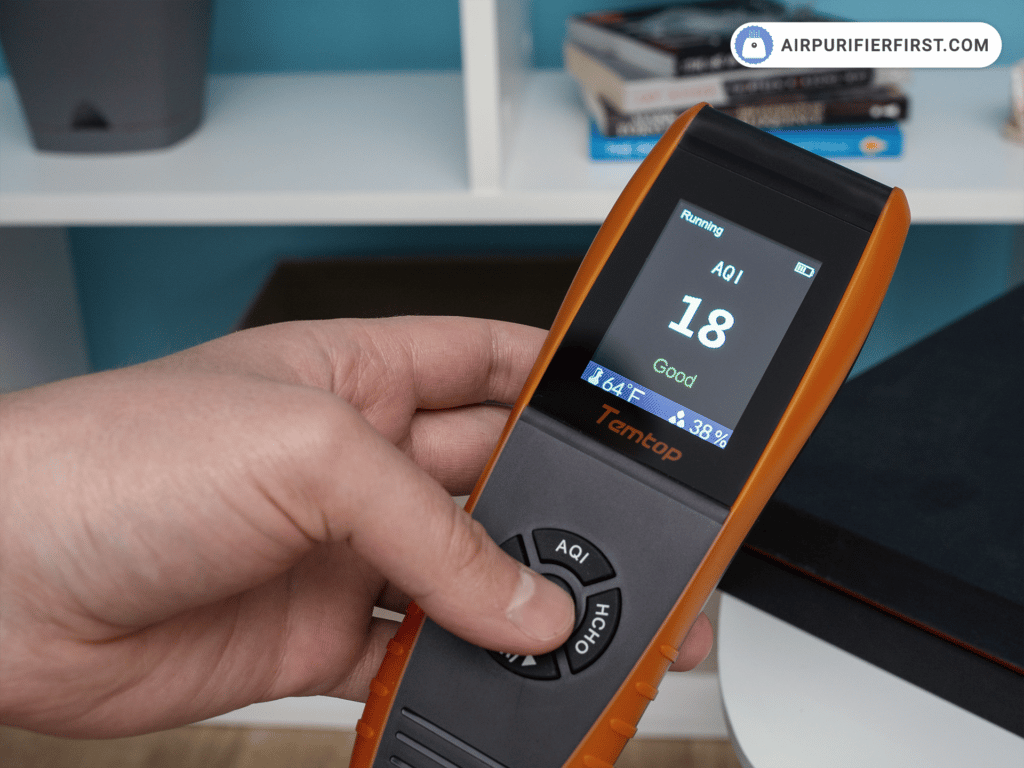
After completing the air purifier setup, thorough testing ensures it’s working as intended and catches any glitches early. Run the unit for 30-60 minutes in your space, then assess air quality using a built-in sensor or a separate air quality monitor (affordable ones start at $20 on Amazon). Feel for improved airflow and sniff for reduced odors—noticeable changes should occur within an hour in small rooms.
Common post-setup issues include weak suction (check for blocked vents) or error lights (consult the manual’s code guide). If the app won’t connect, restart your router and device. For persistent problems like overheating, unplug immediately and let it cool—Warning: Overheating could indicate a faulty cord; seek replacement. Track performance over the first week by noting filter status indicators, which remind you when to replace (every 6-12 months). If testing reveals inefficiencies, reposition the unit or clean intake areas. This step solidifies your investment, potentially reducing allergens by up to 99% per EPA standards on HEPA models.
Pro Tips for Optimal Air Purifier Setup
To maximize your air purifier setup and get the most out of your device, go beyond the basics with these expert recommendations. These tips, drawn from user reviews and manufacturer guidelines, can enhance efficiency and longevity.
- Room Size Matching: Always select a purifier with CADR (Clean Air Delivery Rate) suited to your space—e.g., 200 CFM for 300 sq ft rooms—to avoid underperformance. Undersized units work harder and burn out filters faster.
- Layered Filtration: If your model supports it, add a VOC (volatile organic compound) filter for homes with new paint or pets, targeting odors more effectively than standard HEPA alone.
- Nighttime Optimization: Place in bedrooms and use sleep mode to minimize noise (under 30 dB on quiet models), improving sleep quality while filtering allergens overnight.
- Integration with Smart Home: Link to Alexa or Google Home for voice control, like “Hey Google, turn on air purifier”—saves energy by automating based on occupancy sensors.
- Avoid Common Mistakes: Don’t place near open windows during setup, as outdoor pollutants can overwhelm the unit initially. Also, never run without filters, as it circulates dust instead of cleaning it.
- Maintenance Kickstart: Set a calendar reminder for monthly pre-filter checks right after setup to extend HEPA filter life by 20-30%.
- Energy Savings: Opt for eco modes on energy-efficient models (under 50W), potentially lowering your electric bill by $10-20 annually per unit.
Implementing these can boost air quality by 50% more than basic use, according to independent tests from Consumer Reports.
When to Call a Professional for Air Purifier Setup
While most air purifier setups are DIY-friendly, certain scenarios warrant professional help to avoid damage or inefficiency. Signs include complex installations like in-wall units for large homes, persistent error codes after troubleshooting, or integration with whole-house HVAC systems, which require certified technicians to ensure compatibility and safety.
Look for providers with certifications from organizations like the National Air Duct Cleaners Association (NADCA) and positive reviews on sites like Angi. Expect costs of $50-150 for basic setup assistance, or $200+ for HVAC integrations, depending on location. Check your warranty—tampering with electricals might void it, so pros often handle that. If your unit is under warranty (typically 1-5 years), contact the manufacturer first for free support.
FAQ
Q: How long does air purifier setup take for beginners?
A: For most models, air purifier setup takes 20-45 minutes, including unboxing and testing. Beginners might add 10-15 minutes for reading the manual, but following this guide keeps it straightforward. Smart features could extend it to an hour if Wi-Fi pairing is tricky.
Q: Can I set up an air purifier without tools?
A: Yes, 80% of consumer models (like Levoit’s Core series) require no tools—just snap-in filters and plug-and-play. If yours needs minor assembly, a basic screwdriver suffices; check the product specs to confirm.
Q: What if my air purifier doesn’t turn on after setup?
A: First, verify the outlet works and the cord is securely connected. Reset by unplugging for 5 minutes. If it persists, check for a blown fuse or consult the manual’s troubleshooting section. For warranty-covered issues, contact support—avoid DIY electrical fixes for safety.
Q: Is it safe to run an air purifier 24/7 after setup?
A: Absolutely, most are designed for continuous use with auto-shutoff features to save energy. However, monitor for overheating in the first few days and ensure good ventilation. Per CDC guidelines, this is ideal for allergy sufferers, filtering up to 99.97% of particles.
Q: Do I need to install filters during initial air purifier setup?
A: Yes, filters must be installed before powering on to prevent damage and ensure proper function. Most come pre-installed or wrapped; follow the manual to avoid incorrect orientation, which could reduce efficiency by 50%.
Q: How do I set up a smart air purifier’s app?
A: Download the app from the App Store or Google Play, create an account, and pair via Bluetooth when powered on. Enter Wi-Fi details and follow on-screen prompts—troubleshoot connectivity by moving closer to your router. This enables remote control and air quality alerts.
Q: Can I mount an air purifier on a wall during setup?
A: Wall-mountable models (e.g., some Dyson or commercial units) require brackets and a level tool. Follow phase 2 assembly, then secure to studs for stability. If unsure, hire a pro to prevent falls or structural damage.
Q: What room is best for initial air purifier setup?
A: Start in high-traffic areas like living rooms for maximum impact, but bedrooms are great for overnight use. Ensure the room size matches the unit’s rating to achieve full air changes per hour (aim for 4-5 ACH).
Alternative Solutions for Air Purifier Setup

If a traditional plug-in air purifier isn’t ideal for your space—say, due to limited outlets or portability needs—consider these alternatives. They’re great backups if setup proves challenging or if you want variety.
| Solution | Pros | Cons | Best For |
|---|---|---|---|
| Portable USB-Powered Purifier (e.g., small desk units) | Easy no-tool setup, cordless options, affordable ($20-50) | Limited coverage (under 100 sq ft), weaker filtration | Offices or travel; quick setup without outlets |
| Whole-House HVAC Filter System | Covers entire home, integrates with existing setup | Requires professional installation ($300+), higher energy use | Large homes; no individual unit placement needed |
| DIY Natural Air Cleaners (e.g., houseplants + fans) | Zero setup cost, eco-friendly, adds decor | Less effective on fine particles, inconsistent results | Budget-conscious users or supplemental to purifiers |
| Battery-Operated Mini Purifiers | Wireless freedom, silent operation | Short battery life (4-8 hours), frequent recharges | Camping or outages; avoids power cord hassles |
These options shine when main air purifier setup doesn’t fit, like in renters’ apartments with outlet restrictions. Weigh pros against your needs—e.g., HVAC for permanence, portables for flexibility.
Enjoy Your Cleaner Air!
With this air purifier setup guide, you’re equipped to transform your indoor environment:
- Essential tools and materials for a smooth start
- Detailed preparation and phased steps for foolproof installation
- Testing methods and pro tips to optimize performance
- Troubleshooting and alternatives for any hiccups
Following these instructions ensures your purifier runs at peak efficiency, potentially cutting airborne allergens by 90% and easing breathing issues. Take action today—set it up now and breathe easier tomorrow.
Have you completed your air purifier setup? Share your tips or challenges in the comments below to help fellow readers! If issues persist, describe them for tailored advice.

