
You’ve just unboxed your new Honeywell humidifier, ready to combat dry winter air that causes chapped lips, scratchy throats, and static shocks. Whether you purchased an evaporative model with wicking filters, an ultrasonic unit producing cool mist, or a steam humidifier that boils water for sterile moisture, proper setup determines everything from performance to safety. This guide walks through each model’s specific requirements so you can get optimal humidity from day one without common setup mistakes.
Before diving into model-specific steps, understand that Honeywell humidifiers aren’t one-size-fits-all. Each type demands unique handling—evaporative models need properly saturated filters, ultrasonic units require demineralization cartridges in hard water areas, and steam models have critical safety considerations. Let’s get your specific unit running perfectly with these precise setup instructions.
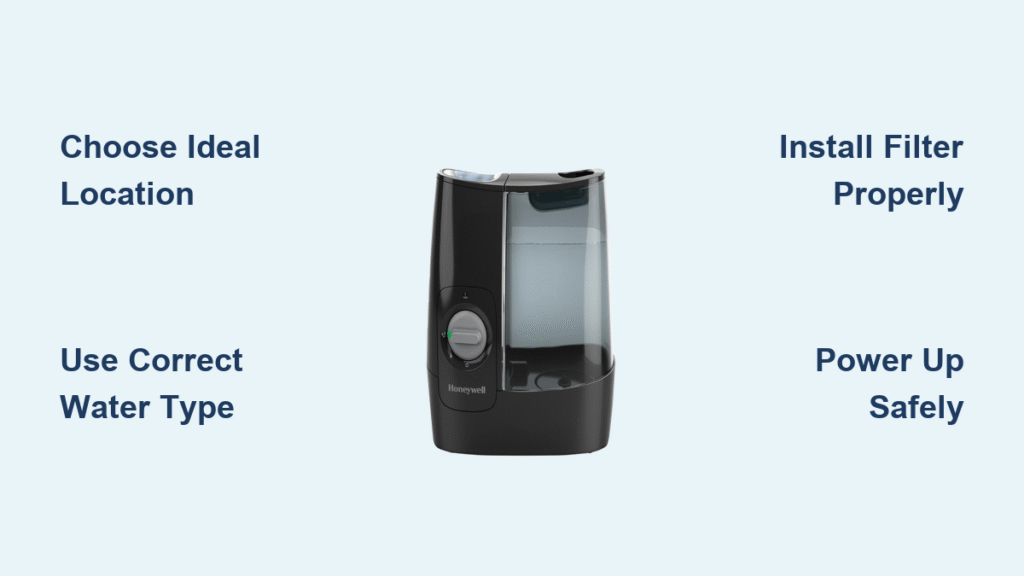
Choose Perfect Location First
Your humidifier’s placement affects performance more than most users realize. The spot you choose impacts everything from humidity distribution to safety hazards.
Find the Sweet Spot
– Position on flat, elevated surface 4-6 inches from walls
– Stay within 5-6 feet of electrical outlet (cord length varies by model)
– Keep 12 inches from heat sources like radiators or vents
– Avoid direct sunlight that promotes bacterial growth
– Steer clear of electronics—moisture and circuit boards don’t mix
Pro tip: Place a small table or stand in the room’s center for steam models. This maximizes humidity distribution while keeping the unit away from walls and furniture. Never place on carpet—pet hair clogs air intakes and reduces performance.
Prepare Your Water Source
Water quality directly impacts your humidifier’s lifespan and output quality. Hard water creates mineral buildup and white dust; distilled water prevents these issues entirely.
Water Requirements by Model
– Evaporative/Ultrasonic: Cool tap water (50-90°F)
– Steam models: Distilled water only—tap water destroys heating elements
– Hard water areas: Use demineralization cartridge or switch to distilled
– Maximum TDS: 180 ppm for optimal performance
Fill a glass with your tap water and let it evaporate overnight. White residue indicates hard water—switch to distilled or install filtration systems. For ultrasonic models, always install the included demineralization cartridge in the tank opening to reduce white dust from hard water minerals.
Set Up Evaporative Models (HCM-350, HEV320, HEV355)

These filter-based units work by pulling dry air through a wet wick, naturally adding moisture without visible mist.
Assemble Components Correctly
- Unpack everything – Remove plastic films and protective materials
- Soak the filter – Submerge wicking filter in cool water for 10 minutes
- Insert filter properly – Blue side faces outward on HCM-350
- Lock housing in place – Tabs should click securely into base slots
Filter gap check: Ensure 1/4 inch clearance between filter bottom and base—contact reduces airflow and creates noise. Replace filters every 30-60 days depending on usage; hard or crumbly filters lose effectiveness.
Fill and Install Water Tank
- Lift tank straight up – Avoid tilting to prevent spillage
- Unscrew cap counterclockwise – Some models use quarter-turn caps
- Fill to MAX line – HCM-350 holds 1.1 gallons
- Hand-tighten cap firmly – Don’t over-tighten (causes cracks)
- Invert and seat properly – Tank should sit flat without wobbling
Configure Ultrasonic Models (HUL430, HUL520, HUL535)
These units use high-frequency vibrations to create fine water droplets, visible as cool mist.
Quick Setup Sequence
- Use anti-slip mat – Included with most models
- Press release button – Location varies by model
- Flip and unscrew – Tank cap removes easily when inverted
- Cool water only – Never use hot water in ultrasonic units
- Listen for the click – Proper tank installation makes audible sound
Direct Mist Output
- Variable dial: Full left = lowest mist output
- 360-degree nozzle: Direct mist away from walls
- Dual outlets (HUL535): Adjust each independently
- Night mode: Reduces LED brightness and fan speed
Install demineralization cartridge in tank opening to reduce white dust from hard water minerals. Replace every 2-3 months or 30-40 tank refills.
Install Steam Models Safely (HWM-340, HWM-445)
Steam humidifiers boil water to create sterile moisture, making them ideal for health-conscious users but requiring extra safety measures.
Critical Safety Steps
- Heat-resistant surface only – Steam reaches 212°F
- 3-foot clearance from walls, curtains, and furniture
- Distilled water mandatory – Prevents mineral buildup and extends heating element life
- Keep away from children – Use high, stable surfaces
Steam Setup Process
- Lift water reservoir by handle—never when hot
- Fill with distilled water to indicated level (1 gallon HWM-340)
- Secure reservoir ensuring proper seal engagement
- Set humidity level between 30-50% (avoid over-humidification)
- Press power button – Steam appears in 1-2 minutes
Steam wand attachment (HWM-445): Position 12-18 inches above floor, directing steam away from windows. Use aromatherapy tray for optional essential oils.
Power Up Your Unit
Before pressing the power button, ensure proper electrical setup to prevent tripped breakers or damaged components.
Electrical Requirements
- Standard household current: 120V, 60Hz
- Power consumption: 20-60W evaporative, 25-40W ultrasonic, 280-425W steam
- GFCI outlet: Required for steam models
- Direct wall connection: Avoid extension cords
Initial Startup Sequence
- Verify tank installation – Must be filled and properly seated
- Plug into wall outlet – Check for secure connection
- Press power button – Indicator lights should activate
- Wait 5-10 minutes – Allow system to reach optimal operation
- Check output – Look for visible mist or feel increased humidity
Configure Controls and Settings
Digital and manual models offer different control schemes—understanding yours prevents frustration and ensures optimal performance.
Digital Models (HEV685, HUL570)
- Power button: Single press toggles on/off
- Humidity range: 30-65% in 5% increments
- Fan speeds: Low/Medium/High/Turbo
- Timer options: 2-4-8-12 hour cycles
- Auto mode: Maintains set humidity automatically
Manual Models
- Rotary dial: Min to Max output control
- Red indicator: Low water warning
- Simple On/Off switch
- Visual refill reminder: Check water level daily
Pro tip: Start at 40% humidity and adjust based on comfort. Over-humidification creates condensation and mold growth.
Troubleshoot Common Setup Issues
Even perfect setup can encounter hiccups. These quick fixes resolve 90% of initial problems.
No Power Solutions
- Test outlet with another appliance
- Check tank seating – Safety switch prevents operation when misaligned
- Reset GFCI outlet – Common in bathrooms and kitchens
- Inspect power cord – Look for cuts or damage
Low Output Fixes
- Increase humidity setting – Often set too low initially
- Check filter saturation – Dry filters reduce evaporative output
- Clean ultrasonic transducer – Mineral deposits block mist production
- Verify water level – Low water equals low output
Stop Water Leaks
- Cap tightening verification – Over-tightening cracks, under-tightening leaks
- Tank crack inspection – Hairline cracks develop during shipping
- Housing alignment check – Misaligned components cause overflow
- Base emptying routine – Empty after each use on steam models
Connect Smart Features (Wi-Fi Models)
Modern Honeywell humidifiers integrate with smart home systems for remote control and automation.
Wi-Fi Setup Process
- Download Honeywell Home app from app store
- Create account or sign into existing one
- Select “Add Device” and choose your specific model
- Press Wi-Fi button for 3 seconds until blinking
- Connect to temporary network created by humidifier
- Enter home Wi-Fi password when prompted
- Name device and assign to specific room
App features include: Remote humidity adjustment, 7-day scheduling, filter life tracking with replacement reminders, usage statistics, and voice control via Alexa/Google Assistant.
Optimize for Room Size
Your humidifier’s effectiveness depends heavily on matching output to room dimensions.
Size-Based Settings
- Small rooms (100-300 sq ft): Low-Medium setting
- Medium rooms (300-500 sq ft): Medium-High setting
- Large rooms (500-700 sq ft): High/Turbo setting
- Open concept: Consider multiple smaller units
Humidity Guidelines by Use
- Occupied spaces: 30-40% prevents dry skin and static
- Bedrooms: 35-45% reduces nighttime congestion
- Houseplants: 40-50% keeps tropical varieties healthy
- Accuracy check: Use separate hygrometer—built-in sensors can drift
Seasonal Setup Variations
Your humidifier needs different handling as seasons change, affecting both performance and storage.
Summer Storage Protocol
- Complete water removal – Empty tank and base entirely
- Vinegar cleaning cycle – Mix 1:3 vinegar to water ratio
- 48-hour air drying – Prevents mold and bacterial growth
- Filter disposal – Remove and discard evaporative filters
- Original box storage – Keeps accessories together and prevents damage
Winter Startup Checklist
- Post-storage inspection – Check for cracks or damage
- New filter installation – Always start season with fresh wick
- Cleaning cycle run – Vinegar solution before first use
- Sensor calibration – Digital models may need adjustment
- Gradual increase – Raise humidity over 3 days to prevent condensation
Final Safety Protocols
Safety considerations vary significantly between humidifier types, especially in homes with children or pets.
Child Safety Measures
- Steam model placement – Use high, stable surfaces only
- Cool mist preference – Safer choice for children’s rooms
- Cord management – Secure against tripping hazards
- Child lock activation – Enable on digital control panels
Pet Considerations
- Ultrasonic positioning – Keep out of pet reach (curious cats love mist)
- Carpet avoidance – Pet hair clogs air intakes
- Filtered water use – Reduces allergens that affect pets
- Feeding area separation – Prevent contamination of food and water
Key takeaway: Proper setup determines your humidifier’s effectiveness, safety, and longevity. Take time with initial placement, water selection, and component assembly—these first steps prevent 90% of future problems and ensure optimal humidification throughout the season. When you correctly set up your Honeywell humidifier following these specific instructions, you’ll enjoy comfortable, healthy indoor air without the common frustrations most users experience.


