Are you setting up your new Crane air purifier or struggling to get the most out of it? Many users unbox their device only to find themselves confused by the controls, filter changes, or optimal placement, leading to underwhelming air quality results. The good news is that with a few simple steps, you can master how to use Crane air purifier to achieve cleaner, fresher indoor air right away. This quick-start tip: Place it in a central room, plug it in, and select auto mode for immediate purification without any hassle.
In this comprehensive guide, we’ll go far beyond the basics, covering everything from initial setup and daily operation to advanced features, maintenance routines, and troubleshooting. By the end, you’ll have the confidence to optimize your Crane air purifier for any space, whether it’s a small bedroom or a larger living area, ensuring it runs efficiently and extends its lifespan. Stick with us, and you’ll transform your home’s air quality effortlessly.
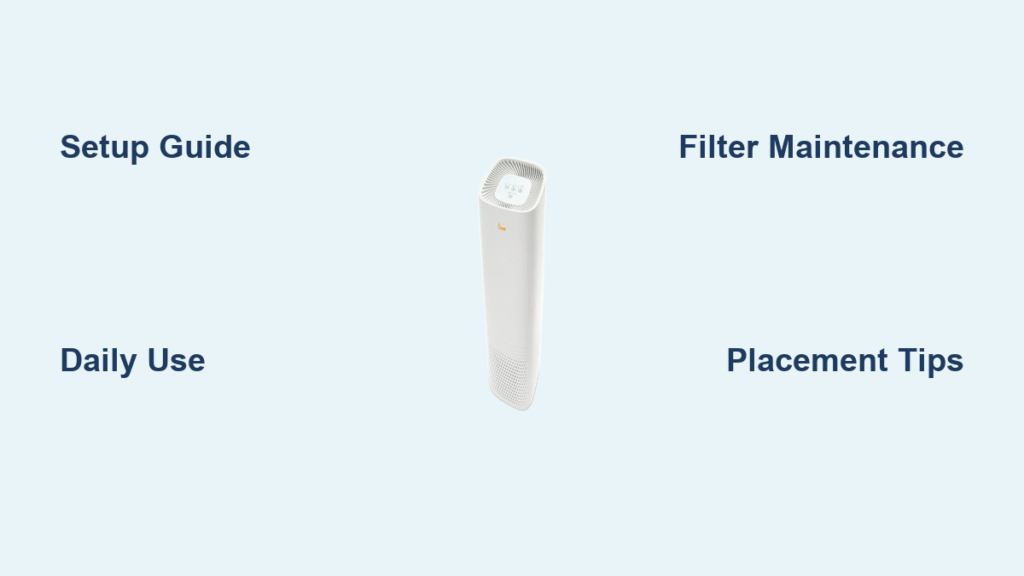
Unboxing and Initial Setup for Your Crane Air Purifier

Before diving into daily use, proper unboxing and setup are crucial to ensure your Crane air purifier operates at peak performance. Crane models, like the popular Crane 4-in-1 Air Purifier or the ultrasonic humidifier combo units, come with essential components that need careful handling. Skipping this step can lead to reduced efficiency or even damage.
What You’ll Need for Setup
While Crane air purifiers are designed for easy out-of-the-box use, having a few basics on hand makes the process smoother. Here’s a quick list of recommended items:
| Item | Quantity | Specifications |
|---|---|---|
| Crane Air Purifier Unit | 1 | Your specific model (e.g., EE-8289 or 5-in-1) |
| Power Outlet | 1 | Standard 110-120V AC outlet, extension cord if needed (avoid long ones to prevent voltage drop) |
| Clean Cloth or Soft Brush | 1 | Microfiber for wiping surfaces |
| Distilled Water (for humidifier models) | As needed | 1 gallon for initial fill, if your model includes humidification |
| Allen Wrench or Screwdriver | Optional | For models with adjustable stands or filters (check your manual) |
Important: Always refer to your model’s user manual, available on Crane’s official website (crane-usa.com), as specifications can vary by series.
Preparation Steps and Safety Considerations
Start by choosing a stable, flat surface away from direct sunlight, drafts, or heat sources like radiators—these can affect sensor accuracy and filter life. Ensure the area is dust-free to avoid contaminating the unit immediately.
Safety first: Unplug any nearby electronics to prevent power surges. For families with pets or children, place the unit out of reach, as some models have removable parts. If your Crane air purifier includes a humidifier function, use only distilled water to prevent mineral buildup, which could void the warranty.
Warning: Never operate the unit with a damaged cord or plug. If you notice any fraying, stop and contact Crane support immediately to avoid electrical hazards.
Step-by-Step Setup Process
Setting up your Crane air purifier takes about 10-15 minutes and involves these logical phases. Follow them sequentially for best results.
Phase 1: Unboxing and Inspection
- Carefully open the packaging and remove the unit, filters, and accessories. Crane ships units with pre-installed HEPA filters, but inspect for any shipping damage.
- Remove protective films from the control panel and sensors. Wipe the exterior with a dry cloth to remove any residue.
- Check the air intake and outlet vents for blockages—common in new units.
Phase 2: Filter Installation and Power-Up
- Open the filter compartment (usually on the back or bottom—twist or slide as per your model). Insert or confirm the True HEPA filter is securely in place. For combo models, ensure the carbon filter layer is aligned.
- If applicable, add water to the tank for humidifier functions: Fill to the max line using a pitcher, then lock the tank back in.
- Plug the unit into a grounded outlet. Press the power button (often a large circular icon) to turn it on. The display should light up, indicating it’s ready.
Phase 3: Initial Configuration
- Use the control panel to set your desired mode. Start with “Auto” for automatic air quality detection via built-in sensors.
- Adjust fan speed if needed—low for quiet nights, high for quick purification. Some models have a timer; set it for 8 hours initially.
- Run a 30-minute test cycle in an empty room to circulate air and familiarize yourself with the noise level (typically 25-50 dB, whisper-quiet).
Pro Tip: Download the Crane app if your model supports smart connectivity (e.g., via Wi-Fi on newer 2025 models). This allows remote control and air quality monitoring through your smartphone.
Daily Operation: How to Use Crane Air Purifier Features
Once set up, using your Crane air purifier daily is straightforward, but understanding its features maximizes benefits like allergen reduction and odor elimination. Crane units use advanced filtration—combining pre-filters, True HEPA, and activated carbon—to capture 99.97% of particles as small as 0.3 microns, per EPA standards.
Understanding Control Panel and Modes
The intuitive LED display on most Crane models includes buttons for power, fan speed (low/medium/high/auto), light settings (for night mode), and sometimes ionizer or UV features. For example:
– Auto Mode: Sensors detect pollutants and adjust speed automatically—ideal for hands-off use.
– Sleep Mode: Dims lights and runs quietly at low speed, perfect for bedrooms.
– Manual Speeds: Use high for smoky areas or during cooking to tackle odors fast.
To activate: Press the mode button until your preference shows. The unit will beep softly to confirm.
Optimal Placement and Runtime Guidelines
Placement is key to effective air purification. Position the unit 1-2 feet from walls, facing the room’s center, to allow 360-degree airflow. In a 200-400 sq ft room (standard for most Crane models), it covers the space in 10-15 minutes on high.
Recommended daily use:
– Run continuously on auto for best results, especially in allergy-prone homes.
– In high-pollution areas (e.g., near highways), aim for 12-24 hours.
– For energy savings, use the timer to shut off after 2-8 hours.
Time Estimate: Daily operation setup takes under 2 minutes once you’re familiar.
Integrating with Smart Home Systems
Newer Crane models (2024-2025 releases) integrate with Alexa or Google Home. To connect:
1. Enable Wi-Fi on the unit via the app.
2. Link your account and voice commands like “Alexa, set Crane to auto mode.”
This adds convenience, letting you monitor PM2.5 levels remotely.
Maintenance and Cleaning for Longevity

Regular maintenance ensures your Crane air purifier performs optimally and lasts up to 5 years, as recommended by the manufacturer. Neglecting it can reduce efficiency by 50% within months.
Why Regular Maintenance is Important
Dust, pet dander, and bacteria accumulate on filters and sensors, forcing the unit to work harder and increasing energy use. Proper care maintains air output and prevents musty smells.
Recommended Frequency and Timing
Follow this schedule based on Crane’s guidelines and usage intensity:
| Frequency | Task | Duration |
|---|---|---|
| Weekly | Wipe exterior and clean pre-filter | 5-10 minutes |
| Monthly | Vacuum intake vents and check sensors | 10-15 minutes |
| Every 6 Months | Replace True HEPA filter (or as indicated by filter life indicator) | 5 minutes |
| Annually | Deep clean water tank (for humidifier models) and inspect carbon filter | 20 minutes |
Note: Filter replacement costs $20-40 per set; subscribe via Crane for discounts.
Complete Cleaning and Maintenance Process
Break it down into major steps for ease.
Step 1: Power Down and Disassembly
- Unplug the unit and let it cool if recently used.
- Remove the pre-filter by gently pulling the tab—shake off dust outdoors.
- For humidifier models: Empty the tank, disassemble the mist nozzle.
Safety Precautions: Wear gloves if handling dusty filters to avoid allergens. Never use water on electrical components.
Step 2: Cleaning Components
- Pre-Filter: Rinse under lukewarm water, air-dry for 24 hours. Avoid soap to prevent residue.
- HEPA and Carbon Filters: These are not washable—vacuum gently with a soft brush attachment. Replace if the indicator light flashes.
- Water Tank (if applicable): Wash with mild dish soap and vinegar solution (1:1 ratio), rinse thoroughly, and dry.
- Exterior and Vents: Use a damp microfiber cloth; for stubborn spots, a 1:10 vinegar-water mix works wonders.
Step 3: Reassembly and Testing
- Reinsert clean/dry components securely.
- Plug in and run on high for 5 minutes to check for unusual noises or odors.
- Reset the filter life indicator via the control panel (hold the filter button for 3 seconds).
Warning: Do not submerge the base in water. If mold appears in the tank, discard and sanitize immediately to prevent health risks.
Warning Signs That Indicate Immediate Attention Needed
Watch for: Reduced airflow, constant high fan speed despite clean air, error lights, or unusual humming. These signal clogged filters or sensor issues—address within 24 hours to avoid inefficiency.
Pro Tips for Maximizing Your Crane Air Purifier

To elevate your experience beyond standard use, here are expert tips tailored for Crane owners:
– Combine with Ventilation: Open windows briefly before running the purifier to flush out initial pollutants, then seal for containment.
– Monitor Air Quality: Use the built-in display or app to track improvements—aim for AQI under 50 for optimal health.
– Pet-Friendly Tweaks: Place on a raised stand to avoid pet hair intake; clean weekly if you have furry friends.
– Energy Optimization: Run on low during off-peak hours to save on electricity (Crane units use about 30W on high).
– Allergy Season Boost: Activate the ionizer feature (if available) for extra particle capture during pollen peaks.
– Avoid Common Mistakes: Don’t place near carpets, as they recirculate dust; also, never run without filters installed, which can damage the motor.
– Upgrade Filters: Opt for Crane’s antimicrobial filters for $10 more—they reduce bacteria by 99% per lab tests.
These tweaks can improve air quality by 20-30% and extend filter life.
When to Seek Professional Help
While Crane air purifiers are user-friendly, some issues warrant expert intervention. Signs include persistent error codes (e.g., E1 for sensor failure), burning smells, or leaks—these could indicate internal faults.
Look for certified technicians via Crane’s authorized service network (find on their site). Expect costs of $50-150 for diagnostics and repairs, depending on warranty status. Most models have a 1-year warranty; register yours online to cover manufacturing defects. If out of warranty, compare quotes from local appliance repair shops.
FAQ
Q: How long does it take for the Crane air purifier to clean a room?
A: In a standard 300 sq ft room, it takes 10-20 minutes on high speed to achieve one full air exchange, filtering out dust, smoke, and allergens effectively. For best results, run continuously.
Q: Can I use tap water in the humidifier part of my Crane unit?
A: No, stick to distilled water to avoid white mineral dust and buildup, which can clog the mist outlet and reduce humidity efficiency over time.
Q: What if my Crane air purifier shows a filter replacement light but I just cleaned it?
A: The light tracks usage hours, not just dirt—reset it manually or replace the filter every 6 months regardless. If it persists, check for sensor dust and clean gently.
Q: Is the Crane air purifier safe for use around babies?
A: Yes, once set up properly. Use sleep mode for quiet operation, and ensure it’s on a stable surface. The HEPA filtration removes 99.97% of fine particles, beneficial for infant respiratory health.
Q: How do I know if my Crane model has smart features?
A: Check the product box or manual for Wi-Fi icons. Models like the 2025 Smart series support app control; older ones don’t but still offer excellent manual performance.
Q: Does the ionizer feature produce ozone?
A: Crane’s ionizers are ozone-free, complying with CARB standards, so they’re safe for indoor use without the health risks associated with older tech.
Q: Can I leave my Crane air purifier running 24/7?
A: Absolutely—it’s designed for continuous use. Just maintain filters regularly to prevent strain on the motor.
Alternative Solutions If Crane Isn’t Ideal
If your space is unusually large or you need specialized features, consider alternatives. Here’s a comparison:
| Solution | Pros | Cons | Best For |
|---|---|---|---|
| Crane 4-in-1 Air Purifier | Affordable ($80-150), multi-function (purify + humidify), quiet operation | Limited coverage (up to 500 sq ft), basic app on some models | Small to medium homes with allergies |
| Honeywell HPA300 | Higher CADR rating for faster cleaning, washable pre-filter | Bulkier design, no humidifier | Large rooms (up to 465 sq ft) with heavy pollution |
| Levoit Core 300S | Smart app with real-time AQI, compact and stylish | Higher price ($100+), no ionizer | Tech-savvy users wanting remote monitoring |
| Blueair Blue Pure 211+ | Stylish fabric pre-filter, energy-efficient | Expensive filters ($50/set), louder on high | Fashion-forward homes prioritizing design |
If Crane doesn’t fit, these options provide similar HEPA-level purification with variations in smart tech or capacity.
Enjoy Cleaner Air with Your Crane Air Purifier
You’ve now got a full roadmap to how to use Crane air purifier from setup to advanced maintenance:
– Initial unboxing and configuration for seamless start
– Daily operation modes and placement for optimal performance
– Cleaning schedules and pro tips to keep it running efficiently
Following this guide ensures fresher air, fewer allergens, and better health without guesswork. Take action today—set up or tweak your unit using these steps, and notice the difference in just one cycle.
Have you mastered your Crane air purifier yet? Share your tips or questions in the comments below to help fellow users! If issues persist, reach out to Crane support for model-specific advice. Breathe easy knowing your air is handled.