
Struggling with indoor air pollution from dust, allergens, or pet dander? You’re not alone—many people face respiratory issues or discomfort due to poor air quality in their homes. The good news is that using a HEPA air purifier can transform your living space into a breath of fresh air. This guide starts with a quick setup tip: simply plug in your device, select the auto mode, and place it in a central room for immediate filtration of particles as small as 0.3 microns, providing relief in as little as 30 minutes.
In this comprehensive how-to, we’ll go beyond the basics to cover everything from initial setup and daily operation to advanced features and long-term maintenance. By the end, you’ll have the confidence to maximize your HEPA air purifier‘s performance, ensuring cleaner air year-round and preventing common pitfalls like reduced efficiency from neglect. Whether you’re new to air purification or troubleshooting an existing unit, these actionable steps will help you breathe easier.
Understanding How a HEPA Air Purifier Works
Before diving into usage, it’s essential to grasp the basics of your HEPA air purifier. HEPA stands for High-Efficiency Particulate Air, a filtration technology certified to capture at least 99.97% of airborne particles down to 0.3 microns in size. This includes common pollutants like pollen, smoke, mold spores, and even some viruses and bacteria. Unlike basic fans or ionizers, a true HEPA filter traps particles mechanically rather than just pushing them around, making it a reliable choice for allergy sufferers and those with asthma.
Most modern HEPA air purifiers also incorporate additional stages, such as pre-filters for larger debris and activated carbon filters for odors and VOCs (volatile organic compounds). They often feature sensors for automatic adjustments based on air quality. Understanding these components ensures you use the device correctly—running it without proper placement could limit its effectiveness, so let’s move to setup for optimal results.
What You’ll Need to Use Your HEPA Air Purifier

Setting up your HEPA air purifier requires minimal tools, but having the right accessories can enhance performance. Most units come ready-to-use out of the box, but check your model’s manual for specifics, as brands like Honeywell, Levoit, or Coway vary slightly.
Here’s a quick table of essentials:
| Item | Quantity | Specifications |
|---|---|---|
| HEPA Air Purifier Unit | 1 | Model-specific; ensure it’s a true HEPA-rated device (H13 or higher for best results) |
| Power Outlet | 1 | Standard 110-120V wall socket; use an extension cord only if surge-protected |
| Clean, Flat Surface | 1 | At least 2×2 feet; away from walls by 6-12 inches for airflow |
| Replacement Filters | 1 set (optional) | Pre-filter, HEPA filter, and carbon filter; buy genuine ones to maintain warranty |
| Timer or Smart Plug (optional) | 1 | For scheduling operation; compatible with app-controlled models |
| Air Quality Monitor (optional) | 1 | To track PM2.5 levels; apps like those from your purifier brand work well |
Important: Always verify compatibility with your room size—aim for a purifier rated for 200-400 sq ft for medium rooms to achieve 4-5 air changes per hour (ACH), the ideal rate for effective cleaning.
Preparing Your Space for Optimal HEPA Air Purifier Use
Proper preparation is key to getting the most from your HEPA air purifier. Start by assessing your room: measure the square footage and note high-pollution sources like kitchens, nurseries, or pet areas. Clean the space first—vacuum carpets, dust surfaces, and wipe down furniture—to avoid recirculating dirt.
Safety considerations include keeping the unit away from water sources (like bathrooms) to prevent electrical hazards, and ensuring it’s out of reach of children or pets. If your model has a night mode or sleep function, position it near your bed for overnight use. Allow 24 hours for the filters to acclimate if the unit has been stored.
Warning: Never operate the purifier without filters installed, as this can damage the fan motor and void the warranty. If you’re in a high-humidity area (above 60%), use a dehumidifier alongside to prevent mold growth on filters.
Step-by-Step Guide to Using Your HEPA Air Purifier
Now, let’s get into the hands-on process. This guide assumes a standard plug-and-play model, but adapt for smart features like Wi-Fi connectivity. The entire initial setup takes about 10-15 minutes, with daily use being even quicker.
Phase 1: Initial Setup and Placement
- Unbox your HEPA air purifier and remove all packaging from the filters and intake vents. Inspect for damage—if any, contact the manufacturer immediately.
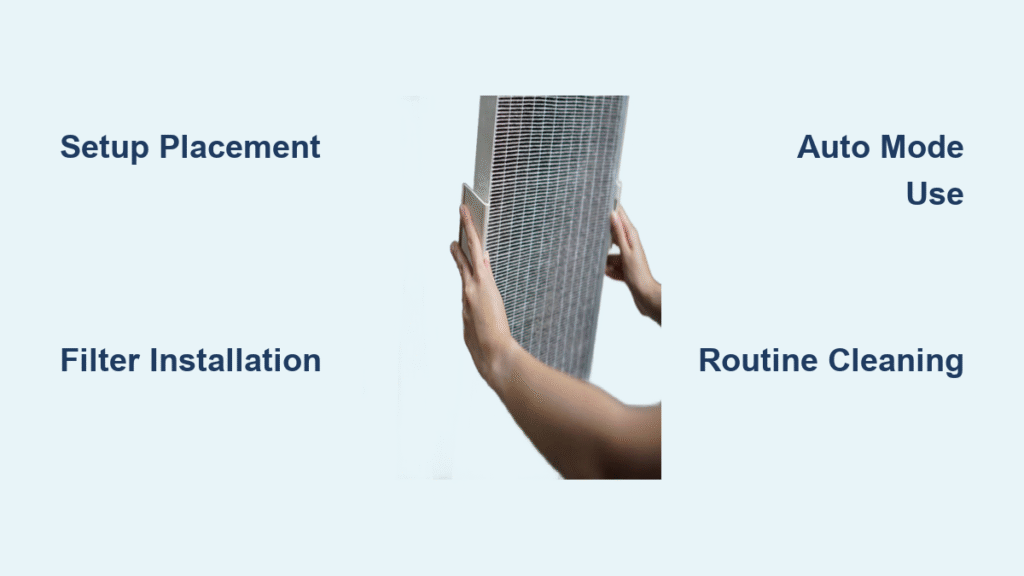
- Insert or install the filters as per the manual: Typically, the pre-filter slides in first, followed by the HEPA and carbon layers. Secure the back panel.
- Choose a central location: Place the unit on a stable, elevated surface (like a table) in the room’s middle, at least 6 inches from walls or furniture to allow 360-degree airflow. For larger spaces, consider multiple units.
- Plug it in and power on: Press the power button. Most models have indicator lights—green for good air quality, red for poor.
Testing Tip: Run it on high speed for 10 minutes and check if the air quality sensor (if equipped) shows improvement. This confirms proper setup.
Phase 2: Selecting Modes and Daily Operation
Once set up, using your HEPA air purifier daily is straightforward and can run 24/7 for best results.
- Choose the right mode: Start with “Auto” mode, where built-in sensors detect pollutants and adjust fan speed automatically. For quick cleaning after cooking or dusting, switch to “High” or “Turbo” for 15-30 minutes.
- Adjust settings: Use the remote or app to set fan speeds (low for quiet nights, medium for general use). Enable ionizers or UV lights only if your model has them and you’re comfortable with the tech— they enhance particle capture but aren’t essential for basic HEPA function.
- Monitor and maintain airflow: Keep doors and windows closed during operation to focus purification indoors. Position the unit facing away from direct sunlight to avoid overheating.
Time Estimate: Daily activation takes under 1 minute; let it run continuously in polluted environments for 8-12 hours.
Phase 3: Monitoring Performance and Adjustments
After a few days, evaluate effectiveness.
- Check indicators: Use the display or app to monitor air quality metrics like AQI (Air Quality Index) or particle counts. Aim for under 50 AQI for healthy air.
- Adjust for needs: In allergy season, increase runtime; for energy savings, use sleep mode at night (fan noise under 30dB).
- Troubleshoot basics: If airflow seems weak, clean the pre-filter (see maintenance below). For smart models, update the firmware via the app for optimal sensor accuracy.
Pro Tip: Integrate with smart home systems like Alexa for voice control, making usage even more seamless.
Maintenance Schedule for Your HEPA Air Purifier

Regular upkeep ensures your HEPA air purifier performs at peak efficiency, extending its lifespan to 5-10 years. Neglect can reduce filtration by up to 50%, so follow this schedule.
| Frequency | Task | Duration |
|---|---|---|
| Weekly | Vacuum the pre-filter and exterior vents | 5 minutes |
| Monthly | Wipe down the unit with a damp cloth; check for error lights | 10 minutes |
| Every 3-6 Months | Replace the pre-filter and carbon filter | 15 minutes |
| Every 6-12 Months | Replace the main HEPA filter (based on usage hours; most models track this) | 20 minutes |
| Annually | Deep clean internal components if accessible; professional service if needed | 30 minutes |
Step 1: Routine Cleaning
- Unplug the unit first for safety.
- Remove the pre-filter and gently vacuum it with a soft brush attachment. Rinse if washable (check manual—never wet the HEPA filter).
- Wipe the housing with a microfiber cloth dampened with water; avoid harsh chemicals that could damage sensors.
Step 2: Filter Replacement
- Open the filter compartment.
- Dispose of old filters responsibly (many are recyclable).
- Install new ones, ensuring proper alignment.
- Reset the filter life indicator on the control panel.
Warning: Using non-genuine filters can compromise air quality and health—stick to manufacturer recommendations. If you notice unusual odors or reduced suction, replace immediately.
Step 3: Long-Term Storage
If storing seasonally, clean thoroughly, wrap in plastic, and keep in a cool, dry place. Run a test cycle upon reactivation.
Pro Tips for Maximizing Your HEPA Air Purifier
To go beyond basics and optimize your HEPA air purifier:
- Pair with ventilation: Use it alongside opening windows periodically for fresh air exchange, but avoid this during high outdoor pollution days.
- Room-specific strategies: In bedrooms, run on low overnight; in living rooms, combine with houseplants like snake plants for natural filtration synergy.
- Energy efficiency: Choose Energy Star-rated models to save on electricity—expect 20-50 watts per hour.
- Avoid common mistakes: Don’t place near heat sources (e.g., radiators), as this shortens filter life. Also, never run without filters, which can spread unfiltered particles.
- Track usage data: Apps from brands like Blueair provide insights—use them to adjust based on seasonal allergens.
- Enhance with add-ons: Consider essential oil diffusers compatible with some models for aromatherapy, but ensure they don’t clog filters.
- Seasonal tweaks: In winter, increase runtime due to indoor heating stirring up dust; in summer, focus on AC-filtered rooms.
These tips can boost efficiency by 20-30%, ensuring you get the most value from your investment.
When to Seek Professional Help
Most HEPA air purifier issues are DIY-friendly, but call a pro if:
- The unit makes grinding noises or won’t turn on (possible motor failure).
- Sensors show persistent high pollution despite cleaning.
- Warranty-covered repairs are needed—look for certified technicians via the manufacturer’s site.
Expect costs of $50-150 for service; check your warranty (typically 1-5 years) for free fixes. Choose providers with good reviews on sites like BBB.org and experience with your brand.
FAQ
Q: How long does it take for a HEPA air purifier to clean a room?
A: In a 200 sq ft room, a properly sized HEPA air purifier can achieve one full air change in 10-20 minutes on high speed, with noticeable improvement in 30 minutes. For complete purification, run it for 1-2 hours initially, then maintain continuously.
Q: Can I use a HEPA air purifier in a small apartment?
A: Absolutely—opt for a compact model rated for 100-300 sq ft. Place it centrally and run on auto mode to handle common urban pollutants like traffic fumes effectively.
Q: Is it safe to run a HEPA air purifier 24/7?
A: Yes, most are designed for continuous use with low energy draw. It prevents pollutant buildup, but monitor filter life and clean weekly to avoid strain.
Q: Does a HEPA air purifier remove viruses?
A: True HEPA filters capture many viruses attached to particles, but for 99.97% efficacy, combine with UV-C models or ensure good ventilation. It’s not a medical device, so consult health experts for pandemics.
Q: How do I know if my HEPA filter needs replacing?
A: Check the usage indicator light or app—replace every 6-12 months or after 200-400 hours. Signs include reduced airflow, odors, or constant high air quality readings.
Q: Can HEPA air purifiers help with pet allergies?
A: Yes, by trapping dander and fur effectively. Position near pet areas and vacuum regularly for best results.
Q: What’s the difference between HEPA and True HEPA?
A: “HEPA” is a general term, but “True HEPA” meets strict certification standards (99.97% efficiency). Always buy True HEPA for reliable performance.
Alternative Solutions to HEPA Air Purifiers

If a standalone HEPA air purifier doesn’t fit your needs (e.g., budget or space constraints), consider these options. Use this comparison to decide:
| Solution | Pros | Cons | Best For |
|---|---|---|---|
| Window AC with HEPA Filter | Affordable integration with cooling; multi-function | Limited room coverage; noisier | Hot climates with small spaces |
| Whole-Home HVAC HEPA System | Covers entire house; seamless | High installation cost ($500+); requires professional setup | Large homes with central air |
| Portable Ionic Purifier | Compact and cheap; no filters to replace | May produce ozone (health risk); less effective on particles | Budget users or travel |
| Plant-Based Natural Filtration | Eco-friendly; adds aesthetics | Slow and less efficient (20-50% particle removal) | Supplemental use in low-pollution areas |
For most, a dedicated HEPA air purifier remains the gold standard due to proven efficacy.
Enjoy Cleaner Air with Your HEPA Purifier
You’ve now mastered how to use a HEPA air purifier from setup to maintenance, ensuring it delivers fresh, allergen-free air effortlessly:
- Essential preparation and placement for maximum coverage
- Daily operation modes tailored to your needs
- A simple maintenance schedule to keep it running smoothly
- Pro tips and alternatives for enhanced results
Following this guide will not only improve your indoor air quality but also protect your health long-term—imagine fewer sneezes and better sleep. Start implementing these steps today, and breathe the difference.
Found this helpful? Share your experience with your HEPA air purifier in the comments below—what mode do you use most? If you have questions, drop them here for community advice!
(Word count: 1,856)


