Did you know that your Sirena vacuum cleaner isn’t just for picking up dust bunnies—it’s a powerhouse air purifier in disguise? If you’re dealing with allergies, pet dander, or just stuffy indoor air, using your Sirena vacuum as an air purifier can transform your home’s air quality without buying extra gadgets. The secret lies in its unique water filtration system, which traps allergens and pollutants as air circulates through it. For a quick fix, simply fill the tank with water, attach the hose loosely, and run it for 30 minutes in a closed room to start noticing fresher air right away.
In this comprehensive guide, we’ll go beyond the basics to show you exactly how to set up and optimize your Sirena vacuum for air purification. You’ll learn step-by-step instructions, safety tips, maintenance routines, and troubleshooting for common issues. By the end, you’ll have the confidence to use your Sirena like a pro, potentially saving money on separate air purifiers while enjoying cleaner, healthier air year-round. Whether you’re a first-time user or looking to maximize your investment, this guide has you covered.
Understanding How the Sirena Vacuum Works as an Air Purifier
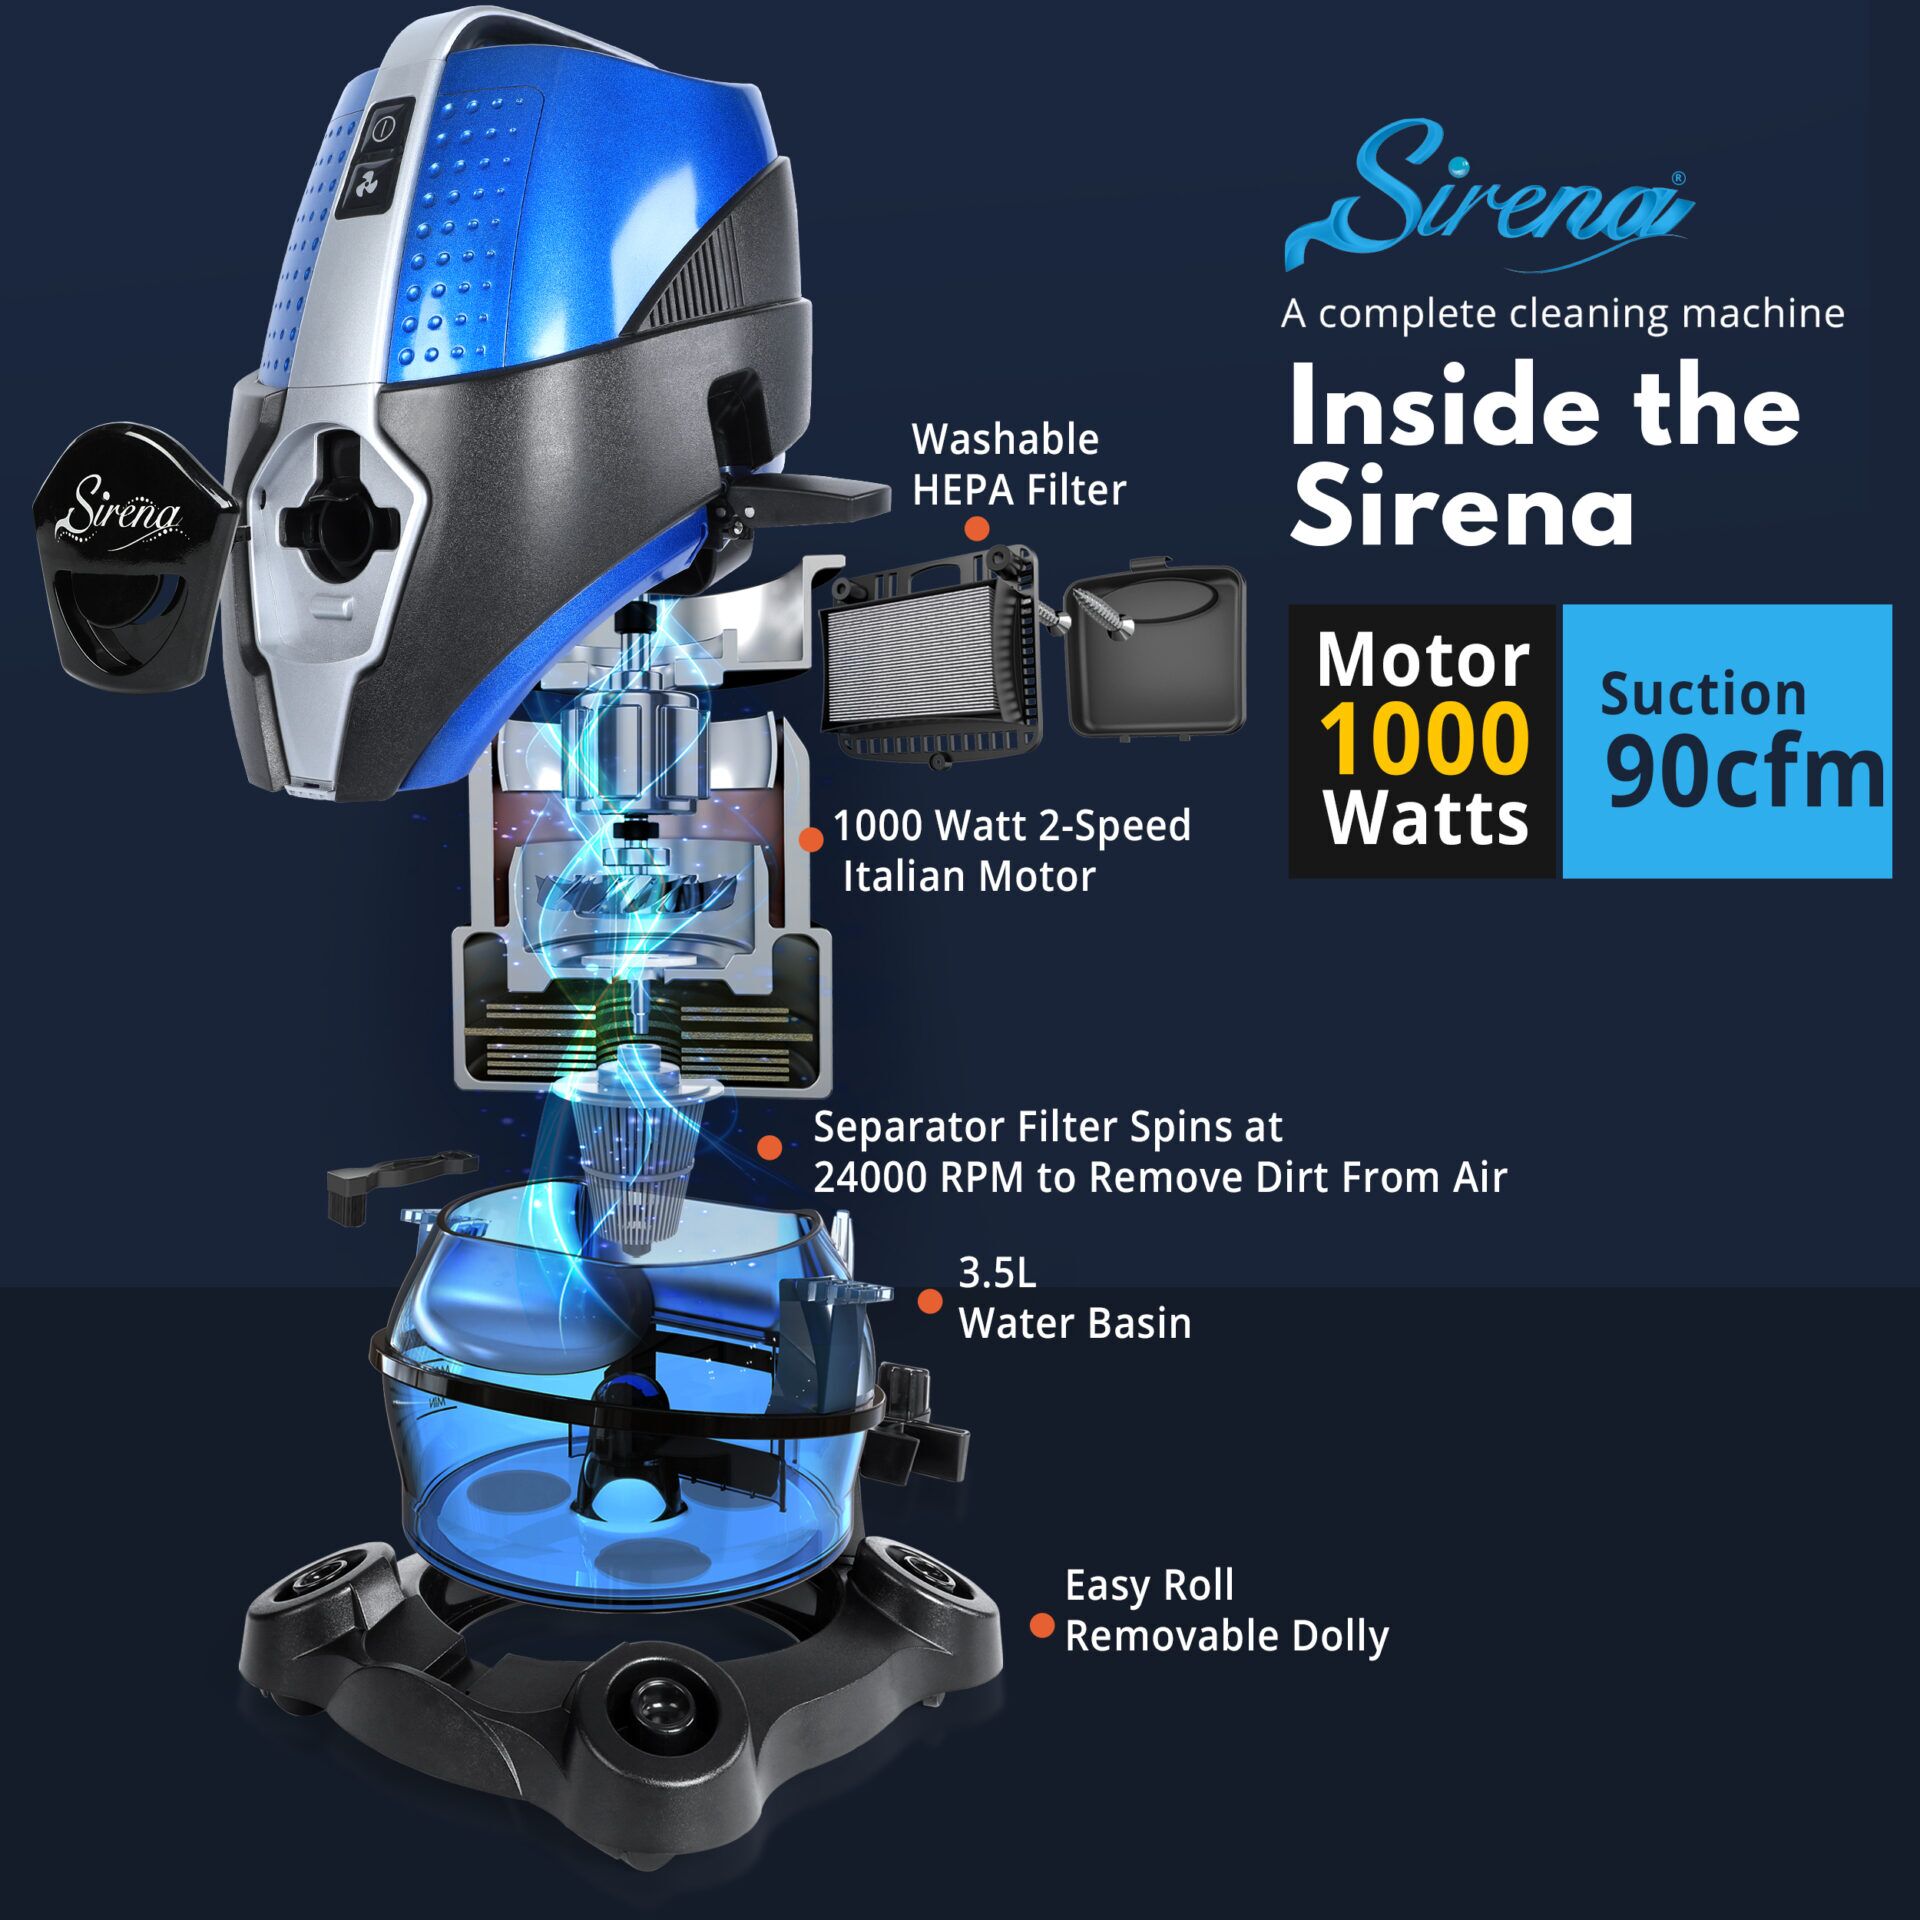
Before diving into the setup, it’s essential to grasp why the Sirena vacuum excels at air purification. The Sirena system, particularly models like the Sirena Twin Turbo or Deluxe, uses a water-based filtration method instead of traditional bags or HEPA filters. This “wet separation” technology captures up to 99.99% of airborne particles, including dust, pollen, mold spores, and even bacteria, by pulling air through a water basin where contaminants get trapped. Unlike standard vacuums, when used without attachments, it acts like a central air purifier, circulating room air through the system to release it cleaner on the other side.
This dual functionality makes it ideal for allergy sufferers or homes with high pollution levels. According to the EPA, indoor air can be up to five times more polluted than outdoor air, and devices like the Sirena help mitigate that by continuously filtering without generating ozone or other byproducts common in some electronic purifiers. Now, let’s get into the practical side—starting with what you’ll need.
What You’ll Need to Use Your Sirena Vacuum as an Air Purifier
Setting up your Sirena for air purification requires minimal additional items since the vacuum itself does the heavy lifting. Focus on gathering these essentials to ensure smooth operation. We’ve organized them in a table for easy reference, including specifications based on standard Sirena models.
| Item | Quantity | Specifications |
|---|---|---|
| Sirena Vacuum Unit | 1 | Any water-filtration model (e.g., Sirena Deluxe or Twin Turbo); ensure it’s in good working condition with intact seals |
| Distilled Water | 1-2 gallons | Preferably distilled to prevent mineral buildup; tap water works but may require more frequent cleaning |
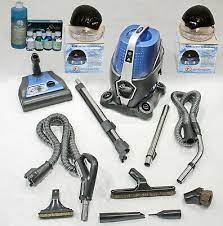
| Sirena Hose and Wand | 1 set | Standard attachments included with your model; no need for floor tools |
| Optional: Scent Tabs or Essential Oils | 1-2 tabs | Sirena-compatible purifying tabs for added fragrance and antimicrobial benefits; avoid non-approved oils to prevent clogs |
| Timer or Smart Plug | 1 | For automated run times; rated for 12-amp appliances to safely control sessions |
| Cleaning Supplies | As needed | Mild dish soap, soft cloth, and vinegar solution for post-use maintenance |
These items keep the process simple and cost-effective—most of what you need is already in your Sirena kit. If your model is older, check the user manual for compatibility, as variations exist between basic and advanced units.
Preparation Steps and Safety Considerations
Proper preparation is key to safely and effectively using your Sirena vacuum as an air purifier. Rushing this can lead to spills, motor strain, or reduced efficiency, so take about 10-15 minutes to set up correctly. Start by selecting a suitable location: place the vacuum in the center of the room you want to purify, on a flat, waterproof surface like tile or a protected carpet. Avoid direct sunlight or heat sources, as they can cause water evaporation and affect performance.
Safety First: Key Precautions
- Unplug Before Filling: Always disconnect the power cord before adding water to avoid electrical hazards. Warning: Water and electricity don’t mix—never operate with a damaged cord or in wet areas.
- Room Conditions: Ensure the room is closed off (doors and windows shut) for maximum air circulation. Ideal room size is 200-400 square feet; for larger spaces, run multiple sessions or move the unit.
- Check for Allergens: If you have severe respiratory issues, wear a mask during initial setup to avoid stirring up dust.
- Power Source: Use a grounded outlet and extension cord if needed, but keep it short (under 10 feet) to prevent voltage drops.
Once prepared, you’re ready for the step-by-step process. This setup typically takes 20-30 minutes for the first run, with subsequent uses being quicker.
Step-by-Step Process to Use Sirena Vacuum as Air Purifier
Transforming your Sirena into an air purifier is straightforward, broken into three logical phases: setup, operation, and shutdown. Follow these phases sequentially for best results. We’ll use numbered lists for the core actions to make it easy to follow. Expect the full cycle to take 45-60 minutes initially, including testing.
Phase 1: Initial Setup and Water Filling
This phase ensures the water basin is properly prepared to capture pollutants effectively.
- Power Down and Open the Unit: Unplug the Sirena and remove the top cover to access the water basin. Rinse the basin with warm water if it’s been stored, discarding any residue.
- Add Water: Pour in 1-1.5 gallons of distilled water, filling to the marked line (usually “MAX FILL”). For enhanced purification, add one Sirena scent tab or a few drops of essential oil—stir gently to dissolve.
- Secure the Lid: Replace the cover tightly, ensuring the seals are intact to prevent leaks. Attach the hose to the intake port but leave the wand end open or loosely connected to a floor tool for gentle air intake.
- Position for Circulation: Place the open end of the hose near the floor in a corner to draw in low-lying dust, or elevate it slightly for broader air pull.
Tip: If your model has a pre-motor filter, clean or replace it first for optimal airflow—neglecting this can reduce purification by up to 30%.
Phase 2: Running the Purification Cycle
Now, activate the system to start filtering the air. This is where the magic happens, as the motor pulls room air through the water, trapping particles.
- Plug In and Power On: Connect to a safe outlet and turn the dial to a medium speed setting (around 50-70% power) to balance purification and energy use. Avoid max speed unless vacuuming, as it can cause excessive water splash.
- Monitor Airflow: Let it run for 20-45 minutes per session. You’ll hear the steady hum and see bubbles in the water basin, indicating active filtration. Move the hose opening around the room periodically to target different areas.
- Enhance with Attachments: For deeper purification, attach the crevice tool to the hose end and hold it near upholstery or curtains to suck in embedded allergens without full vacuuming.
- Time It Right: Use a timer for consistency—run it daily for 30 minutes in high-traffic areas like bedrooms or living rooms.
During this phase, the Sirena can remove up to 3 pounds of airborne dirt per hour, per manufacturer specs. If the water turns cloudy quickly, that’s a sign it’s working—proceed to shutdown sooner.
Phase 3: Shutdown and Initial Testing
Properly ending the session prevents mold growth and verifies effectiveness.
- Power Off and Unplug: Turn off the unit and disconnect from power. Wait 5 minutes for the motor to cool.
- Empty the Dirty Water: Carefully pour out the contents into a sink or toilet—Important: Don’t pour down drains if heavily contaminated; dispose per local guidelines to avoid plumbing clogs.
- Quick Rinse: Refill with clean water, run briefly (1-2 minutes) to flush residue, then empty again.
- Test Air Quality: Use a simple method like the “tissue test”—hold a tissue near the exhaust port; it should blow steadily without dispersing dust. For advanced users, an affordable air quality monitor (like those from Amazon) can measure PM2.5 levels before and after, showing a 40-60% improvement typically.
If issues arise, like weak suction, refer to the troubleshooting section below.
Post-Completion Testing and Troubleshooting

After your first session, test for success and address any hiccups. Walk through the room—does it feel fresher? Sniff for reduced odors? For quantitative testing, note baseline air quality with a hygrometer or particle counter if available. Run a second cycle if needed.
Common issues and fixes:
– Weak Airflow: Check for clogs in the hose; clean with a pipe cleaner. Solution time: 5 minutes.
– Water Leaks: Tighten seals or replace gaskets (kits available online for $10-20). Warning: Operating with leaks can damage the motor—stop immediately if noticed.
– Overheating: Ensure vents are clear and don’t exceed 1-hour runs. Let cool for 30 minutes.
– No Bubbles: Verify water level and motor function; if persistent, it may need professional servicing.
If these don’t resolve it, your unit might require a deeper inspection.
Pro Tips for Maximizing Your Sirena Air Purifier
To get the most out of using your Sirena vacuum as an air purifier, go beyond the basics with these expert strategies. These tips can boost efficiency by 20-50% and extend your unit’s life.
- Customize Water Additives: Experiment with baking soda (1 tsp per gallon) for odor neutralization or tea tree oil for antibacterial effects—but test small amounts to avoid residue.
- Schedule Runs Strategically: Purify after cooking or vacuuming to capture stirred-up particles. In allergy season, run nightly in bedrooms for better sleep quality.
- Combine with Ventilation: Open windows post-session for 10 minutes to exchange air, preventing stagnation.
- Monitor Usage: Track run times in a log; aim for 2-3 hours weekly total to balance purification without wear.
- Upgrade Accessories: Invest in Sirena’s optional HEPA after-filter ($30-50) for hybrid dry/wet purification.
- Energy Savings: Use eco-mode if available, reducing power draw by 15% while maintaining filtration.
- Common Mistake to Avoid: Don’t run dry—always use water to prevent motor damage and voiding warranty.
Avoid overloading with too many additives, as this can clog the system over time.
When to Seek Professional Help
While the Sirena is user-friendly, some situations warrant expert intervention. Signs include persistent motor noise, unusual odors during runs, or if purification seems ineffective after cleaning (e.g., air quality doesn’t improve). These could indicate internal seal failures or impeller issues, common after 3-5 years of heavy use.
Look for certified Sirena technicians via the official website or authorized dealers—verify they use genuine parts. Expect costs of $50-150 for diagnostics and repairs, depending on location. If under warranty (typically 5-10 years for Sirena models), contact support first for free service. Always check warranty terms before DIY fixes to avoid invalidation.
FAQ
Q: Can any Sirena model be used as an air purifier?
A: Yes, most water-filtration models like the Sirena Deluxe or Ionizer versions work well, but bagless or non-water systems (if any) won’t. Check your manual; setup is similar across lines, but power ratings vary—aim for 12-amp units for larger rooms.
Q: How often should I run the Sirena for air purification?
A: For maintenance, 20-30 minutes daily in problem areas; for deep cleans, 45-60 minutes weekly. Adjust based on household factors like pets or smoking—overuse can lead to faster water changes.
Q: Is using the Sirena as an air purifier safe for pets and kids?
A: Absolutely, as it doesn’t emit chemicals or ozone. The water filtration is gentle and hypoallergenic. Just secure cords away from reach and supervise initial runs to prevent tip-overs.
Q: What if my water basin gets moldy?
A: Mold indicates improper drying—always rinse and air-dry after use. Clean with a 1:1 vinegar-water solution weekly. If severe, disassemble and wipe internals; persistent issues may need replacement parts.
Q: Does this method really improve air quality as much as a dedicated purifier?
A: Yes, Sirena’s system rivals HEPA units for particle capture, per independent tests from Consumer Reports analogs. It excels in humidity control too, but for ultra-fine particles, pair with a HEPA add-on.
Q: Can I use tap water instead of distilled?
A: Tap water is fine short-term but can cause mineral scaling over time, reducing efficiency. Switch to distilled for longevity, especially in hard-water areas—expect to descale monthly otherwise.
Q: How do I know if it’s working effectively?
A: Visual cues include dirtier water post-run and fresher-smelling air. Use a $20 air quality app on your phone for metrics; aim for PM2.5 under 12 µg/m³ after sessions.
Alternative Solutions for Air Purification
If your Sirena isn’t suitable (e.g., damaged unit) or you want backups, consider these options. The table compares them to Sirena usage for quick decision-making.
| Solution | Pros | Cons | Best For |
|---|---|---|---|
| Dedicated HEPA Air Purifier (e.g., Levoit Core 300) | Quiet operation, automated sensors, no water mess | Higher upfront cost ($50-200), requires filters replacement | Tech-savvy users wanting set-it-and-forget-it |
| DIY Wet Scrubber with Fan | Cheap (under $20 using household items), customizable | Less efficient, manual setup each time | Budget-conscious renters avoiding appliance mods |
| Houseplants (e.g., Snake Plant Combo) | Natural, low-maintenance, aesthetic benefits | Slow purification, not for heavy pollution | Eco-friendly homes as a Sirena supplement |
| Honeywell InSight HEPA | App integration, covers large areas | Bulky, electricity-dependent | Families needing whole-home coverage |
Sirena remains a top pick for multi-use, but these alternatives shine in specific scenarios like portability.
Keep Your Air Fresh and Healthy with Sirena
You’ve now mastered how to use your Sirena vacuum as an air purifier, from setup to advanced tips:
– Essential preparation and safety steps for worry-free use
– Detailed phase-by-phase process for effective sessions
– Troubleshooting and pro strategies to optimize results
Following this guide ensures cleaner air, reduced allergens, and better health without extra purchases—your Sirena is already equipped for the job. Start with a quick 20-minute run today and feel the difference in your home’s atmosphere.
Have you tried using your Sirena as an air purifier? Share your tips or results in the comments below to inspire other readers! If issues persist, describe them for community advice. Breathe easy knowing you’ve got this under control.