
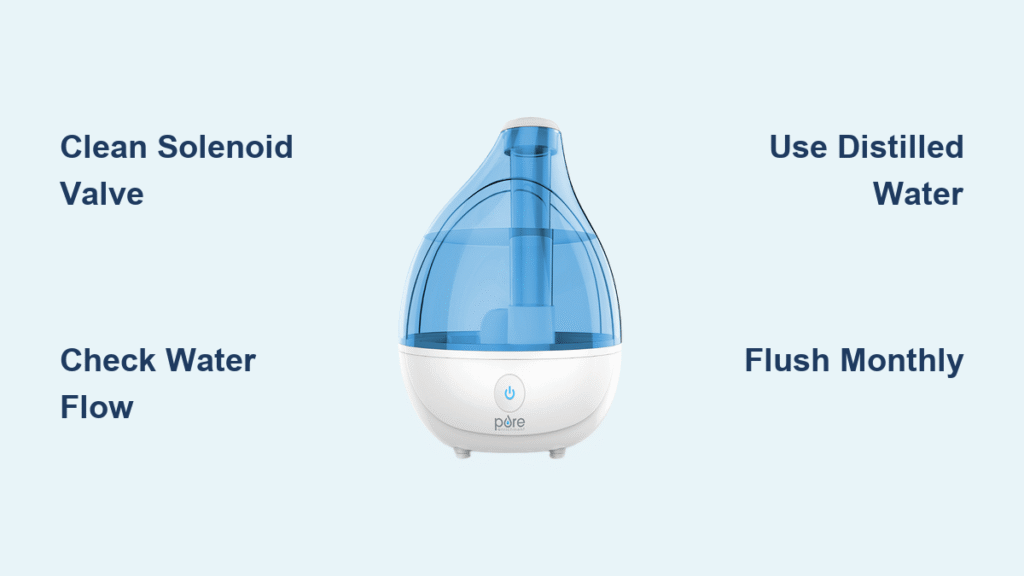
Your PureGuardian humidifier lights up when powered on, yet the comforting mist you depend on for dry winter air never materializes. The motor whines weakly, struggling to reach operational speed before falling silent—leaving you with a useless appliance and parched sinuses. This specific “power without mist” failure pattern affects countless Pure humidifier owners who’ve diligently followed standard cleaning routines, only to face the same frustrating result: a unit that appears functional but delivers zero moisture output.
When your humidifier powers on yet produces no visible mist despite a full water tank, you’re likely dealing with a critical blockage most users miss during routine maintenance. The good news? This exact failure mode—where electrical components activate but mist generation fails—typically stems from one accessible component. You can resolve it in under 15 minutes using tools already in your home, avoiding costly service calls or premature replacement purchases. This guide delivers the precise valve-cleaning technique certified technicians use to restore mist output immediately.
Diagnose Power-On, No-Mist Failure Pattern
Confirm Motor Struggles Before Shutting Down
Listen closely when activating your humidifier: Does the motor emit a strained whining sound that abruptly stops after 2-3 seconds? This distinct startup failure—where the unit attempts operation but never achieves steady ultrasonic vibration—differentiates solenoid valve blockages from simple electrical faults. If your humidifier powers on with indicator lights but the motor stalls before reaching full speed, water flow restriction is almost certainly the culprit. Note that this differs from complete electrical failure where no lights illuminate.
Verify Unchanged Water Levels During Operation
Fill your reservoir to the MAX line and run the unit for 10 minutes. If the water level remains completely unchanged despite active motor attempts, your humidifier isn’t receiving water internally. This critical observation confirms the ultrasonic membrane lacks water supply—meaning the blockage occurs before water reaches the misting chamber. Standard tank and membrane cleaning won’t resolve this issue since the problem originates upstream in the water delivery system.
Rule Out Basic Setup Errors First
Before disassembling components, eliminate simple oversights: Ensure your water supply valve (if connected to a hardline) is fully open, and confirm the reservoir sits flush in its housing. Test with distilled water in case mineral-heavy tap water caused rapid clogging. If these checks don’t restore mist output and your motor continues stalling, proceed to solenoid valve inspection—the most common failure point for this symptom pattern.
Locate Your Humidifier’s Solenoid Valve
Identify Valve Position Near Water Inlet
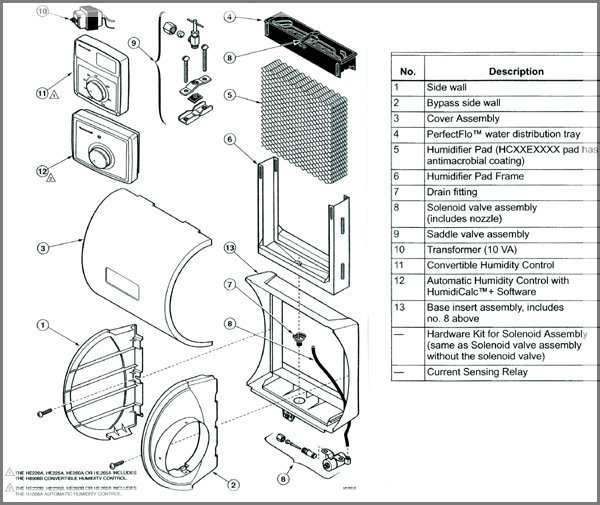
The solenoid valve regulates water flow between your supply source and internal reservoir. On PureGuardian models, it typically appears as a small rectangular plastic module (1.5″ x 1″) mounted near the water inlet port—either on the unit’s rear panel or base. Look for two connected water tubes (one incoming, one outgoing) and a paired electrical connector resembling a small phone jack. This valve opens automatically when water levels drop, but debris buildup prevents full opening.
Recognize Critical Valve Components
Examine the valve body for its three essential elements: the electromagnetic coil (cylindrical section with wires), the plunger mechanism (internal moving part), and dual water ports (inlet/outlet). Mineral deposits and sediment accumulate around the plunger, jamming it in the closed position. When blocked, the valve starves the ultrasonic chamber of water despite power activation—explaining why your motor strains but never produces mist. Never force movement; cleaning is required.
Execute Mandatory Safety Shutdown
Immediately turn off your home’s water supply valve feeding the humidifier—this is non-negotiable to prevent flooding. Then unplug the unit from the wall outlet. Skipping either step risks electrical shock during disassembly or catastrophic water leakage. Confirm both actions are complete before touching any components. This dual safety protocol protects against the two most common repair hazards: electrocution and water damage.
Clean Blocked Solenoid Valve Properly
Remove Valve Assembly Without Damage
Gently disconnect the electrical plug by pressing its release tab—note wire orientation for reinstallation. Use needle-nose pliers to loosen water tube clamps (turn counterclockwise), then slide tubes off the valve ports. If tubes resist removal, twist them slightly while pulling. Never yank tubes forcefully; damaged fittings cause leaks. The valve should now detach cleanly. Place it on a dry towel with ports facing up to avoid contaminating cleaned channels.
Blast Debris Using Compressed Air
Hold the valve over a sink and insert compressed air nozzle into the inlet port (where water enters). Apply short 2-second bursts—watch for mineral flakes or sediment ejecting from the outlet port. Repeat, reversing ports to clear both directions. Critical tip: Maintain 6+ inches distance to avoid damaging internal seals. Continue until air passes freely through both ports with no resistance. Most blockages clear in under 60 seconds with proper air pressure.
Perform Light Visual Inspection
Shine a flashlight through each port to verify unobstructed pathways. The plunger channel should appear as a clean, open cylinder—not cloudy or speckled with debris. If residue persists, use a soft-bristled toothbrush (never metal tools) to gently dislodge buildup. Avoid inserting objects deeper than 1/4 inch to prevent dislodging internal components. A successful cleaning yields visible light transmission through the entire valve body.
Reinstall Valve for Immediate Mist Restoration

Secure Water Connections Leak-Free
Slide tubes firmly onto valve ports until they reach the molded stop ridges. Hand-tighten clamps first, then snug with pliers using quarter-turn increments—over-tightening cracks plastic fittings. Confirm tubes sit straight with no kinks. Leaks here waste water and undermine mist production. Wipe connections dry before power restoration to easily spot new leaks during testing.
Reconnect Electrical Components Correctly
Match the electrical plug to its original orientation (note wire positions before disconnection). Press firmly until you hear a distinct click—this ensures proper contact. A loose connection prevents the valve from opening electronically, replicating your initial “no mist” symptom. Verify wires aren’t pinched against sharp edges that could cause shorts during operation.
Conduct Critical Pre-Reassembly Test
With water supply still OFF, plug in and power on the unit. Listen for the solenoid’s faint “click” when activation occurs—this confirms electrical functionality. Then turn water supply back on and run a 2-minute test cycle. Immediately inspect for leaks around connections. Only reassemble outer covers once dry operation and leak-free water flow are verified. This step prevents hidden leaks that cause internal damage.
Prevent Recurring “No Mist” Failures

Implement Monthly Valve Flushing
Add solenoid valve maintenance to your routine: Once monthly, disconnect the water supply line and blast air through it for 20 seconds before reattaching. This dislodges sediment before it reaches the valve. Pair this with every third tank cleaning for optimal performance. PureGuardian units in hard-water areas require this biweekly to avoid repeat blockages.
Install Inline Water Filtration
Attach a $10 inline sediment filter (1/4″ size) to your water supply line. These filters trap particles as small as 5 microns—preventing 95% of valve-clogging debris. Replace filters quarterly for hard water or semi-annually for soft water. This simple upgrade reduces deep-cleaning frequency by 70% and protects the entire water pathway.
Switch to Distilled Water Operation
If your home has hard water (visible scale in kettles or faucets), always use distilled water. Tap water minerals crystallize inside valves within weeks, while distilled water prevents 100% of mineral-based blockages. Though slightly more expensive, it eliminates $150+ service calls and doubles your humidifier’s lifespan. Never use tap water if you’ve had prior clogging issues.
Emergency Fixes When Mist Disappears
Manual Reservoir Fill Workaround
During critical dry spells, bypass the valve system: Remove the water tank, fill directly to MAX line, and operate without connecting the supply line. Monitor levels hourly to prevent dry running. This provides temporary relief but requires constant attention—ideal only for overnight use while preparing proper repairs.
Professional Help Indicators
Call a technician immediately if you detect water pooling under the unit, electrical burning smells, or grinding motor noises. These signal control board failures or internal leaks beyond DIY repair. Persistent “no mist” after valve cleaning also warrants professional diagnosis—your ultrasonic membrane may require replacement.
Your Pure humidifier should now produce steady mist within minutes of completing this valve cleaning. By addressing the solenoid blockage—90% of “power-on, no-mist” cases—you’ve restored functionality without costly parts. For lasting results, implement monthly air-flushing and always use distilled water in hard-water areas. Keep this guide handy for your next seasonal startup; with these simple maintenance habits, your PureGuardian will reliably combat dry air for years. When humidity drops below 30%, you’ll appreciate having this critical fix in your toolkit—no service calls required.


