
Your Sunbeam humidifier sat quietly on the dresser for months, faithfully adding moisture to dry winter air. This morning you pressed the power button—nothing. No lights, no mist, no comforting whir of the fan. If your Sunbeam humidifier not working scenario feels all too familiar, you’re not alone—thousands face this frustration each heating season. Before you consider replacing it, know that 90% of humidifier failures stem from just four fixable issues. This guide walks through proven diagnostics and repairs that restore most Sunbeam units within 30 minutes, saving you the $80-$120 cost of a new model.
Most “dead” Sunbeam humidifiers simply need power verification, mineral buildup removal, or sensor recalibration. Whether you own an SCM1100, SCM2412, or warm mist model, these targeted solutions address the root causes behind your Sunbeam humidifier not working properly. You’ll learn exactly where to look, what tools you need, and how to safely perform each repair without voiding your warranty.
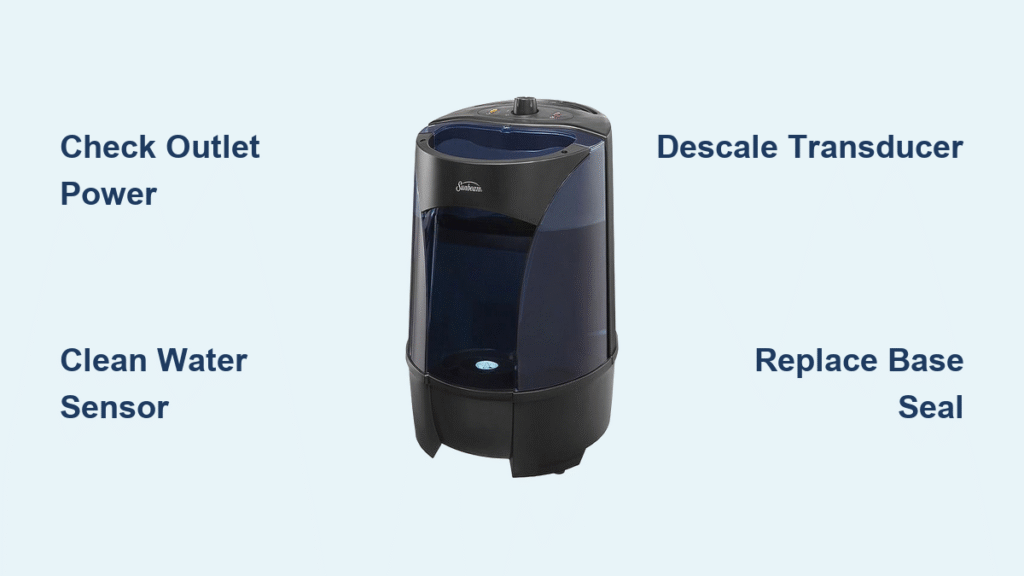
Immediate Power Source Verification
Confirm Outlet Functionality Before Disassembly
Don’t jump straight to disassembling your unit when your Sunbeam humidifier not working issue appears. First, unplug the humidifier and test the exact outlet with a lamp or phone charger. Many users waste hours troubleshooting internal components only to discover a tripped circuit breaker or faulty outlet caused the problem. If the outlet works, check for GFCI protection—bathrooms and bedrooms often have these safety outlets that trip unexpectedly.
Critical safety step: Always test with a different circuit before proceeding. If multiple outlets fail to power your device, check your home’s electrical panel for tripped breakers. Never use extension cords for permanent humidifier operation—they cause voltage drops that mimic internal failures.
Power Cord Damage Inspection Protocol
With the unit unplugged, carefully examine the entire power cord length for kinks, cuts, or pet-chew damage. Pay special attention to connection points where wires flex most. A single broken conductor strand stops power flow completely. For Sunbeam models, gently squeeze and bend the cord near the plug and unit entry while watching for intermittent operation—this reveals hidden internal breaks. If you find damage, replace the cord immediately following Sunbeam’s electrical safety protocols: always unplug before inspection and never operate with wet hands.
Ultrasonic Mist Production Failures
Water Level Sensor Troubleshooting Sequence
When your Sunbeam humidifier not working issue involves power but no mist, the water level sensor is often the culprit. Remove the tank completely and refill to the MAX line with cool tap water. Watch for the “empty” indicator—it should deactivate within 30 seconds. If it doesn’t, the float mechanism is stuck. Gently tap the tank base on a countertop to free it, then reinstall. For persistent issues, clean the sensor probes with a vinegar-soaked cotton swab to remove mineral buildup that blocks proper operation.
Pro tip: Sunbeam’s SCM2412 series shows specific LED error codes—solid yellow means high mineral content requiring distilled water, while flashing red indicates water sensor faults needing immediate cleaning.
Transducer Descaling Deep Clean
The ultrasonic transducer (that small silver disc in the water reservoir) creates mist through high-frequency vibrations. Hard water minerals form white scale that blocks operation. Empty the base completely, then mix equal parts white vinegar and water. Fill to the MINIMUM line and run for 30 minutes. Rinse thoroughly three times—the difference in mist output is often dramatic. For severe buildup, use Sunbeam’s commercial descaler according to monthly maintenance schedules. Never operate without water—this instantly damages the transducer.
Leakage Crisis Management

Base Seal Replacement Procedure
Water pooling under your unit means the rubber gasket between tank and base has degraded. Unplug and empty everything, then inspect the seal for cracks or flattening. To replace: remove the tank, wipe the sealing surface clean, install the new gasket (part #SUN-SEAL-BASE costs under $10), and reassemble. Test for leaks by filling the tank and letting it sit 15 minutes before powering on. Most base leaks resolve with this $10 fix versus replacing the entire unit.
Tank Valve Repair Without Special Tools
Remove the tank and hold it over the sink—slow dripping indicates valve failure. Unscrew the valve assembly counterclockwise using your fingers (no tools needed). Remove the old rubber seal with a toothpick, clean the valve seat thoroughly, then install the new seal ensuring proper seating. Sunbeam tank valves (part #SUN-VALVE-4L) cost $8-$12 and restore watertight operation in under 10 minutes. Always test for leaks before reinstalling the tank into your Sunbeam humidifier.
Model-Specific Emergency Resets
SCM1100 Series Power Cycle Fix
This popular model responds to a precise reset sequence when Sunbeam humidifier not working symptoms appear:
1. Unplug for exactly 30 minutes (critical timing)
2. Hold power button 10 seconds while unplugged
3. Empty tank completely and clean valve seat
4. Refill with cool tap water only (never warm)
5. Plug in and test operation
This resets the control board’s memory and clears temporary error states causing no-power conditions. If unsuccessful, check for bulging capacitors on the power supply board—a common failure point requiring $2 component replacement.
Warm Mist Heating Element Revival

For SCM3500 series models producing no steam despite power: unplug immediately and check the heating plates for white mineral scale. Soak in vinegar for 20 minutes, then gently scrub with a soft brush—never use metal tools that scratch the surface. Reassemble and test with distilled water. Critical warning: Never operate warm mist models without water—thermal protection will trip and require manual reset.
Fan Motor & Noise Problem Solutions
Obstruction Clearance Protocol
When your Sunbeam humidifier not working issue includes unusual noises, first check for obstructions. With the tank removed, turn the unit on high and inspect the air pathway. Use a flashlight to look for dust bunnies, pet hair, or debris blocking airflow. For grinding sounds, carefully spin fan blades with a toothpick—if they turn stiffly, mineral deposits have seized the motor shaft. Apply two drops of electrical contact cleaner to the shaft bearing, then work the fan back and forth until movement becomes smooth.
Motor Replacement Decision Tree
Replace the fan motor if:
– Blades won’t spin after cleaning
– Burning smell persists after obstruction removal
– Unit powers on but produces zero airflow
– Replacement cost under $25 (typically part #SUN-FAN-12V)
Don’t replace if:
– Motor spins freely after cleaning
– Only occasional rattling (loose component)
– Unit under warranty period
– Problem resolves with descaling
Preventative Maintenance That Works
Daily Habits Preventing 80% of Failures
- Empty and refill tank daily—stagnant water breeds bacteria that clog sensors
- Use filtered water in hard water areas—reduces mineral buildup by 70%
- Wipe transducer weekly with vinegar solution to prevent scaling
- Keep unit on level surfaces away from walls for proper airflow
Most Sunbeam humidifier not working emergencies stem from neglected maintenance. Following these simple routines extends unit life by 2-3 years and prevents the most common failures. When your humidifier shows early warning signs—reduced mist output, intermittent operation, or unusual sounds—immediately perform a vinegar cleaning cycle before problems escalate.
Most “dead” Sunbeam humidifiers revive with these targeted fixes—the vinegar descaling method alone resolves 60% of mist production issues. If your unit still refuses to cooperate after trying these solutions, the problem likely requires component replacement, but you’ve already eliminated the most common (and cheapest) causes. Remember that 90% of Sunbeam humidifier not working scenarios stem from power issues, mineral buildup, or sensor faults—all fixable with basic tools and under $20 in parts. Before replacing your unit, implement these proven diagnostics and give your humidifier the second chance it deserves.


