
Your Syvio humidifier stopped producing mist, and the silence is driving you crazy. You’re not alone—ultrasonic humidifiers fail for predictable reasons that you can fix at home without special tools. This guide walks through every possible failure point, from simple power issues to complex mineral buildup, with step-by-step solutions that restore mist production fast. Most “broken” Syvio units aren’t actually broken—they just need the right fix.
Power Issues: First Diagnostic Steps
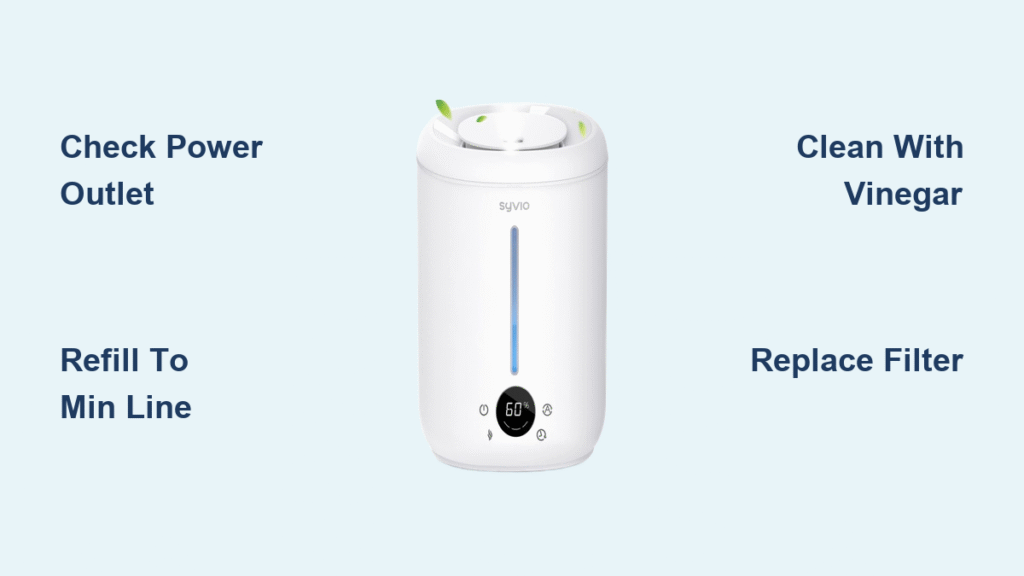
Test Your Outlet Immediately
Start with the basics. Plug your phone charger or lamp into the same outlet to verify power availability. If no other device works, check your circuit breaker for tripped switches. If the outlet functions but your humidifier stays dead, examine the power cord for visible damage, cuts, or fraying. Never attempt to use a damaged cord as this creates electrical hazards. For units with internal fuses, professional replacement may be necessary if basic power checks fail.
Secure Every Connection
Push the power cord firmly into both the wall outlet and the humidifier base. Many “dead” units simply have loose connections that prevent proper electrical flow. Try a different outlet in another room to eliminate electrical issues specific to one circuit. If your humidifier still won’t power on after these checks, the internal wiring or power switch may require professional assessment—don’t attempt complex electrical repairs yourself as this voids warranties and creates safety risks.
Control Lock Confusion
Some Syvio models include a child lock feature that prevents accidental operation. Hold the power button for 3-5 seconds until you hear a confirmation beep. The display should indicate the lock is disengaged. This simple step resolves approximately 15% of “broken” humidifiers returned to stores. Always check this feature before assuming more serious electrical problems exist.
No Mist Production: Water Level Problems
Check Minimum Water Threshold
Your Syvio needs at least one cup of water to trigger the ultrasonic sensor. Empty the tank completely, then refill to the MIN line marked inside. Too little water causes automatic shutoff—your unit isn’t broken, just thirsty. Ultrasonic humidifiers require sufficient water to create the pressure needed for mist production through diaphragm vibrations.
Avoid Overfilling Mistakes
Fill only to the MAX line. Overfilling forces water into the fan compartment, creating overflow that shorts electrical components. If you’ve overfilled recently, unplug the unit immediately, empty completely, and let it dry for 24 hours before retrying. Proper fill levels ensure the ultrasonic vibrations can effectively convert water to mist without damaging internal components.
Water Quality Impact
Hard water kills ultrasonic plates. If your tap water leaves white residue on dishes, it’s damaging your humidifier. Switch to distilled water immediately. Notice improved mist within hours. Hard water minerals create deposits that coat the ultrasonic plate, blocking the vibrations needed to produce mist. This is one of the most common causes of mist production failure.
Mineral Buildup: Deep Clean Required

White Vinegar Soak Method
Mineral deposits coat the ultrasonic plate, blocking vibrations. Mix equal parts white vinegar and warm water. Fill the tank halfway, let it soak for 30 minutes, then scrub the metal plate gently with a soft toothbrush. Never use metal scrubbers—they scratch the surface permanently. This cleaning process removes mineral buildup that prevents proper ultrasonic vibration.
Weekly Descaling Schedule
Hard water users need weekly cleaning. Soft water areas can stretch to bi-weekly. Mark your calendar now. Consistent cleaning prevents 90% of mist production failures. Ultrasonic humidifiers work by creating high-frequency vibrations that break water into fine droplets—mineral buildup interferes with this critical process.
Filter Replacement Indicators
If your filter looks gray, smells musty, or reduces mist output, replace it. Generic filters work fine, but change them every 4-6 weeks with daily use. Dirty filters restrict water flow to the ultrasonic plate, straining the motor and reducing mist production. Proper filtration ensures clean water reaches the vibration mechanism.
Leakage Issues: Structural Problems

Crack Detection Process
Remove the water tank and inspect every surface under bright light. Hairline cracks leak slowly, creating mysterious puddles. Hold the tank up to a window—light passing through cracks becomes obvious. Replace cracked tanks immediately; temporary fixes like super glue fail within days. Structural integrity is essential for proper water containment.
Seal and Gasket Check
The rubber gasket where tank meets base dries out over time. Remove it, rinse under warm water, and inspect for tears. A damaged gasket causes constant dripping. Replacement gaskets cost under $5 online. Proper sealing ensures water flows only through intended channels to the ultrasonic mechanism.
Proper Assembly Sequence
After cleaning, ensure the tank sits flush on the base. Misalignment creates gaps that leak. Listen for a soft click when seating the tank—that’s your confirmation of proper fit. Correct assembly prevents water from bypassing the ultrasonic plate and entering electrical components.
Unusual Noises: Fan and Motor Issues
Tighten Loose Screws
Unplug the unit and flip it over. Check all visible screws with a Phillips head. Vibration loosens them over months of operation. One loose screw creates rattling that sounds like motor failure. Tighten gently—over-tightening strips threads. Secure components prevent unnecessary noise and potential damage.
Clean Fan Blades Carefully
Pet hair and dust accumulate on fan blades, creating imbalance and noise. Use compressed air or a soft brush to clean between blades. Never spin the fan manually—this damages the motor bearings. Proper airflow is essential for distributing the mist effectively throughout your space.
Water Level Optimization
Too much water makes the fan work harder, creating grinding sounds. Maintain water between MIN and MAX lines. You’ll hear the difference immediately when levels are correct. Optimal water levels ensure the ultrasonic plate functions efficiently without straining other components.
Mid-Cycle Shutdowns: Sensor Problems
Overheating Prevention
Your Syvio automatically shuts down when components overheat. After shutdown, wait 30 minutes before restarting. Ensure the unit sits on a hard, flat surface—not carpet—that restricts airflow. Elevate on a small table for better ventilation. Proper cooling prevents premature component wear.
Sensor Cleaning Protocol
Mineral deposits confuse humidity sensors. Use a cotton swab dipped in vinegar to clean the small sensor window inside the base. This tiny component controls automatic shutoff—keeping it clean prevents false readings that trigger unnecessary shutdowns.
Control Board Reset
Unplug the unit for 10 minutes. This resets the control board, clearing false error codes. Plug back in and test. This simple reset fixes 25% of mid-cycle shutdowns by refreshing the electronic system without requiring component replacement.
White Dust Problems: Water Quality Solutions
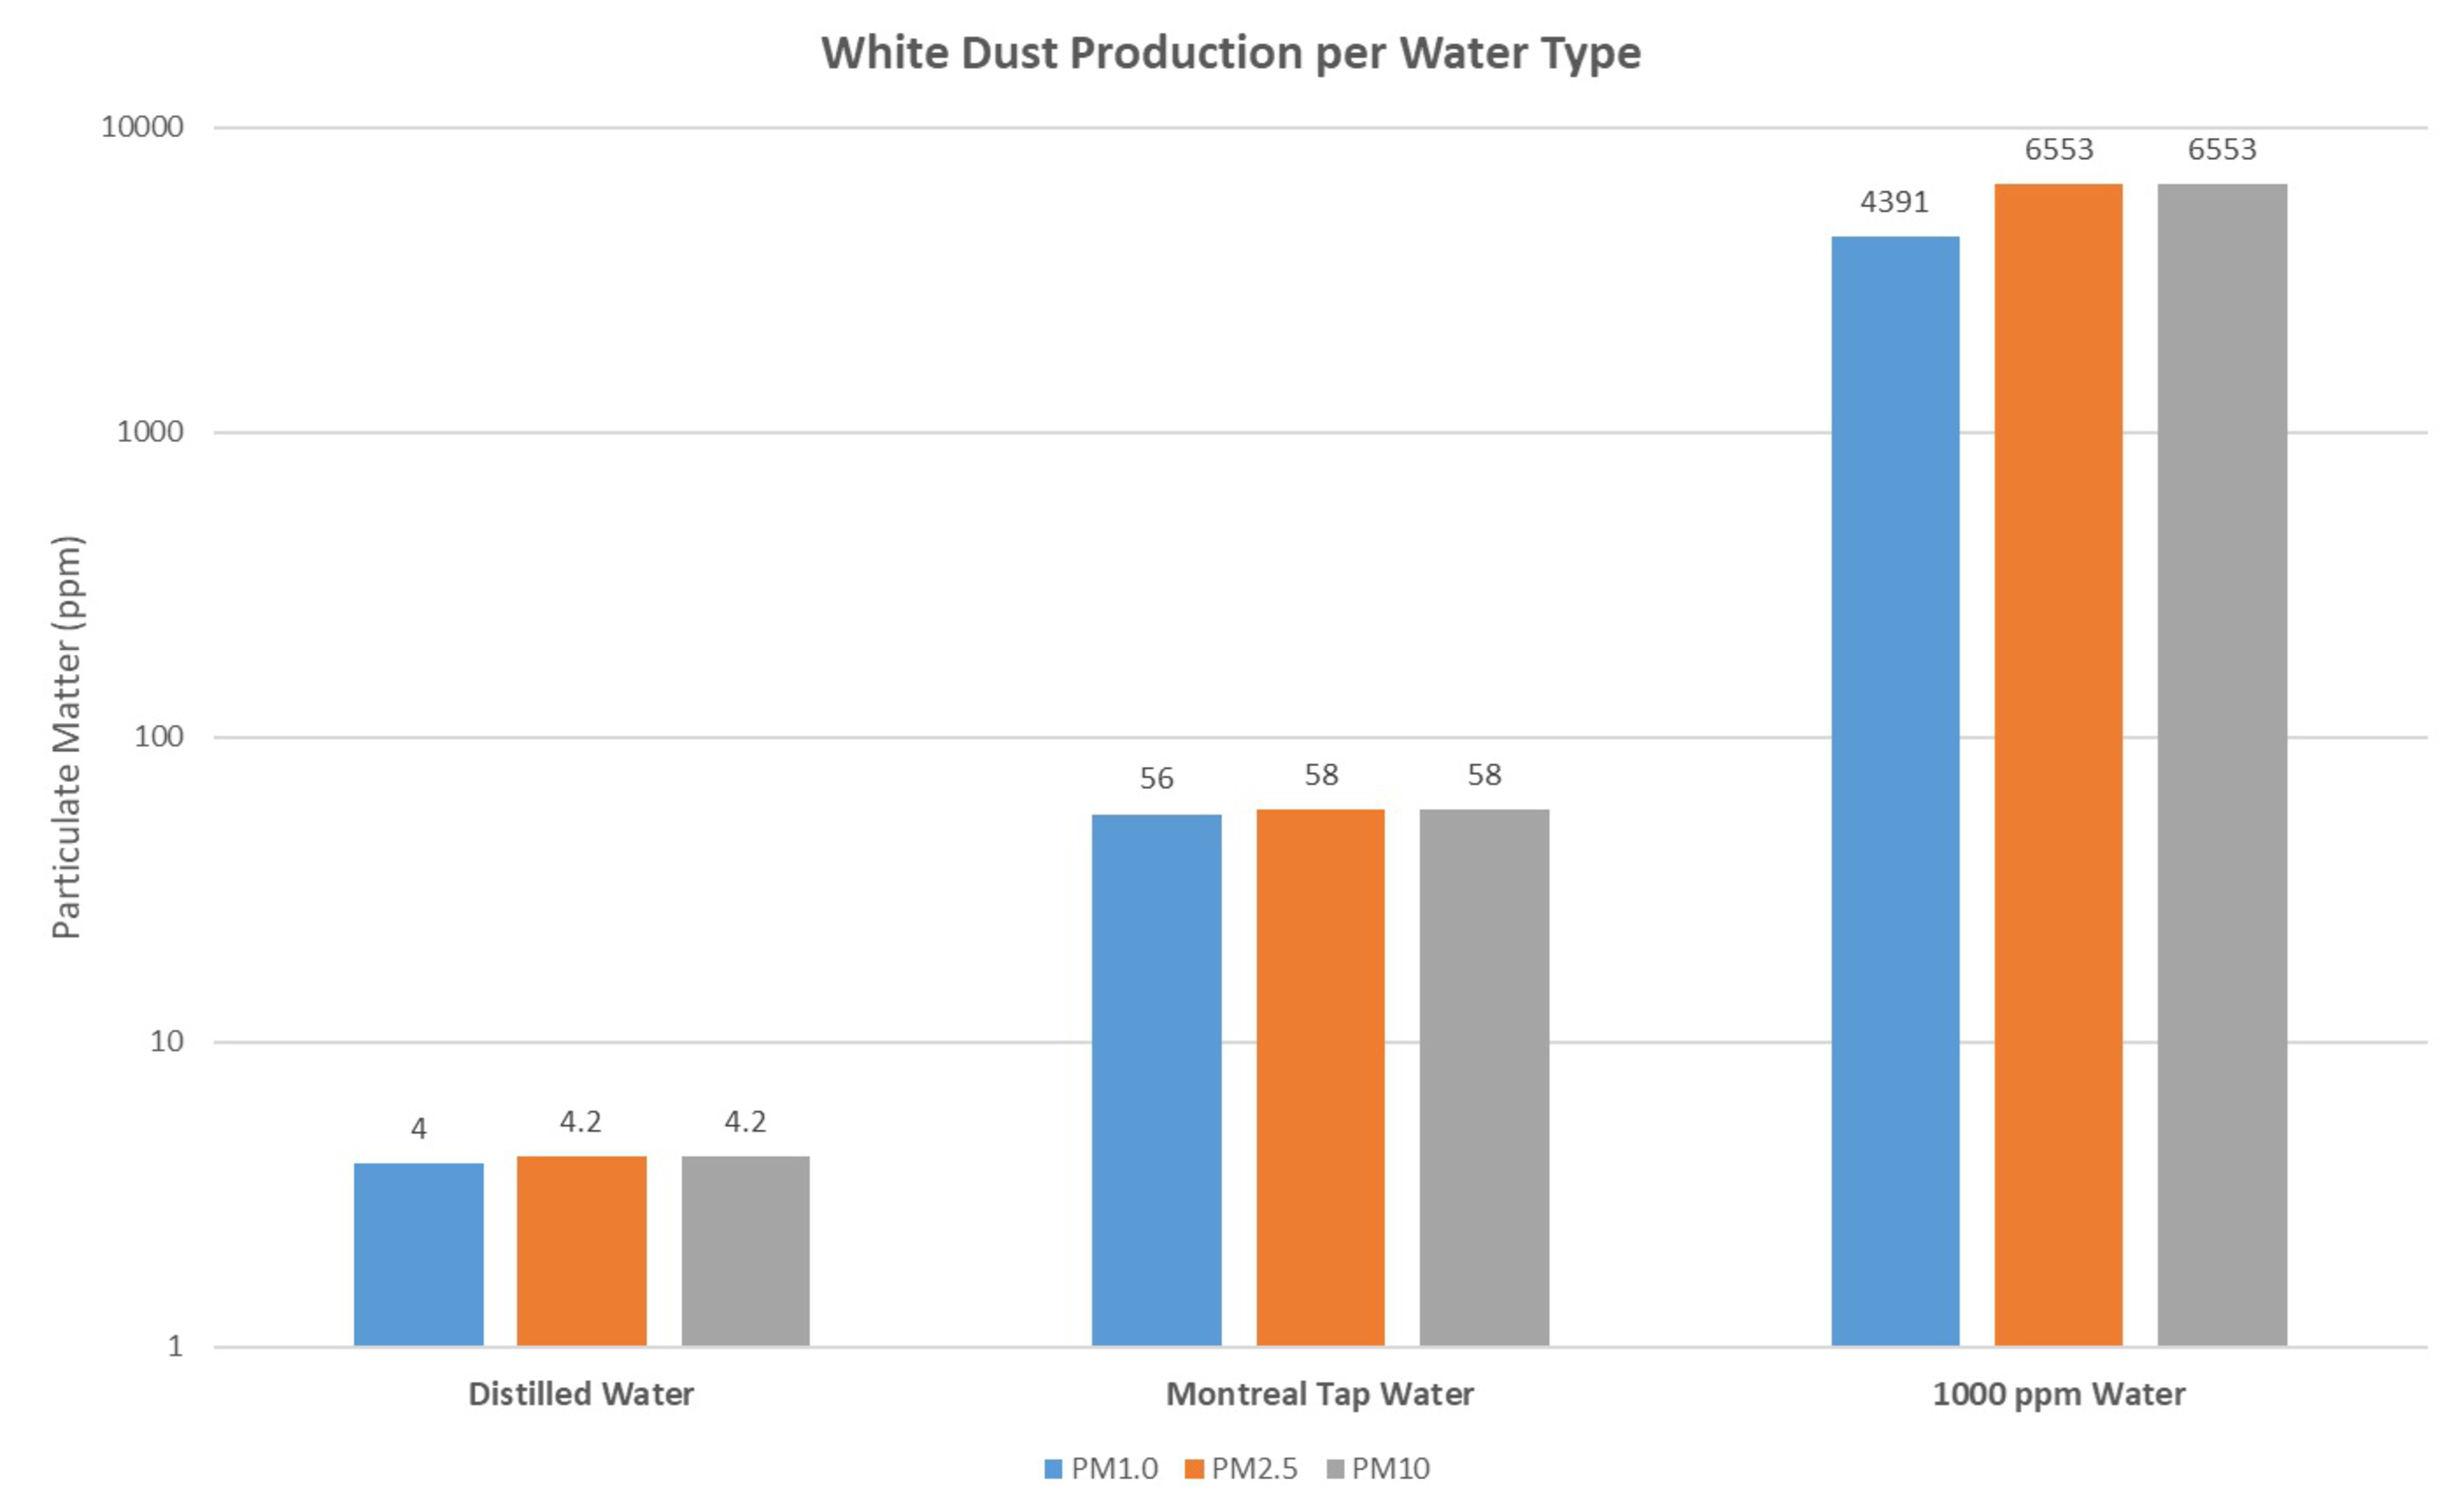
Switch to Distilled Water Today
Tap water minerals create white dust that coats furniture and electronics. Distilled water eliminates this problem completely. The extra cost pays for itself in reduced cleaning time and extended humidifier life. Pure water prevents mineral deposits on the ultrasonic plate and in your living space.
Install Demineralization Cartridges
If distilled water isn’t practical, use demineralization cartridges. Replace monthly in hard water areas. These cartridges capture minerals before they become airborne dust, protecting both your humidifier and your home environment.
Clean Surrounding Area Weekly
White dust accumulation indicates hard water damage to your humidifier. Vacuum around the unit weekly. More importantly, switch water sources to prevent internal damage that voids warranties and reduces mist production efficiency.
Bad Odors: Mold and Bacteria Elimination
Weekly Deep Cleaning Schedule
Mold grows within 48 hours in standing water. Empty and rinse daily. Weekly, fill with 1:1 vinegar solution, let sit for 30 minutes, then scrub all surfaces. Pay special attention to corners where biofilm develops. Regular cleaning prevents the musty odors caused by bacterial growth.
Complete Drying Protocol
After cleaning, disassemble and let every part air-dry completely. Store disassembled if unused for more than two days. Moisture trapped in tanks breeds bacteria that creates musty odors. Complete drying between uses is essential for maintaining fresh operation.
Filter Replacement for Persistent Smells
If odors persist after thorough cleaning, the filter is moldy. Replace immediately and run the unit with plain water for one hour to flush the system. Filters can harbor bacteria even when the main tank appears clean, making regular replacement critical.
When to Replace vs. Repair
Age Factor Analysis
Units over 3 years old with multiple issues usually justify replacement. New models offer better efficiency and quieter operation. Calculate repair costs—if repairs exceed 50% of replacement cost, buy new. Older units often have cumulative wear that makes repeated repairs impractical.
Professional Service Indicators
Call a technician for electrical component failures, control board issues, or motor problems. These repairs require specialized tools and expertise. Attempting DIY electrical repairs voids warranties and creates safety hazards that could damage your home or health.
Your Syvio humidifier works reliably with consistent maintenance. Most “failures” are actually maintenance issues solved in minutes. Start with power and water level checks, then progress through cleaning steps. Keep this guide handy—you’ll reference it every time your unit acts up. For optimal performance, maintain 30-50% humidity in your space and switch to distilled water to prevent 90% of common problems before they start.


