
Waking up with cracked lips, itchy skin, and static shocks zapping your fingertips? That dry winter air isn’t just uncomfortable—it’s warping your hardwood floors and aggravating respiratory issues. Installing a furnace humidifier solves this by adding moisture through your existing HVAC system, creating healthy 40-45% humidity levels throughout your home. Skip the $300-$1,200 professional fee and learn exactly how to install furnace humidifier units yourself in 4-8 hours. You’ll master bypass and fan-powered models step-by-step while avoiding costly water damage from common DIY mistakes.
Critical Safety Steps Before Installation
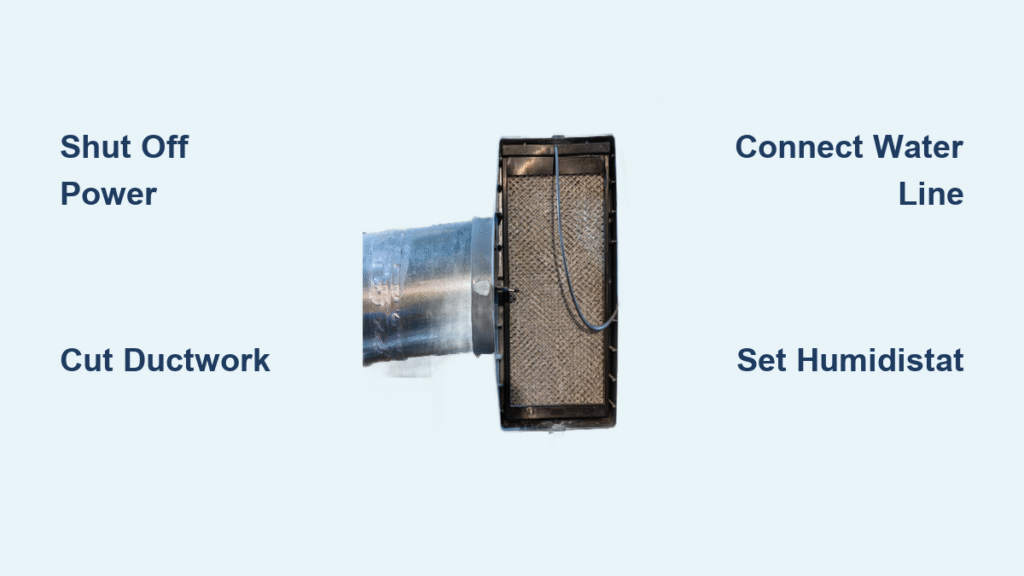
Shut off both furnace and air handler breakers—not just one—then verify zero power with a non-contact voltage tester. One live wire could electrocute you during ductwork modifications. Simultaneously, shut off your main water supply or closest branch valve. Skipping this risks catastrophic flooding when connecting copper pipes. Keep a fire extinguisher within arm’s reach if soldering, and wear ANSI-approved safety glasses plus cut-resistant gloves. Sharp sheet metal edges cause 12,000+ ER visits annually—don’t become a statistic.
Must-Have Safety Gear Checklist
- Electrical: Non-contact voltage tester, circuit breaker lockout tag
- Plumbing: Pipe wrench, tubing cutter (no hacksaws—creates burrs)
- Protection: ANSI Z87.1 safety glasses, ANSI cut-resistant gloves (Level 4)
- Emergency: Bucket under work area, towels for immediate leak control
Precise Ductwork Cutting for Perfect Fit

Position the manufacturer’s template on your supply plenum (the large metal box above the furnace), ensuring arrows align with airflow direction. Mark corners with permanent marker, maintaining 6-inch clearance from duct seams to prevent weak points. Drill 1/4″ pilot holes at each corner first—this stops metal distortion during cutting. Insert red-handled aviation snips into the first hole and cut slightly inside your marked line toward the next corner. File edges smooth with a metal file; rough edges cause air leaks that slash HVAC efficiency by 20%.
Pro Tip: Place masking tape over your cut line before marking. This prevents slippage and reduces metal burrs. Test fit the humidifier housing before final mounting—if it wobbles, your cut is oversized.
Water Supply Line Installation Without Leaks
Always tap into the cold water line near your furnace (usually the water heater supply). Hot water accelerates mineral buildup that clogs humidifiers. Install a saddle valve on straight copper pipe sections only—never on elbows. Tighten clamps evenly in quarter-turn increments until you hear water flow. Critical warning: Saddle valves fail within 2-3 years. For permanent installations, use a tee fitting with shutoff valve instead. Route 1/4″ copper tubing in gentle curves (no sharp bends!) with insulated staples every 18 inches. Maintain a 1/4″ per foot downward slope toward the humidifier for proper drainage.
Leak-Proof Connection Sequence
- Wrap all threaded fittings with 3 layers of Teflon tape clockwise
- Hand-tighten compression nuts, then give 1/4 turn with wrench
- Place dry paper towels under connections before testing
- Turn water on slowly—watch for damp spots indicating micro-leaks
- If leaks appear, tighten nut 1/8 turn max (overtightening cracks fittings)
Wiring Humidistat for Accurate Control
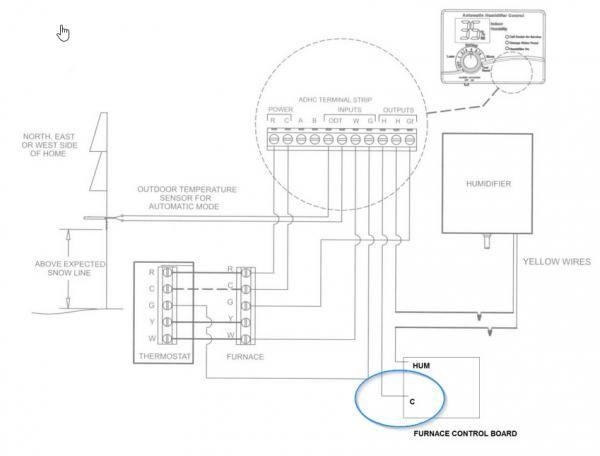
Mount the humidistat on the return air duct 12-24 inches upstream from the humidifier. This placement reads dry air before moisture addition, preventing false readings. Cut a precise hole using the manufacturer’s template—too large causes inaccurate humidity sensing. Connect two 18-gauge thermostat wires to your furnace control board’s “HUM” terminals. No HUM terminals? Wire to the blower motor’s low-speed tap instead. Never connect 120V directly—humidistats require only 24V. Secure wires with cable staples every 12 inches, avoiding furnace heat exchangers.
Expert Note: Test voltage at humidistat wires with a multimeter before connecting. Should read 24-28V AC when furnace runs. Higher voltage fries controls.
Bypass Duct Setup for Optimal Airflow (Bypass Models)
Measure between supply and return plenums for bypass duct length. Use 6″ diameter rigid ducting per most manufacturer specs. Position the bypass connection 6 inches above the humidifier to prevent water backflow. Install a manual damper in the duct with “WINTER OPEN / SUMMER CLOSED” markings in permanent marker. Seal all joints with mastic duct sealant—not duct tape (it fails at high temps). A properly installed bypass duct increases moisture distribution by 30% compared to return-duct installations.
Drain Line Configuration to Prevent Flooding

Run 3/4″ PVC pipe with integrated P-trap from the humidifier drain to your floor drain. The trap prevents sewer gases from entering your home—skip this and you’ll smell rotten eggs. Maintain a 1/4″ per foot downward slope and include an air gap per local codes (typically 2x pipe diameter above drain level). In unheated basements, wrap the line with self-regulating heat tape to prevent winter freezes. Test drainage by pouring 2 cups of water into the drain pan—any standing water means improper slope or clogs.
System Startup and Calibration Protocol
Follow this exact sequence to avoid damage:
1. Water test: Turn on supply slowly while checking all connections (5-minute watch)
2. Power restoration: Flip breakers while monitoring for electrical smells
3. Initial settings: Set humidistat to 35% (never exceed 45% in winter)
4. Operation check: Run furnace 10 minutes, then activate humidifier
5. Drain verification: Confirm water flows within 2 minutes of activation
6. Leak inspection: Place paper towels under all plumbing joints overnight
Calibrate within 48 hours: Increase humidity 5% daily until reaching 40-45%. If windows fog, reduce settings by 5%—excessive moisture causes mold growth inside walls. Monitor with a $10 hygrometer placed away from vents.
First-Season Maintenance Checklist
Monthly: Inspect the water panel for white mineral crust (indicates hard water). Replace filters every 1-3 months—clogged pads reduce output by 70%. Quarterly: Pour 1 cup vinegar down the drain line to prevent clogs. Pre-season: Before next winter, soak the water panel in vinegar 30 minutes, clean housing with 50/50 bleach solution, and replace corroded copper fittings.
Critical Warning: Shut off water supply and drain the system completely at season’s end. Standing water breeds mold that spreads through ducts when reactivated.
When DIY Becomes Dangerous: Call a Pro
Hire a technician immediately if:
– You need a steam humidifier (requires 240V circuits)
– Your ductwork has complex bends or limited access
– Local codes mandate permits for plumbing modifications
– You’re uncomfortable with electrical wiring tests
Attempting these scenarios risks $5,000+ water damage from hidden leaks. For bypass or fan-powered units, DIY is safe if you follow this guide precisely—just budget 6 hours for your first installation.
A correctly installed furnace humidifier transforms parched winter air into comfortable, healthy humidity while protecting your home’s structural integrity. By executing these ductwork cuts, water connections, and calibration steps with precision, you’ll maintain ideal 40-45% humidity levels all season. Monitor your system weekly for the first month—check for water pooling beneath the unit or white mineral dust on furniture, which indicate immediate issues. Once verified, enjoy crack-free skin, silent wood floors, and easier breathing knowing you mastered this essential home upgrade yourself. Remember to schedule quarterly filter replacements and annual deep cleans to keep your investment flowing smoothly for years.


