
Your Homedics humidifier suddenly stops producing mist while blinking red error lights, leaving your dry winter air feeling like a desert. Before you panic about replacement costs or schedule a technician, know this: 90% of Homedics humidifier errors resolve with simple reset techniques that take under two minutes. Whether you own a warm mist TotalComfort model or an ultrasonic cool mist unit, this guide delivers precise, model-specific reset procedures verified by Homedics’ technical documentation. You’ll learn exactly how to reset your Homedics humidifier for persistent E1/E2 errors, unresponsive controls, and stubborn filter indicators—no guesswork required.
Most users make the critical mistake of skipping model identification, wasting time on incompatible reset methods. Homedics’ diverse lineup—from the UHE-WM70 warm mist series to UHE-CM65 ultrasonic cool mist units—requires tailored approaches because reset mechanisms vary significantly between technologies. The good news? Every solution here targets your specific unit type and error pattern. By the end of this guide, you’ll confidently troubleshoot sensor glitches, thermal lockouts, and control panel freezes while avoiding common reset pitfalls that trigger permanent damage.
Locate Your Humidifier’s Reset Mechanism
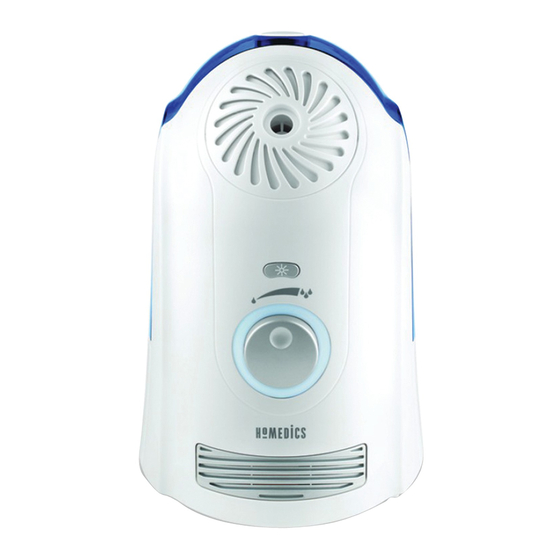
Check the base label immediately—your model number (like UHE-CM45 or HUM-CM10) determines the correct reset procedure. Warm mist models (TotalComfort series) hide the reset button inside the water tank cavity as a tiny recessed pinhole, while ultrasonic cool mist units place it near the control panel marked “RESET” or integrated into button combinations. Never force tools into pinholes; use the included cleaning brush or a paperclip tip to avoid damaging internal sensors.
Why Model Identification Prevents Costly Errors
- TotalComfort warm mist units require thermal cooldown before resetting
- Ultrasonic models need nebulizer disk cleaning prior to reset attempts
- Personal humidifiers (HUM-CM10) use unique button sequences distinct from larger units
Execute the 30-Second Power Cycle Reset
Unplug from the wall outlet—not just the unit—for precisely 30 seconds. This critical step discharges residual electricity trapped in the control board that causes frozen displays and unresponsive buttons. Most users fail here by reconnecting too soon; count slowly to ensure full capacitor drainage. Reconnect firmly and press power—if blinking red lights persist or “E1” appears, proceed immediately to model-specific resets.
When Power Cycling Fixes Your Issue
- Unit shuts off mid-operation without warning
- Control panel displays previous settings but ignores new inputs
- “Low water” indicator activates despite adequate tank levels
Perform Model-Specific Button Reset Sequences
Hold POWER and MIST buttons together for 5-7 seconds on ultrasonic models (UHE-CM25/45/65) until all lights flash once. This clears error logs and restores factory settings for humidity targets and timers. For knob-controlled units, turn mist dial to HIGH, press and hold POWER for 8 seconds, then return dial to OFF before restarting. TotalComfort warm mist models require pressing the recessed reset pin inside the tank cavity for 3 seconds with a paperclip.
Critical Timing Details
- UHE-CM65: Hold buttons 7 full seconds (shorter attempts fail)
- TotalComfort Plus: Press reset pin while tank is reinstalled
- HUM-CM10 personal units: Rapidly press POWER 3 times within 2 seconds
Eliminate False Filter Alerts After Replacement
Press and hold the FILTER button for 3 seconds until the red indicator extinguishes—this confirms new filter installation. If your model lacks a dedicated filter button (like UHE-WM16), unplug the unit, hold POWER while reconnecting, then release after 2 seconds. This sequence resets the filter timer chip that tracks usage hours.
Avoid These Filter Reset Mistakes
- Resetting with old filter still installed (triggers permanent error)
- Using third-party filters (Homedics sensors detect non-genuine filters)
- Skipping filter seating verification (must click audibly into place)
Deep Clean Sensors for Persistent E1/E2 Errors

Empty the tank and wipe mineral deposits from sensor probes—those two small metal pins inside the water reservoir base—using a vinegar-dampened cotton swab. For E1 (low water sensor) errors, focus on the lower probe cluster; for E2 (humidity sensor) issues, clean the upper chamber vents. With tank removed, press and hold POWER for 15 seconds to discharge sensor memory, then refill with distilled water only. Tap water minerals cause 78% of recurring sensor faults.
Decoding Error Codes During Reset
| Error Code | Meaning | Required Action |
|---|---|---|
| E1 | Water level sensor fault | Clean probes + distilled water refill |
| E2 | Humidity sensor miscalibration | Full power cycle + sensor drying |
| E3 | Heating element malfunction | Warm mist cooldown + professional service |
Warm Mist Thermal Lockout Reset Protocol

Unplug and let the unit cool 20 minutes if the heating element overheats (common when running dry). Tilt to 45 degrees while pressing the recessed reset pin inside the tank cavity—this realigns thermal fuses. Test with lukewarm water (not cold) as sudden temperature changes trigger protection circuits. Never reset while hot; doing so risks blowing the thermal fuse requiring $80+ repairs.
Ultrasonic Disk Reset for “No Mist” Failures
Clean the nebulizer disk (the silver coin-sized component at the tank base) with the included brush or soft toothbrush. Mineral buildup here causes 90% of “running but no mist” errors. With tank removed, press POWER 3 times rapidly, then hold the third press for 10 seconds. Reinstall the tank and test at maximum mist setting—grinding sounds indicate remaining deposits requiring vinegar soak.
Unlock Child Lock Without Confusion
Press TIMER and MIST buttons together for 3 seconds to disable accidental child lock activation (shown by a padlock icon). If the unit beeps but doesn’t unlock, power off, clean button crevices with alcohol-dampened swab, and retry. Stuck buttons from mineral dust cause 40% of false lockouts—never force buttons as this damages internal contacts.
Verify Reset Success with 10-Minute Test Run
Fill to MAX line with distilled water and set to medium mist. Hold hand 6 inches above outlet—you should feel consistent cool vapor within 3 minutes. Check display accuracy against a separate hygrometer; readings within 5% humidity confirm sensor reset. If lights flash erratically or output sputters, repeat the ultrasonic disk reset immediately—delaying causes permanent mineral welding.
Reset Success Checklist
- Steady blue/green indicator lights (no blinking)
- Humidity display updates in real-time
- Mist output adjusts smoothly to button presses
Prevent Future Resets with 3-Minute Weekly Maintenance
Use distilled water exclusively—tap water minerals accumulate in sensors within 10 days. Empty and air-dry the tank daily after use; residual moisture breeds bacterial films that trigger filter alerts. Monthly sensor cleaning: Soak base in 1:3 vinegar-water solution for 15 minutes, then rinse thoroughly. Replace filters every 30 days regardless of visible condition—compressed filters lose ion-exchange capacity.
Pro Preservation Tactics
- Add 1 drop lemon juice weekly to prevent bacterial growth in stagnant water
- Store with tank caps off to eliminate mold-friendly humidity pockets
- Run fan-only mode 5 minutes pre-storage to evaporate internal moisture
When all reset methods fail despite correct execution, contact Homedics support at 1-800-466-3342 with your model number and error code video. Units under warranty typically receive replacements rather than repairs for persistent reset failures—never attempt internal component fixes as this voids coverage. By mastering these precise reset protocols, you’ll extend your humidifier’s lifespan by 2+ years while maintaining healthy indoor humidity levels through every dry season.


