
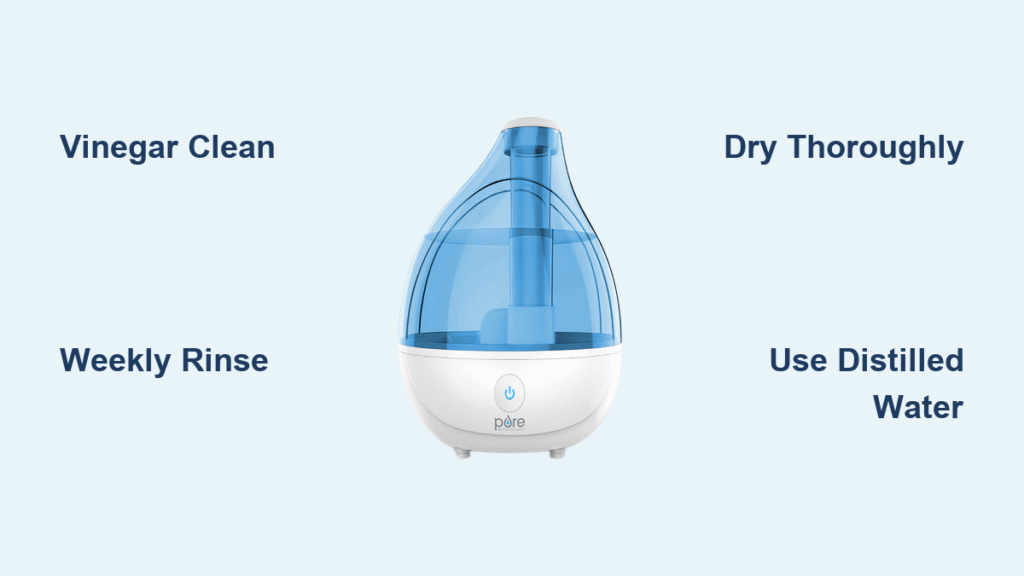
That faint musty smell from your Pure Enrichment humidifier? The stubborn white crust around the water tank? You’re not alone—over 60% of humidifier owners unknowingly circulate mold spores through their homes because of improper cleaning. When mineral deposits and bacteria take root in your unit, it stops humidifying effectively and starts compromising your family’s respiratory health. This guide delivers the exact 20-minute vinegar cleaning protocol that restores peak performance while eliminating harmful contaminants. You’ll learn model-specific disassembly tricks, how to spot early mold growth, and why your current cleaning routine might be making things worse.
Weekly Cleaning Schedule That Actually Works
Skipping weekly maintenance turns your humidifier into a bacterial breeding ground within 72 hours. Pure Enrichment’s engineering team confirms mineral buildup begins after just three uses with tap water. Stick to this non-negotiable routine to avoid costly replacements and health risks.
Daily Prevention Protocol
Empty the water tank completely every morning—never let stagnant water sit beyond 24 hours. Refill only with fresh, cool water to prevent thermal shock to internal components. Wipe the tank rim with a microfiber cloth to remove initial mineral deposits before they harden.
Weekly Deep Clean Timing
Schedule cleaning every Sunday morning when humidity levels are typically lowest. If you notice reduced mist output or pink slime in the tank, clean immediately—don’t wait for your scheduled day. Heavy users in hard water areas should clean twice weekly.
Essential Supplies You Already Own
Forget expensive cleaners—Pure Enrichment specifically recommends these household items for safe, effective maintenance. Using anything else voids your warranty and risks damaging ultrasonic components.
- White vinegar (undiluted, 5% acidity) – dissolves limescale without scratching
- Soft-bristled toothbrush (old but clean) – reaches crevices without damaging plastic
- Large glass bowl – for soaking small parts (plastic can absorb vinegar odor)
- Microfiber towels – lint-free drying for sensitive components
Power Down & Safety Protocol
Unplug immediately before touching any part—electric shock risk remains even when the unit appears off. Never submerge the base unit in water; electronics are only splash-resistant. Allow 30 minutes cooling time after operation since the nebulizer plate retains heat. Check for moisture in the power cord socket with a dry cotton swab before reassembly.
Complete Disassembly Without Damage
Water Tank Removal Technique
Lift the tank straight upward with firm pressure—no twisting required. If stuck, gently rock side-to-side while lifting. Pour remaining water into sink immediately; never let old water contact new cleaning solution. Inspect the tank seal for cracks that cause leakage.
Model-Specific Component Separation
Your Pure Enrichment model determines critical disassembly steps:
– MistAire models: Twist nozzle counterclockwise 45 degrees before lifting
– Elite models: Press both side tabs simultaneously to release filter housing
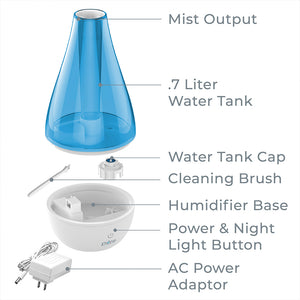
– All models: Remove the circular mist diffuser plate from the base reservoir
Pro Tip: Place components in disassembly order on a labeled towel—reassembly mistakes cause 70% of post-cleaning leaks.
Vinegar Cleaning Treatment for Hard Water
Tank Deep Clean Procedure
Pour 1½ cups undiluted white vinegar directly into the empty tank. Swirl vigorously for 30 seconds to coat every surface—pay special attention to the bottom corners where deposits hide. Place the tank back on the base unit, allowing vinegar to drain into the reservoir. Set timer for 25 minutes—hard water areas need full duration to dissolve calcium crystals.
Small Parts Soak Method
Submerge these components in a vinegar-filled glass bowl:
– Mist nozzle and directional spout
– Removable filter housing (if washable)
– Ultrasonic plate cover
– Water level sensor cap
Critical Warning: Never soak electronic components like the control panel base. Limit soak time to 20 minutes—prolonged exposure degrades rubber seals.
Scrub & Rinse Process That Eliminates Residue

Targeting Hidden Contamination Zones
After soaking, use your toothbrush to scrub these high-risk areas:
– The white ring inside tank neck (mineral crust)
– Pink slime near water line (Serratia marcescens bacteria)
– Base reservoir grooves where mold hides
Apply light pressure—scratches create bacterial hiding spots. For caked-on deposits, make a paste of vinegar and baking soda.
Triple Rinse Verification System
Rinse each part under running water for 45 seconds minimum. Fill the tank with clean water, swish, and dump three times. Sniff test: No vinegar odor should remain—if detected, repeat rinsing. Check the reservoir drain hole with a flashlight for lingering debris.
Drying & Reassembly Without Recontamination
Air-Dry Protocol for Mold Prevention
Lay components on a clean microfiber towel in a well-ventilated area. Never use heat sources—hair dryers warp plastic housings. Allow 3+ hours drying time; residual moisture in the nebulizer chamber reignites bacterial growth. Verify dryness by touching the ultrasonic plate—it should feel room temperature, not cool.
Filter Replacement Red Flags
Inspect filters during reassembly for these replacement triggers:
– Gray discoloration (mineral saturation)
– Musty smell after cleaning
– Visible black specks (mold penetration)
Most Pure Enrichment filters last 60 days with distilled water—halve that with tap water. Never reinstall damp filters.
Prevent Mineral Buildup Like a Pro
Water Quality Hacks That Cut Cleaning Time
Distilled water users need only monthly deep cleans—minerals cause 95% of buildup. If using tap water, add one tablespoon of citric acid to the tank weekly to prevent scaling. Never use well water—its high iron content creates rust-colored deposits that damage sensors.
Storage Protocol for Off-Seasons
Before storing:
1. Run full vinegar cleaning cycle
2. Disassemble completely
3. Air-dry for 48 hours in direct sunlight
4. Store parts in breathable cotton bag (not plastic!)
Check monthly for moisture accumulation—humidifiers stored while damp develop mold in 14 days.
Troubleshooting Immediate Fixes
Why Mist Output Drops After Cleaning
Most common cause: Vinegar residue blocking the nebulizer plate. Disassemble and repeat rinsing with distilled water. Check: Is the mist diffuser plate seated perfectly flush? A 1mm gap reduces output by 40%. If problems persist, replace the ultrasonic transducer.
Eliminating Persistent Musty Odors
Step 1: Soak all parts in hydrogen peroxide (3%) for 10 minutes—more effective than vinegar for organic matter. Step 2: Run unit with 1 cup vinegar and 2 cups water for 15 minutes. Step 3: If odor remains, replace the water tank—microscopic cracks harbor bacteria.
Solving White Dust Clouds
This indicates excessive minerals in your mist. Immediate fix: Switch to distilled water. Long-term solution: Install a demineralization cartridge specific to your Pure Enrichment model. Clean the unit twice weekly until deposits disappear—white dust can trigger asthma attacks.
Maintenance Reminders That Stick
Set recurring phone alerts labeled “Humidifier Health Check” every Sunday at 9 AM. Keep a vinegar bottle in your linen closet with a sticky note: “Pour 1 cup in tank NOW.” Track filter life with a permanent marker on the base—write “Replace [date]” after each installation. Critical habit: Wipe the tank dry every time you refill it—this simple step reduces weekly cleaning time by 60%.
Your Pure Enrichment humidifier transforms from a potential health hazard to a wellness ally with consistent 20-minute weekly maintenance. By following this model-specific protocol, you’ll extend your unit’s lifespan by 3+ years while ensuring every breath your family takes is clean and healthy. Remember: when that mist smells fresh and flows strong, you’ve mastered the art of humidifier care. Start your next cleaning session now—your lungs will thank you before bedtime.


