Your skin feels tight, your throat scratches, and static electricity snaps every time you touch a doorknob. Welcome to dry indoor air season. An ultrasonic humidifier can transform your space from parched desert to comfortable oasis—if you know how to use it correctly. Unlike other types, ultrasonic models work silently while creating visible mist, but improper use leads to white dust, mold, or wasted energy. This guide walks you through everything from first setup to advanced features, ensuring your humidifier runs efficiently and safely for years.
Choose the Right Water and Location Before First Use
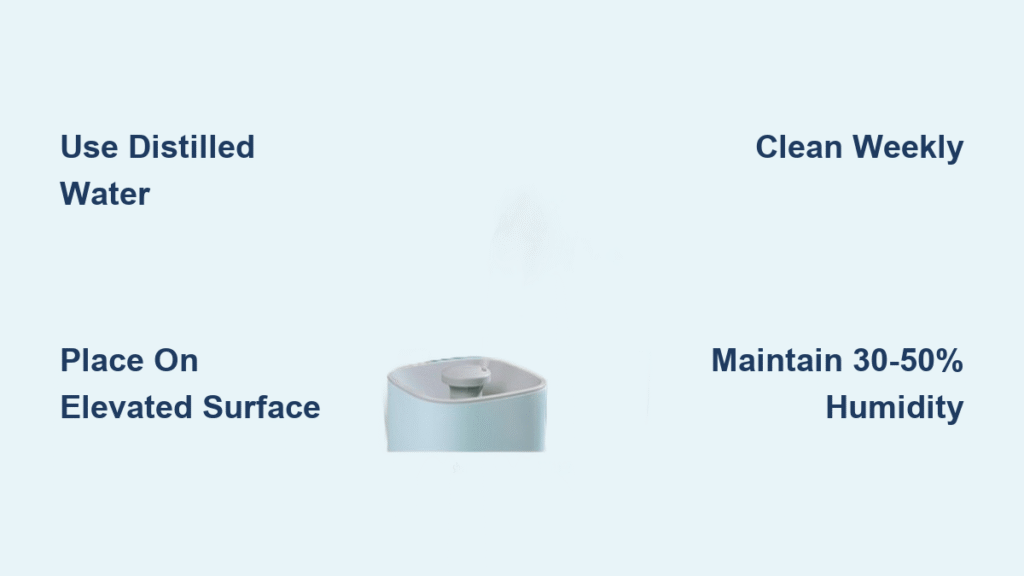
Avoid White Dust with Proper Water Selection
Fill your ultrasonic humidifier with room temperature or cool water only. Hot water damages the ultrasonic transducer and creates safety risks. While tap water works, distilled or demineralized water prevents white dust—that powdery residue from mineral content that settles on furniture and electronics. The ultrasonic vibrations break down minerals in hard water, creating the fine white particles that coat your surfaces. Switching to distilled water eliminates this problem completely.
Never use: Hot water, essential oils (unless model specifically allows), or any additives not designed for humidifiers. Even small amounts of essential oils can damage the delicate ultrasonic components over time, voiding your warranty and reducing performance.
Position for Optimal Mist Distribution
Place your unit on a stable, elevated surface 2+ feet above floor level. Nightstands, sturdy tables, or dedicated humidifier stands work perfectly. Maintain 6 inches clearance from walls, curtains, and electronics. Avoid carpets, wooden furniture tops, and heat sources like radiators. The elevated position allows mist to disperse evenly through the room rather than pooling near the floor.
Pro tip: Position near the room’s center or 3+ feet from beds for optimal distribution without direct mist exposure. Direct mist on your face while sleeping can cause discomfort and doesn’t improve overall room humidity effectively.
Master the Filling and Operation Process

Fill Your Water Tank Without Spills
- Power down and unplug the unit before handling
- Lift tank straight up from base without twisting
- Invert tank and unscrew cap counterclockwise
- Fill to max line—never overfill (takes 30-60 seconds)
- Hand-tighten cap firmly (don’t overtighten to avoid cracks)
- Return tank to base until seated with audible click
- Wait 2-3 minutes for water to settle before powering on
Overfilling causes leaks and water damage to your floors or furniture. Underfilling forces you to refill too frequently. The max fill line exists for a reason—respect it for smooth operation.
Control Mist Output for Your Room Size
Plug in your humidifier, then press the power button once for continuous operation. Most models offer Low, Medium, and High mist levels. Start low—you can always increase output based on room response. For bedrooms under 200 square feet, low setting often suffices. Larger living areas need medium to high output.
Advanced features you should utilize:
– Auto mode: Self-regulating based on humidity (ideal for beginners)
– Timer: Set 4, 8, or 12-hour cycles to avoid over-humidification overnight
– Sleep mode: Dimmed lights and quiet operation for undisturbed rest
Maintain Perfect Humidity Levels Daily
Target the 30-50% Humidity Sweet Spot
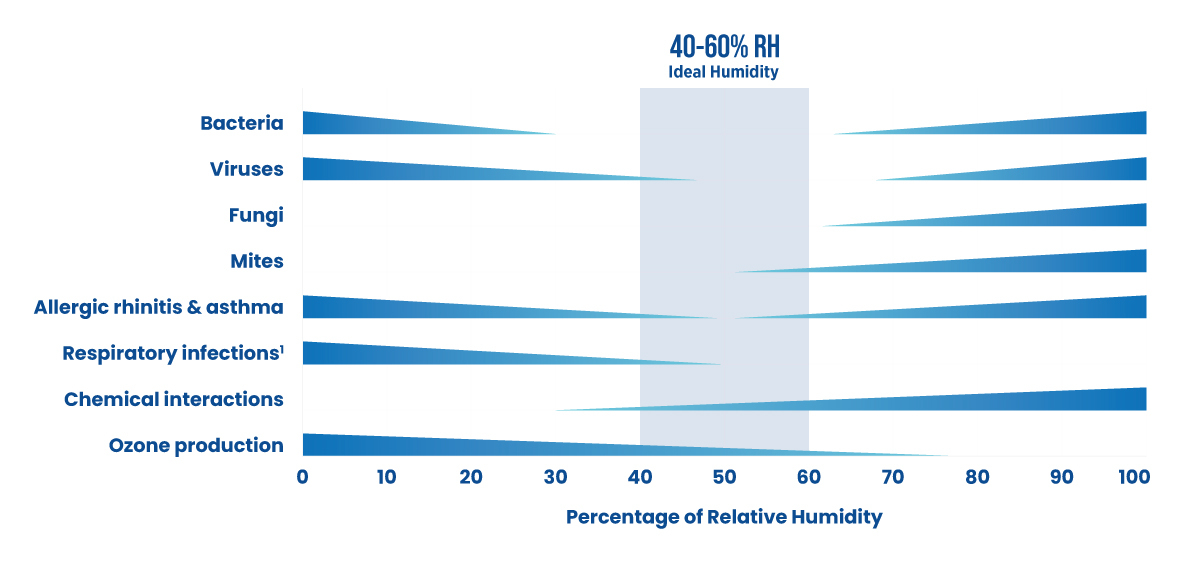
Maintain 30-50% humidity for optimal comfort. Below 30% causes dry skin and respiratory irritation. Above 50% invites dust mites and mold. Most built-in sensors give rough estimates—invest in a separate $10 hygrometer for accuracy. You’ll notice immediate improvements in comfort when hitting this range.
Adjust based on results:
– Below 30%: Increase mist output or runtime
– Above 50%: Decrease output or run shorter cycles
– Condensation on windows: Reduce immediately
– Static electricity persists: Increase slightly
Smart Daily Operation Schedule
Check water levels every 8-12 hours during continuous use. Most units auto-shutoff when low, but running dry damages the transducer. Refill when mist output noticeably decreases. For best results:
- Nighttime: Run 8-10 hours while sleeping (when humidity naturally drops)
- Winter heating season: 12-16 hours daily (heating systems create desert-dry air)
- Rest periods: Allow 2-4 hours between refills for optimal performance
- Avoid: 24/7 operation (promotes mold growth and wastes energy)
Prevent Problems with Proper Maintenance
Weekly Deep Cleaning Routine
- Unplug and empty all water completely
- Fill tank with 1:3 white vinegar solution
- Soak 20-30 minutes to dissolve mineral deposits
- Scrub gently with soft brush around ultrasonic disk
- Rinse thoroughly until vinegar smell disappears
- Clean nozzle with vinegar-dipped cotton swab
- Air dry completely before reassembly (2-4 hours)
Skipping regular cleaning leads to bacterial growth that gets dispersed into your air. The vinegar solution effectively breaks down mineral deposits without damaging components like bleach would.
Fix Common Issues in Under 5 Minutes
No mist production? Check these quick fixes:
– Water level—refill if below minimum line
– Tank seating—remove and reseat firmly
– Ultrasonic plate—clean mineral buildup
– Power source—test with another device
White dust everywhere? Switch to distilled water immediately and clean the ultrasonic plate. Install a demineralization cartridge if available—most models have compatible options.
Weird noises?
– Gurgling: Normal water movement (no action needed)
– Squealing: Add water—level too low
– Rattling: Check tank placement and tighten parts
– Grinding: Stop use—may need professional service
Critical Safety Protocols You Must Follow

Electrical Safety Rules That Prevent Fires
Keep the power cord away from water sources at all times. Always unplug before filling, cleaning, or moving your unit. Check cords monthly for fraying or damage—replace immediately if found. Never use extension cords—plug directly into wall outlets to prevent overheating risks.
Health Protection Measures
Change water daily to prevent bacteria growth. Clean thoroughly if unused 3+ days—a stagnant water tank becomes a breeding ground for harmful microorganisms. Monitor humidity levels constantly—excess moisture causes mold that triggers allergies and asthma. If you notice condensation on windows, reduce output immediately.
Optimize Performance Year-Round
Winter Operation Mode for Dry Heating Season
Heating systems create desert-dry air that drains moisture from your skin and respiratory system. During winter:
– Increase mist output to counter aggressive heating
– Check water levels twice daily (consumption increases)
– Position away from heating vents to prevent rapid moisture loss
– Consider upgrading to larger capacity for extended runtime
Summer Storage Preparation
When humidity rises naturally in summer:
– Clean thoroughly and dry all parts completely
– Empty completely before storage—no residual water
– Run briefly every 2-3 weeks to maintain seals
– Store in cool, dry place with cord loosely wrapped
Maximize Your Investment with Smart Habits
Strategic Placement for Even Distribution
Position near (but not in) air circulation paths for better distribution. Avoid corners where mist accumulates and creates damp spots. Elevate 2-3 feet high on stable platforms—coffee tables work better than floor placement. Ensure 360-degree air access around the unit by maintaining clearance on all sides.
Energy Efficiency Hacks That Save Money
- Use timer functions to avoid unnecessary operation
- Right-size your unit for the space (no oversized models)
- Clean regularly to maintain peak efficiency
- Combine with plants for natural humidity boost
- Close doors/windows in humidified rooms
Key Takeaway: Master your ultrasonic humidifier by starting with proper water selection and placement, maintaining consistent cleaning habits, and monitoring humidity levels daily. Your reward? Comfortable air, better sleep, and no more static shocks. Follow these precise steps for a healthier home environment all year round—without the white dust, mold, or wasted energy that plagues improper humidifier use.