
Your humidifier sits empty, the air feels dry, and you’re not sure if you’re filling it right. One wrong move with water type or tank placement can damage your unit—or worse, spray water across your room. The good news? Proper humidifier filling takes under two minutes once you know the exact steps. Whether you’re dealing with winter dryness or allergy season, mastering how to fill a humidifier properly ensures you get clean moisture without leaks or damage.
This guide walks you through the foolproof process, from choosing the right water to securing the tank without leaks. You’ll learn the safety steps most people skip, the water types that prevent mold, and the positioning tricks that maximize efficiency. Follow these specific instructions for how to fill a humidifier correctly and avoid common pitfalls that shorten your unit’s lifespan.
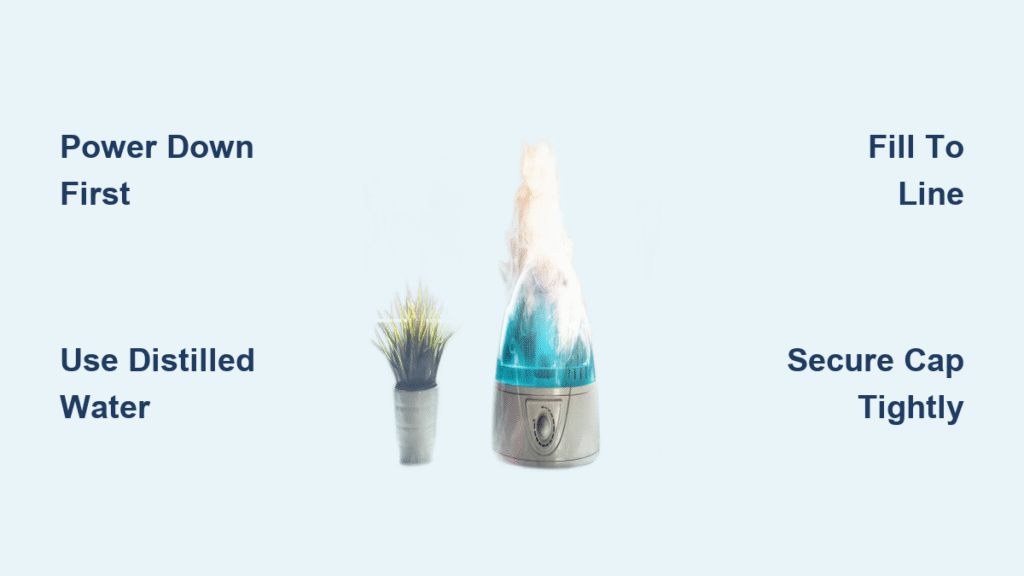
Power Down Before Touching Your Humidifier Tank
Always turn off and unplug your humidifier before handling the water reservoir. This critical safety step prevents electrical shock and stops the unit from accidentally activating while you’re refilling. Many users skip this simple precaution, risking both personal safety and potential motor damage that voids your warranty.
Essential Power-Down Checklist
- Press the power button to confirm the unit is off
- Physically remove the plug from the wall outlet
- Wait 10 seconds for any residual power to discharge completely
Never attempt to fill your humidifier while it remains plugged in. Water and electricity create dangerous combinations that could lead to serious injury or permanent unit damage. Taking these few seconds to power down properly makes how to fill a humidifier a completely safe process.
Select the Best Water for Your Humidifier

Distilled water prevents 90% of common humidifier problems. The minerals in tap water create white dust that coats your furniture and promotes bacterial growth inside your unit. Using the right water type when you fill a humidifier extends its life and improves air quality in your home.
Water Type Comparison Guide
- Optimal choice: Distilled water (contains zero minerals)
- Acceptable alternative: Clean, cool tap water
- Never use: Hot water (can crack plastic components and create safety hazards)
While distilled water costs slightly more, it saves you money long-term by preventing mineral buildup that requires frequent cleaning and part replacements. When learning how to fill a humidifier, remember that water temperature matters just as much as water type—always use cool or room-temperature water.
Remove the Water Tank Without Spills
Pull the tank straight up and off the base with both hands. Most humidifiers use a simple lift-off design, but some models require a slight twist before removal. If you feel resistance, check for locking mechanisms near the tank’s base rather than forcing it.
Tank Removal Best Practices
- Support the tank with both hands when it contains water
- Place the base on a towel to catch accidental drips
- Note the tank’s orientation for correct reinstallation
Never attempt how to fill a humidifier with the tank still attached to the base. This common mistake leads to overfilling, spills, and potential electrical damage. Proper tank removal is the foundation of a leak-free humidifier operation.
Access and Fill the Reservoir Properly

Flip the tank upside down and twist the cap counter-clockwise. The fill opening is typically located at what becomes the top when inverted. Fill until water reaches the marked line—usually 1-2 inches below the rim to allow for expansion during operation.
Correct Filling Technique
- Turn the tank completely upside down on a stable surface
- Twist the cap left (counter-clockwise) until it comes free
- Pour in your chosen water type to the indicated fill line
- Hand-tighten the cap clockwise until snug but not over-tightened
Overfilling is one of the most frequent mistakes when learning how to fill a humidifier. Water above the maximum line can spill during reinstallation or cause overflow when the unit operates. Always fill to the marked line for optimal performance.
Secure the Cap Without Causing Damage
Hand-tighten the cap firmly but avoid excessive force. The cap needs to create a complete seal, but over-tightening can crack the plastic or strip the threads. You should feel resistance, followed by a final quarter-turn to achieve proper snugness.
Cap Security Verification
- The cap sits flush with the tank surface
- No visible gaps exist between cap and tank threads
- The cap doesn’t wiggle when gently tugged
A poorly secured cap is the leading cause of leaks when you fill a humidifier. Take the extra moment to ensure proper cap installation—this simple step prevents water damage to your floors and furniture.
Reinstall the Tank with Perfect Alignment
Slide the tank straight down until you hear a distinct click. This sound confirms the tank has seated properly in the base. A misaligned tank causes immediate leaks or prevents the unit from detecting water levels, triggering error messages.
Installation Confirmation Steps
- The tank sits perfectly level in the base
- No rocking or tilting occurs when gently touched
- The fill cap faces the correct direction (check your manual)
- The power indicator shows water has been detected
Never force the tank into position. If it doesn’t slide in smoothly or click into place, remove it and try again. Proper tank seating is non-negotiable when you fill a humidifier—this single step determines whether your unit operates correctly.
Position Your Humidifier for Optimal Performance
Place your humidifier at least 12 feet from walls on a level, elevated surface. This distance allows proper moisture circulation while preventing wall damage from excess humidity. A table or sturdy shelf works best for most units.
Ideal Placement Requirements
- Maintain 3+ feet distance from beds or furniture
- Position away from direct sunlight
- Use a waterproof mat if placing on wood surfaces
- Ensure proximity to an electrical outlet (avoid extension cords)
Poor placement reduces efficiency even when you correctly fill a humidifier. Proper positioning ensures the mist disperses evenly throughout your room rather than concentrating in one area.
Install or Replace Filters During Refilling
Insert a fresh filter when refilling if your model uses one. The filter should slide into a designated slot inside the tank or base, depending on your specific humidifier type. Regular filter replacement maintains air quality and unit efficiency.
Filter Replacement Schedule
- Daily users: Replace monthly
- Weekly users: Replace every 2-3 months
- Occasional users: Replace every 4-6 months
Never operate your humidifier without the proper filter if your model requires one. When you fill a humidifier with a missing or overdue filter, you risk circulating impurities into your breathing space.
Start Your Humidifier After Proper Filling
Plug in and power on immediately after tank installation. Most units show a green or blue indicator light when water is properly detected. If no lights appear within 10 seconds, check tank placement and water level before assuming malfunction.
First-Operation Verification
- Listen for motor activation within 5 seconds
- Check for visible mist output within 30 seconds
- Inspect the base for any water pooling
Proper startup sequence completes how to fill a humidifier correctly. Rushing this step by walking away too soon can lead to missed issues that cause damage over time.
Maintain Daily Water Freshness
Empty and refill with fresh water every time you use your humidifier. Stagnant water breeds bacteria and mold within 24-48 hours, transforming your humidifier from health aid to health hazard. Daily water changes are non-negotiable for clean operation.
Quick Daily Water Change Routine
- Power off and unplug the unit
- Remove the tank and pour out old water
- Rinse the tank with fresh water
- Refill with clean water
- Total time: less than 90 seconds
Many users think how to fill a humidifier ends with the initial fill, but daily maintenance is equally important for healthy operation. Skipping this step creates breeding grounds for harmful microorganisms.
Clean Your Humidifier Twice Weekly

Perform a thorough cleaning at least twice weekly with regular use. Use mild soap and warm water for the tank, and soak removable parts in white vinegar for 15-30 minutes to dissolve mineral buildup that regular filling can’t prevent.
Effective Cleaning Protocol
- Disassemble all removable components
- Wash the tank with mild dish soap
- Soak the filter in a 1:3 vinegar solution (if washable)
- Rinse all parts thoroughly with clean water
- Allow complete air-drying before reassembly
Regular cleaning extends the life of your humidifier and ensures that how to fill a humidifier properly translates to clean, healthy moisture output. Neglecting this step creates mineral buildup that interferes with proper operation.
Avoid These Common Filling Mistakes
Never fill the tank while it’s attached to the base. This leads to overfilling, spills, and potential electrical damage. Always remove the tank first—this single practice prevents 80% of humidifier filling problems.
Top User Errors to Eliminate
- Using hot water (cracks plastic components)
- Overfilling past the max line (causes leaks)
- Forgetting to tighten the cap (results in immediate spillage)
- Reinstalling the tank at an angle (prevents proper operation)
Learning how to fill a humidifier correctly means recognizing and avoiding these preventable mistakes that damage units and create messes.
Fix Common Fill-Related Problems Quickly
No mist after filling? Check tank placement first. Nine times out of ten, the tank isn’t seated correctly. Verify proper installation before investigating other potential issues when your humidifier won’t operate after filling.
Rapid Diagnostic Process
- Remove and firmly reseat the tank
- Confirm water reaches the minimum level line
- Check if the filter is clogged or overdue for replacement
- Ensure the cap is properly tightened
Most issues that appear after you fill a humidifier stem from simple installation errors rather than unit malfunctions. Addressing these basic points often resolves problems without professional service.
Key Takeaway: Proper humidifier filling combines the right water choice with precise tank handling. Use distilled water, remove the tank for filling, fill to the marked line, secure the cap firmly, and reinstall until you hear the click. Your humidifier will reward you with clean, comfortable air and years of reliable service.
Keep this routine: power down, remove tank, fill to line, secure cap, reinstall with click, position correctly. Master these six steps, and you’ll never deal with leaks, mineral dust, or bacterial growth again. For optimal results, change water daily and clean your unit twice weekly—this simple maintenance transforms how to fill a humidifier from a chore into a seamless part of your healthy home routine.


