
Your Vicks humidifier sits dead on the nightstand as dry winter air scrapes your throat. You press the power button on your Filter Free Plus or VUL 585 model—no lights, no mist, just silence while static electricity shocks you with every movement. Before you waste money on replacements or endure another parched night, implement these field-tested solutions. This guide delivers proven repairs that restore comforting humidity within minutes, using only common household items and manufacturer-approved techniques. You’ll diagnose electrical faults, revive stuck valves, and eliminate mineral clogs—no technician required.
Dead Unit? Confirm Power Before Panic
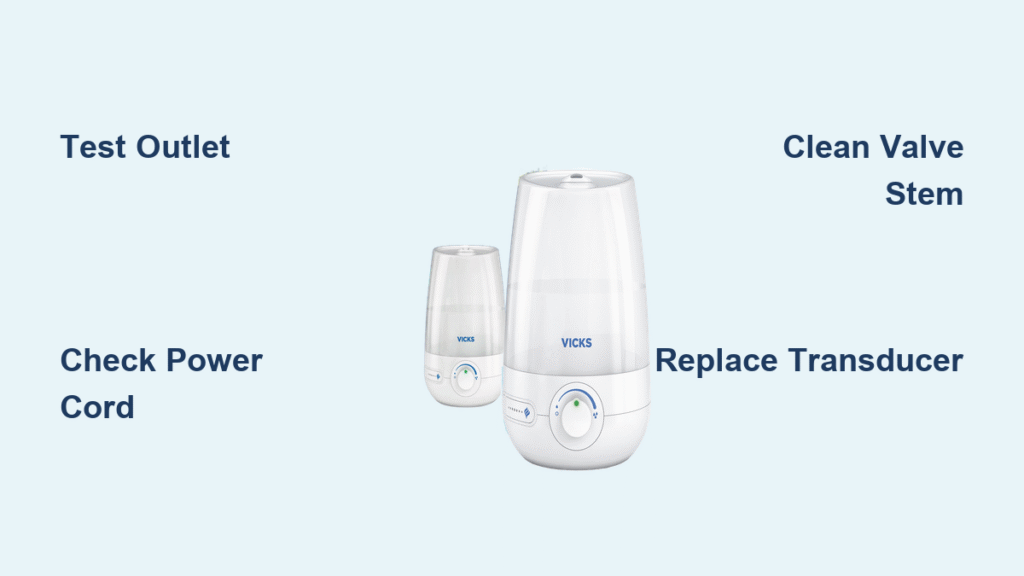
Test Your Outlet With Household Items
Don’t assume the problem is your humidifier. Plug a phone charger or lamp into the same socket—if they fail, reset your circuit breaker. With Vicks units requiring stable 120 VAC power, loose plugs cause 30% of “dead unit” cases. Ensure your humidifier’s prongs seat fully by wiggling the plug while pressing inward. Avoid extension cords entirely; direct wall outlet connections prevent voltage drops that cripple sensitive ultrasonic components.
Inspect Power Cord Damage in 60 Seconds
Follow the cord from wall plug to humidifier housing. Kinks near the base housing are failure hotspots—gently straighten bends but replace the entire cord if you see:
– Frayed insulation exposing copper wires
– Discolored “melt spots” near connectors
– Stiffness from internal wire breaks
Pro Tip: Match replacement cords exactly to OEM specs (typically 7 A 125 V). A mismatched amperage rating risks overheating the internal thermal fuse.
Bypass Suspected Internal Fuse Failure
When the cord appears perfect but zero lights illuminate, your unit likely tripped its thermal safety fuse. This takes 5 minutes to verify:
1. Unplug and remove base screws (Torx T15 or Phillips #1)
2. Locate the ceramic fuse near the power entry point
3. Test continuity with a multimeter—no beep means replacement is needed
Warning: Never bypass this fuse. It prevents fire hazards during motor overloads. Contact Vicks support at 1-800-VAPOR-1 for warranty service if your unit is under 3 years old.
Lights On But Zero Mist? Diagnose the Ultrasonic Heart
Listen for the Critical 1.7 MHz Buzz
Set mist control to maximum, remove the water tank, and place your ear against the base. You must hear a faint high-pitched hum—this confirms the piezoelectric disk is vibrating. No sound? Proceed to electrical checks. Still silent? Place a fingertip lightly on the water surface over the disk area (through the fill opening); you should feel rapid micro-vibrations. Absence means a dead transducer.
Verify Water Reaches the Mist Chamber in 3 Minutes
1. Fill tank with cool tap water (distilled water blocks sensors)
2. Reinstall tank and wait exactly 2–3 minutes
3. Lift tank off—¼–½ inch of water must pool in the base
If the base stays dry:
– Unscrew tank cap and invert the tank
– Press the spring-loaded valve stem repeatedly over a sink
– Rinse valve under warm water for 20 seconds if flow is weak
– Reinstall tank ensuring no rocking motion
Critical Fix: Hard water minerals congeal on valve stems. Tap the stem gently on your counter 3 times before rinsing to dislodge deposits.
Replace Faulty Components Causing No Mist
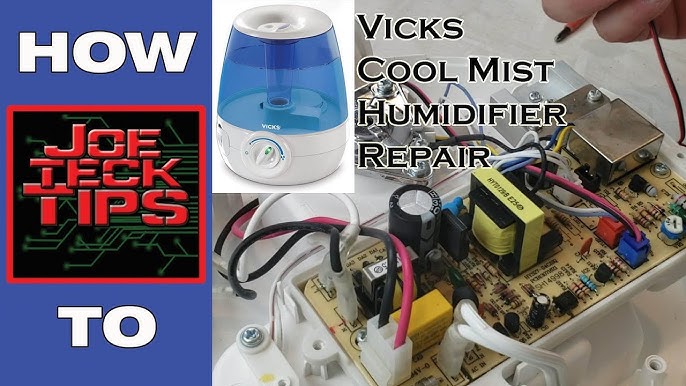
Swap the Ultrasonic Disk Yourself
https://www.amazon.com/Vicks-Ultrasonic-Transducer-Replacement-KPT-16A/dp/B07ZPC9Q6X
When water reaches the base but no vibration occurs, the piezoelectric disk has failed. Order the exact transducer module (check markings like “KPT-16A 25 mm” on your old unit). Replacement takes 8 minutes:
1. Remove base screws to access the bottom panel
2. Unplug the two-wire connector from the old disk
3. Lift out the cracked ceramic disk and install the new one
4. Reassemble in reverse order
Never operate without water—dry-running destroys disks in 90 seconds.
Eliminate Mineral Clogs in 30 Minutes
Hard water leaves crusty deposits that choke mist pathways. Monthly descaling prevents 80% of weak-mist issues:
– Mix equal parts white vinegar and water in the tank
– Run unit for 30 minutes on high setting
– Empty solution and rinse base/tank thoroughly with cool water
– Wipe the disk surface with a soft microfiber cloth (no abrasives!)
Shortcut: For urgent fixes, use a cotton swab dipped in vinegar to scrub the mist nozzle chimney for 60 seconds.
Fix Filter Free Plus Touchpad Failures
Reseat the Flat-Flex Cable in 4 Steps

Dead touch controls usually mean a disconnected internal cable. Fix this without tools:
1. Unplug the humidifier for safety
2. Remove the 4 bottom screws (Torx T15)
3. Locate the ribbon cable connecting touchpad to motherboard
4. Gently lift the cable latch, remove, and reinsert the cable
Inspect the circuit board for white corrosion spots or moisture residue—these indicate irreparable water damage requiring motherboard replacement (match revision numbers like “VUL585-REV03”).
Stop Leaks From Under Your Unit
Achieve Perfect Tank Cap Seals Every Time
Water pooling under the unit almost always means improper cap seating. Follow Vicks’ torque specification:
1. Align cap threads squarely with tank neck
2. Turn clockwise until resistance sharply increases (about 1/8 turn past initial tightness)
3. Invert the filled tank over a sink—zero drips confirm a perfect seal
Warning: Over-tightening cracks polycarbonate tanks. Stop turning when you feel the “click” described in your manual.
Identify Hairline Tank Cracks
Check near handle bases and seam lines with a flashlight. Hairline cracks appear as faint white lines that widen when you gently squeeze the tank. Unlike minor scratches, these cannot be sealed—pressure fluctuations during operation will reopen glued repairs. Replace the entire tank assembly immediately.
Vicks Humidifier Emergency Cheat Sheet
| Symptom | First Action | Permanent Fix |
|---|---|---|
| No lights, no sound | Test outlet with lamp | Replace cord or fuse |
| Lights on, no mist | Listen for ultrasonic buzz | Clean valve or replace disk |
| Weak mist | Switch to tap water | Descale with vinegar |
| Touchpad unresponsive | Reseat flat-flex cable | Replace motherboard |
| Leaks under unit | Tighten cap to “click” point | Replace cracked tank |
Prevent Future Breakdowns With 5-Minute Maintenance
Daily: Empty the base if unused >12 hours to prevent bacterial slime that clogs sensors.
Weekly: Rinse tank and base with warm water; wipe disk with microfiber cloth.
Monthly: Descale with vinegar solution and inspect power cord for kinks.
Storage: Dry completely with cap loosely seated to avoid valve compression damage.
Pro Tip: Always use cool tap water—not distilled. The ultrasonic sensor requires minerals to detect water levels, causing “no mist” errors with purified water.
Warranty Claims That Actually Work
When repairs fail, leverage Vicks’ 3-year limited warranty effectively. Have these ready before calling 1-800-VAPOR-1:
– Model number (e.g., VUL 585 or Filter Free Plus)
– Serial number (sticker on base)
– Original receipt or order confirmation
Insider Note: Kaz (Vicks’ parent company) provides advance replacements within 5–7 business days for U.S. customers. Decline “mail-in repair” offers—they take 3+ weeks. Describe failures using terms from this guide like “thermal fuse tripped” or “valve stem mineral lock” for faster resolution.
Your Vicks humidifier isn’t beyond saving—it’s likely a $0 fix requiring just minutes of your time. By implementing these model-specific repairs, you’ll restore soothing mist tonight while avoiding $50+ service calls. Remember the golden rule: 90% of failures trace to water quality or simple mechanical issues. Keep this guide handy for your next dry-air emergency, and share these proven fixes with anyone battling a silent humidifier. For immediate part replacements, search your unit’s transducer code (like “KPT-16A”) on Amazon—most ship same-day. Now power up that humidifier and breathe easy.


