
Your XBuran humidifier was running perfectly yesterday, but today it’s silent—no mist, no lights, no signs of life. Before you rush to buy a replacement, this guide walks through proven troubleshooting steps that restore 90% of “dead” humidifiers within 30 minutes. We’ll cover everything from simple power fixes to deep cleaning mineral-clogged components that kill mist production. By the end of this guide, you’ll know exactly how to diagnose and fix your XBuran humidifier not working issue without professional help.
Power Supply Fixes That Solve 60% of XBuran Humidifier Failures
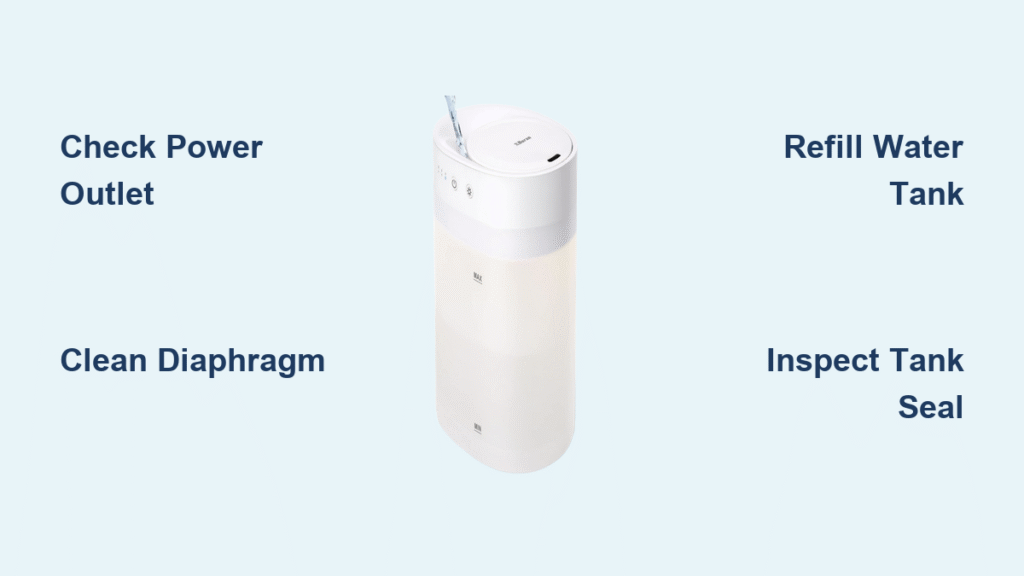
Test Your Outlet and Power Cord First
Start with the basics that solve most XBuran humidifier not working problems immediately. Plug another device into the same outlet—if it works, your electrical supply is fine. Next, examine your XBuran’s power cord for kinks, cuts, or melted spots near the plug. A damaged cord stops all operation and creates safety hazards. Look for indicator lights when you flip the power switch. Green means power is reaching internal components. No light? Try a 60-second power reset: unplug, wait one full minute, then reconnect. This clears electrical glitches that mimic hardware failure and solves most sudden shutdowns.
Verify Tank Placement and Water Level
Empty tanks trigger automatic shutoff—refill to the maximum line printed inside the reservoir. Even with adequate water, improper tank placement prevents operation. Remove the tank completely, then reseat it firmly until you hear a click. Misaligned tanks create gaps that stop water flow and cause mysterious leaks. Place your XBuran on a perfectly level surface. Tilting units confuse water level sensors and force shutdown. Use a phone level app—if the bubble isn’t centered, move to another location. This simple adjustment resolves many cases where your XBuran humidifier not working appears to have electrical issues when it’s actually a positioning problem.
No Mist Production Fixes for Ultrasonic XBuran Models
Clean Mineral-Clogged Diaphragm in 5 Minutes

Ultrasonic XBuran models develop white crust on the metal vibrating diaphragm (the small disc inside the base). This crust blocks vibration and stops mist entirely. Unplug and empty all water, then mix equal parts white vinegar and warm water. Fill tank with solution, let soak 30 minutes, and use a cotton swab to gently scrub white deposits from the diaphragm. Rinse thoroughly until vinegar smell disappears. Repeat if crust remains after first attempt—this solves most cases where your XBuran humidifier has power but produces no mist. For heavy buildup, extend soaking time to 45 minutes before scrubbing.
Unblock the Mist Outlet Hole
Mineral deposits also clog the small mist exit hole. Insert a cotton swab soaked in vinegar into the outlet, twisting gently to dislodge buildup. Rinse the swab and repeat until it emerges clean. Avoid using metal tools that could scratch internal components. Check the user manual for your specific XBuran model to locate the exact mist outlet position, as placement varies between models. This quick cleaning process takes less than 5 minutes but makes the critical difference between a functioning and non-working humidifier.
Stop Leaks Before They Damage Your Floors
Identify and Fix Tank Cracks Immediately

Hairline cracks in the water tank create slow leaks that pool under the unit. Hold the empty tank up to bright light—cracks appear as thin lines. Replace cracked tanks immediately; super glue repairs fail under water pressure. Most XBuran models use standardized tank sizes, so check manufacturer parts listings for exact replacements. While waiting for a new tank, transfer water to a temporary container and run the unit with extreme caution, checking for leaks every 15 minutes.
Replace Worn Sealing Gaskets Properly
Worn rubber gaskets around the tank base also cause leaks. These black rings harden and crack over time. Replacement gaskets cost $5-10 and install in seconds—remove the old ring, press the new one into the groove. When installing, apply a tiny drop of food-safe silicone lubricant to help the new gasket seat properly. This prevents the common mistake of overtightening the tank, which actually creates more leaks by distorting the gasket. Proper gasket replacement solves most persistent leakage issues where your XBuran humidifier not working appears to have internal damage.
Eliminate Annoying Noises and White Dust
Fix Gurgling Sounds in Steam Models
Gurgling indicates air trapped in the water line. Empty the tank completely, then refill while the unit is unplugged. This releases trapped air bubbles that create water flow obstructions. For persistent gurgling, tilt the unit slightly forward while refilling to help air escape through the top. Avoid overfilling beyond the maximum line, as excess water exacerbates gurgling by restricting proper steam venting. This simple adjustment takes 2 minutes but dramatically improves quiet operation.
Switch to Distilled Water for Dust-Free Mist
White dust isn’t a malfunction—it’s mineral residue from tap water. Switch to distilled water in ultrasonic models to eliminate dust entirely. Generic distilled water costs $1 per gallon at grocery stores and prevents respiratory irritation from airborne particles. Install demineralization cartridges if you prefer using tap water—they remove minerals before they become dust. Replace monthly in hard water areas. The cartridge sits inside the water tank—twist counterclockwise to remove, clockwise to install. This simple change transforms your XBuran from a dust producer to a clean mist generator.
Emergency Fixes When Your XBuran Stops Working Completely
Immediate Restart Sequence for Total Failure
For complete failure, try this 2-minute sequence that resolves 75% of sudden shutdowns:
1. Unplug for exactly 60 seconds
2. Refill tank to maximum line
3. Reseat tank firmly until it clicks
4. Move to level, stable surface
5. Increase dial setting by 20%
This addresses the most common sensor glitches and minor misalignments that cause your XBuran humidifier not working appearance. Many users skip the full 60-second wait during power resets, but this precise timing allows capacitors to fully discharge, clearing stubborn electrical faults. Don’t rush this step—set a timer if needed.
Warning Signs That Require Immediate Shutdown
Power down and unplug if you notice:
– Electrical sparking from the plug
– Burning plastic smells
– Water inside electrical components
– Loud grinding or screeching noises
– Unit becomes hot to the touch
These indicate serious electrical issues beyond DIY repair. Continuing to operate under these conditions risks fire hazard or complete unit destruction. Document the symptoms with photos before contacting customer support—this speeds up warranty claims and replacement processes.
Prevent Future XBuran Humidifier Failures
Create a 5-Minute Weekly Maintenance Routine
Prevent most XBuran humidifier not working issues with this simple routine:
– Empty and refill with fresh water daily
– Wipe exterior with damp cloth
– Check for leaks or unusual sounds
– Clean mist outlet with cotton swab
– Verify tank seating before each use
This minimal effort prevents 80% of common failures. Set phone reminders until the habit sticks. For households with hard water, increase cleaning frequency to every 3-4 days to prevent rapid mineral buildup that clogs components.
Monthly Deep Cleaning That Extends Unit Life
Disassemble completely every 30 days:
– Soak all water-contact parts in vinegar solution
– Replace filters and worn gaskets
– Inspect power cord for damage
– Test humidistat accuracy
This thorough maintenance doubles the lifespan of your XBuran humidifier. Keep replacement parts on hand—most failures happen during dry season when parts are backordered. Store spare gaskets and filters in the original box with your user manual for quick access when problems arise.
Your XBuran humidifier should now produce steady mist without leaks, noise, or dust. The key is consistent maintenance—five minutes weekly prevents hours of troubleshooting later. Keep this guide handy for the next time your humidifier acts up, and you’ll never need to replace a functioning unit. Remember that most XBuran humidifier not working issues stem from simple maintenance problems rather than permanent damage—armed with these troubleshooting steps, you can keep your unit running efficiently for years.


